
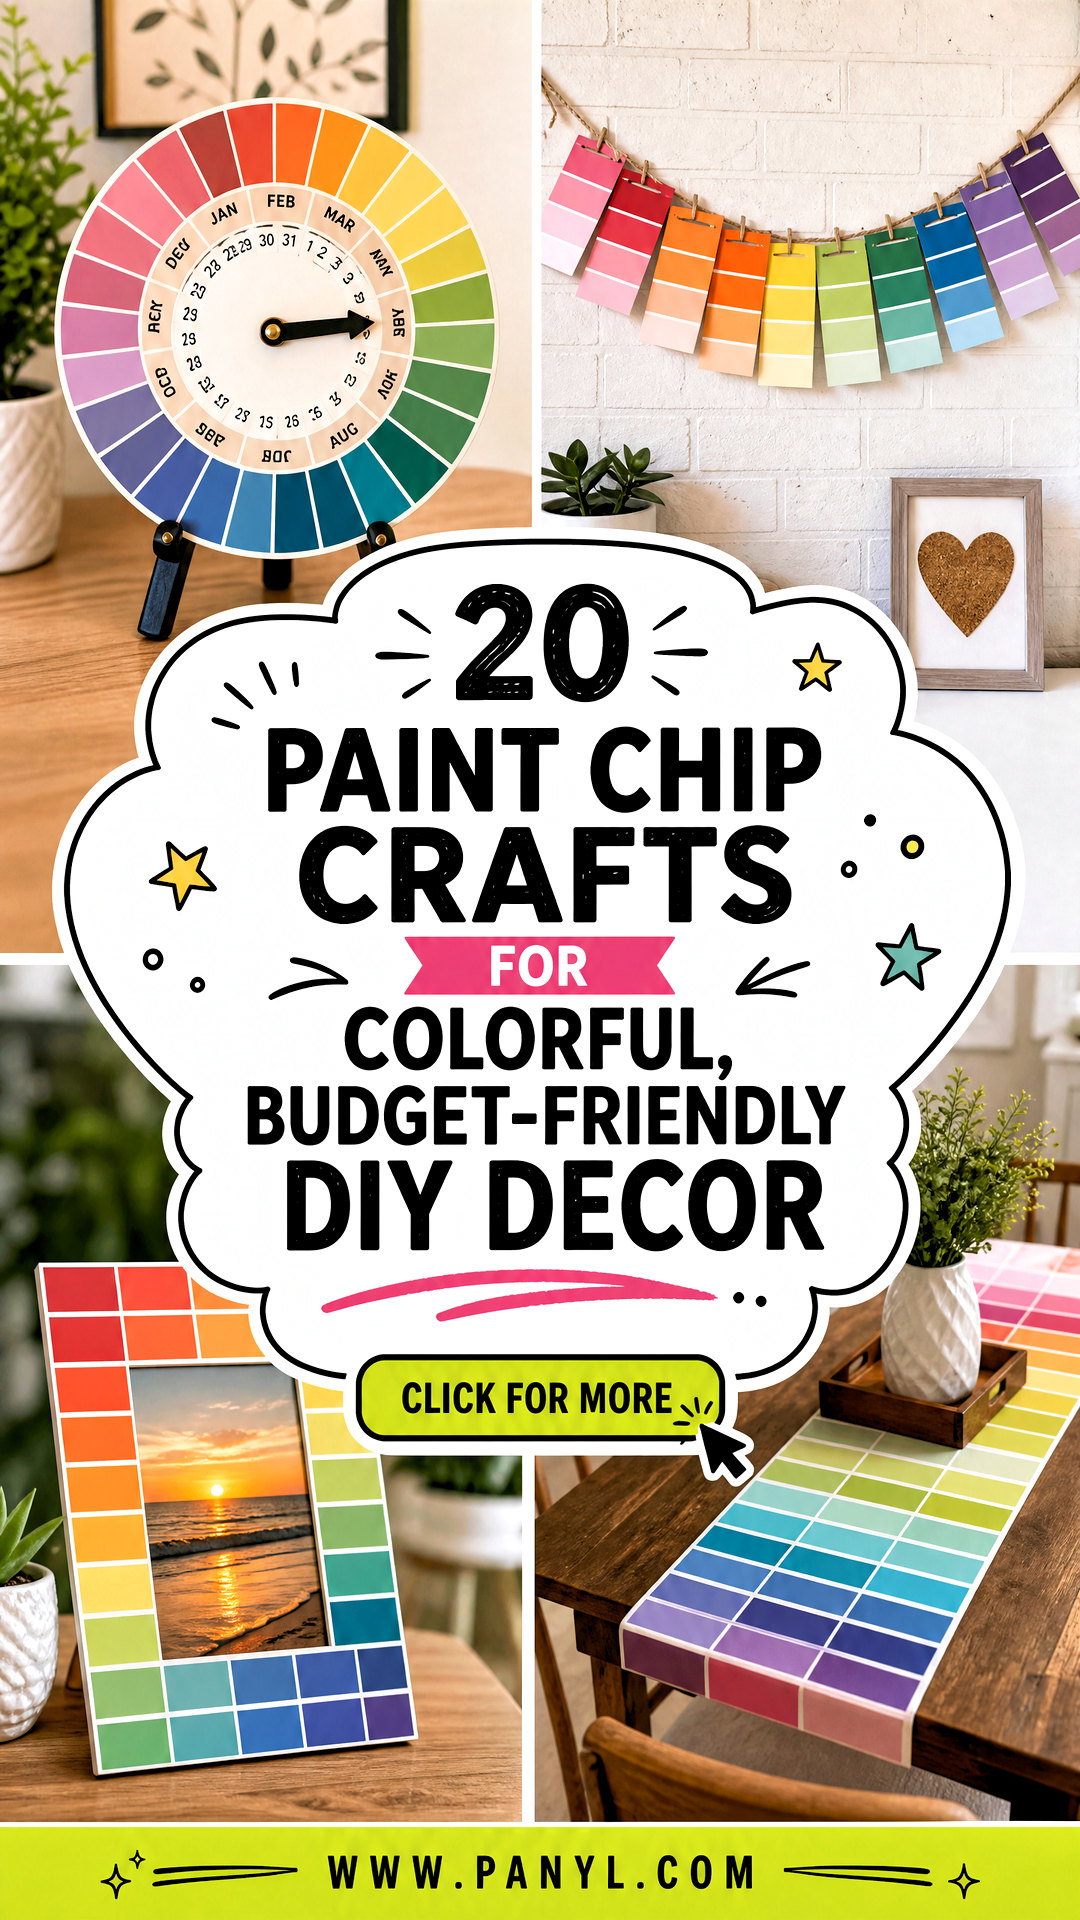
Paint sample cards are small, colorful, and surprisingly versatile, making them perfect for quick projects that brighten your home without expensive supplies. These 20 paint chip crafts turn leftover samples into wall art, desk accessories, party decorations, gifts, and useful organizing tools. Paint chips can be cut, punched, folded, layered, and arranged by shade, so even simple shapes create a polished result. () Use samples you already have, discontinued cards, or extras offered with permission by your local paint store. Gather sharp scissors, a paper trimmer, craft glue, punches, and clear sealer before beginning. From beginner-friendly bookmarks to detailed mosaics, the projects below offer colorful inspiration for trying 20 paint chip crafts.
1. Paint Chip Ombre Wall Art
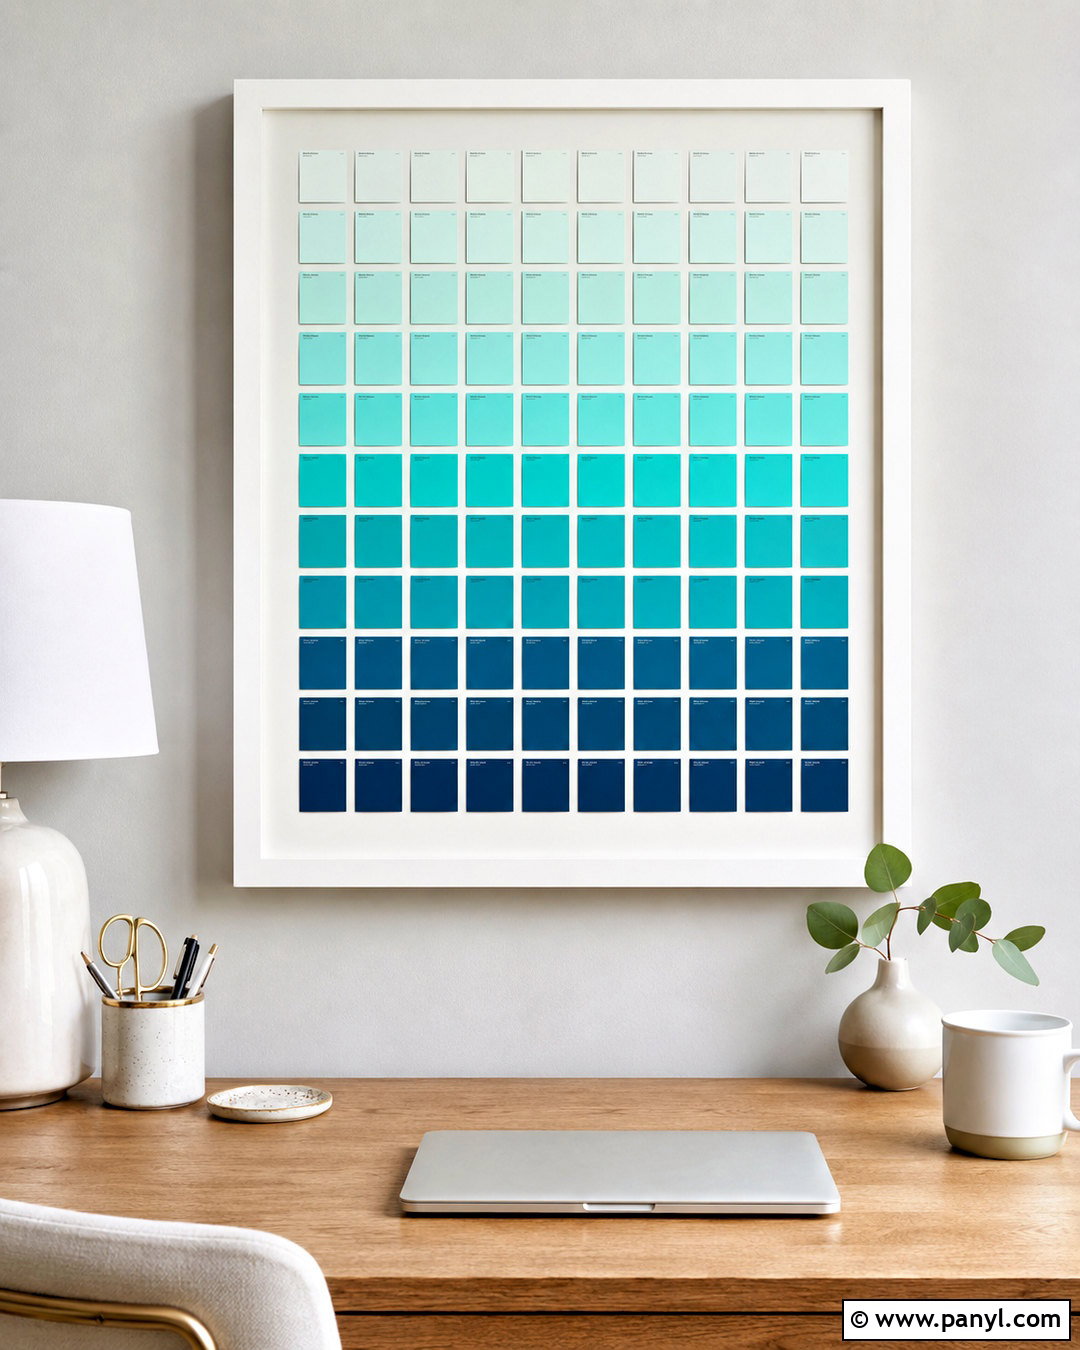
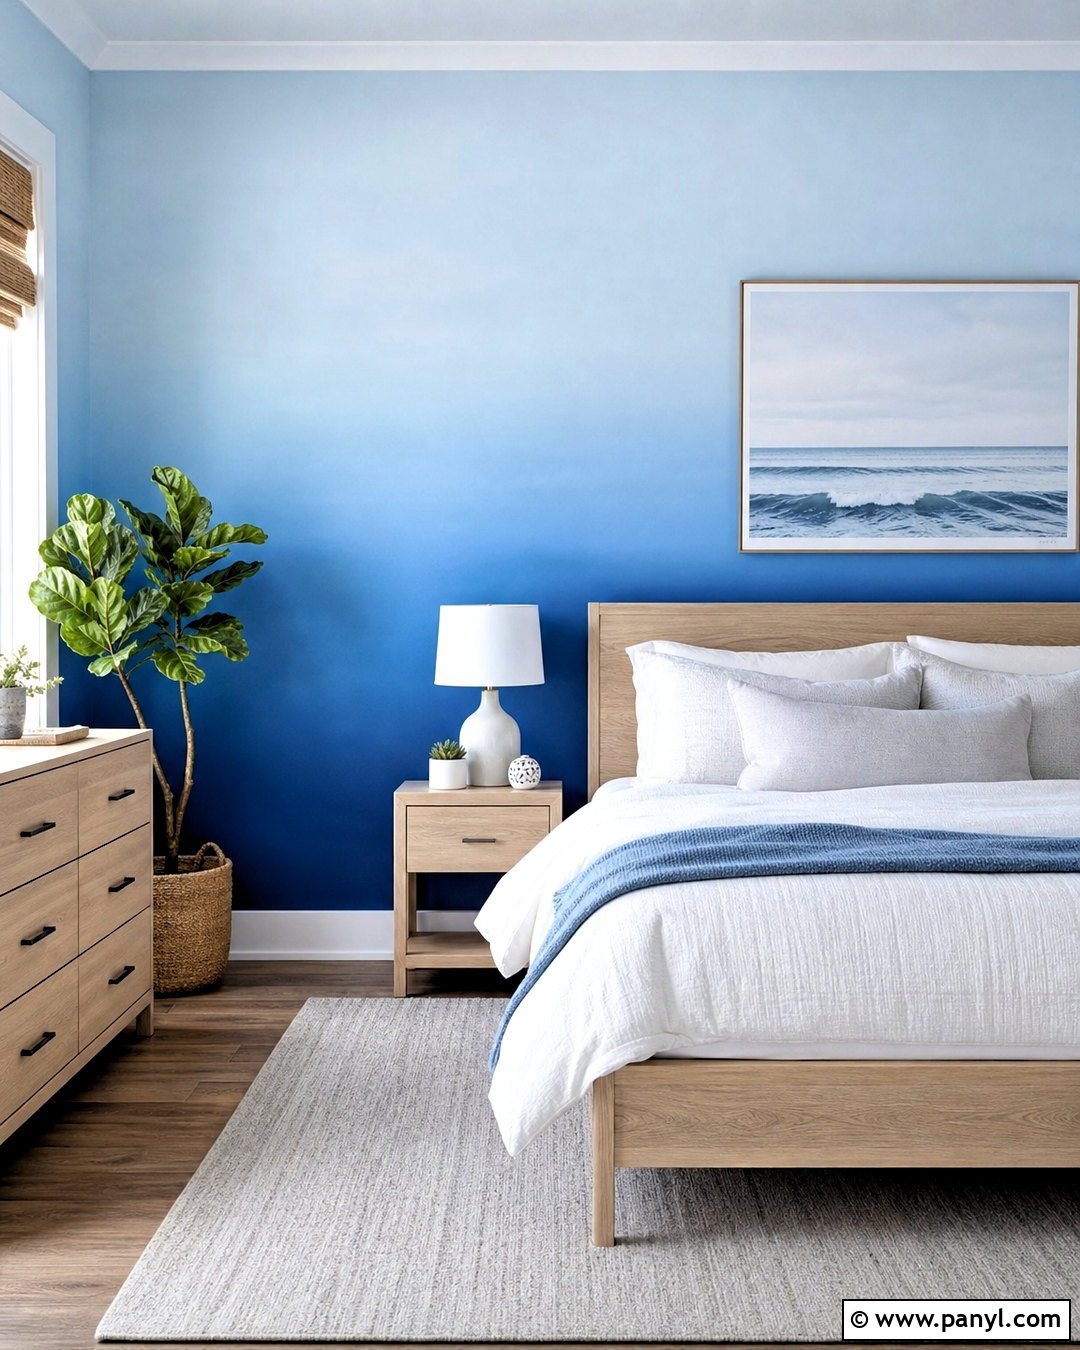
Create polished ombre wall art by arranging paint chip squares from the palest tint to the deepest shade. Choose one color family, such as ocean blue, coral pink, or leafy green, so the finished piece feels coordinated rather than busy. Cut equal squares with a paper trimmer and test the arrangement on white cardstock before gluing. Slight gaps between the pieces create a crisp grid, while overlapping rows produce a softer, textured effect. Mount the finished design inside a simple white, oak, or matte black frame. For a larger statement, make three matching panels with different color families and hang them in a row above a desk, console, or sofa.
2. Paint Chip Geometric Mosaic
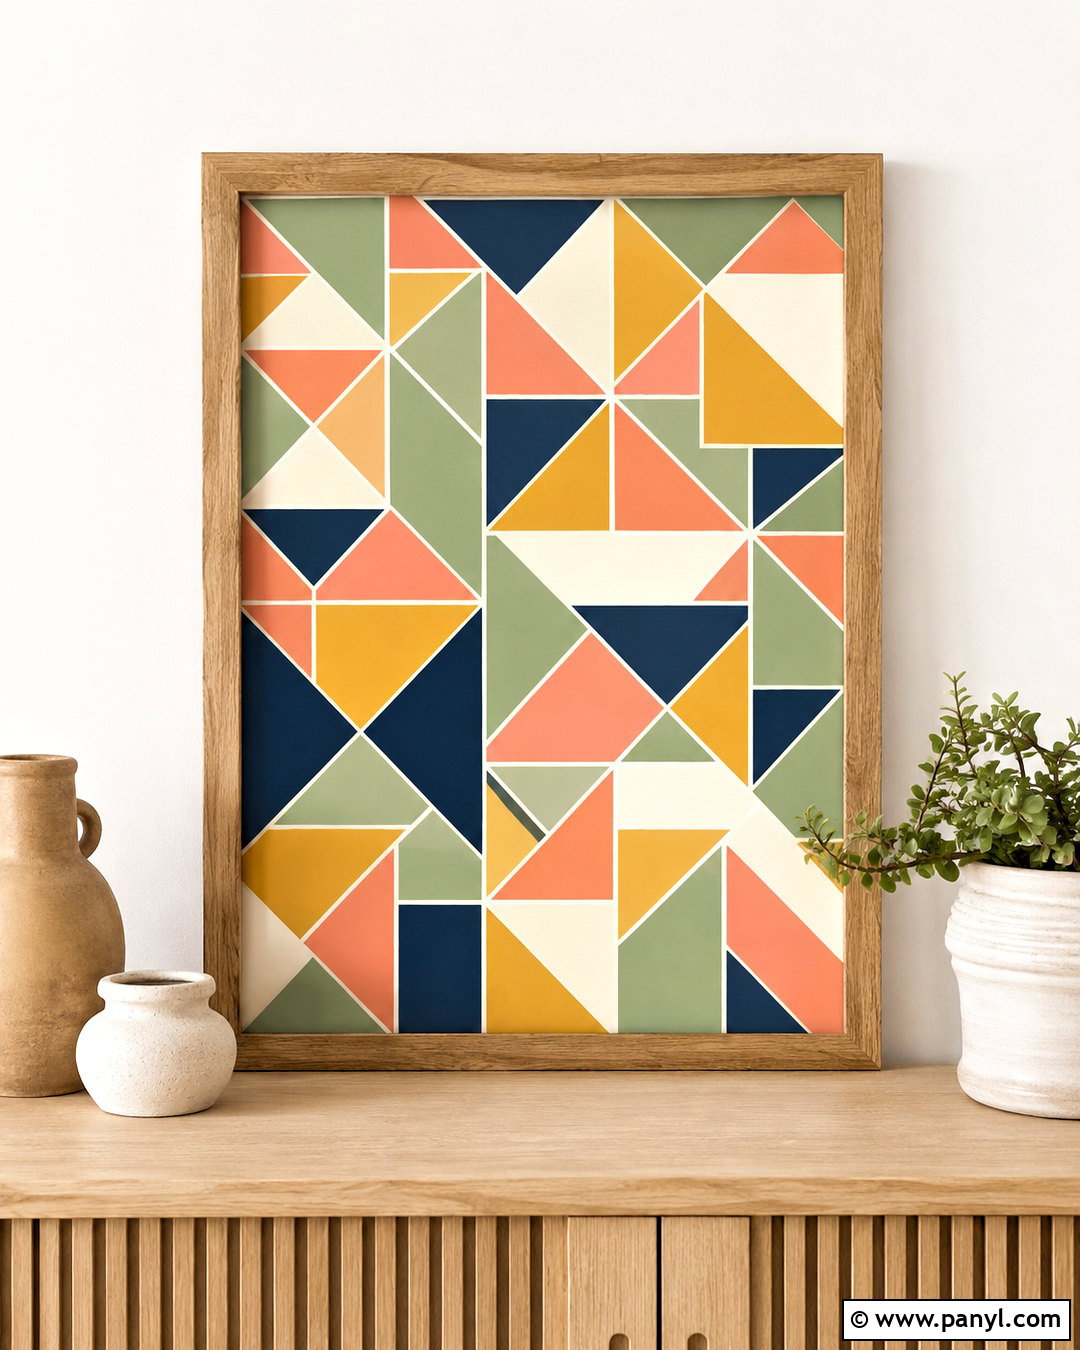
A geometric mosaic makes mismatched paint samples look intentional and modern. Select five or six coordinating colors, then cut the chips into triangles, diamonds, or hexagons of equal size. Sketch a simple repeating pattern on heavyweight cardstock or a small wood panel. Arrange the pieces from the center outward, balancing warm, cool, light, and dark shades across the design. Leave narrow white lines between shapes to mimic tile grout, or place the pieces edge to edge for saturated color. Once everything is aligned, secure each shape with archival craft glue. Finish the artwork in a natural wood frame and display it with neutral accessories so the detailed pattern remains the main attraction.
3. Paint Chip Tassel Bookmarks
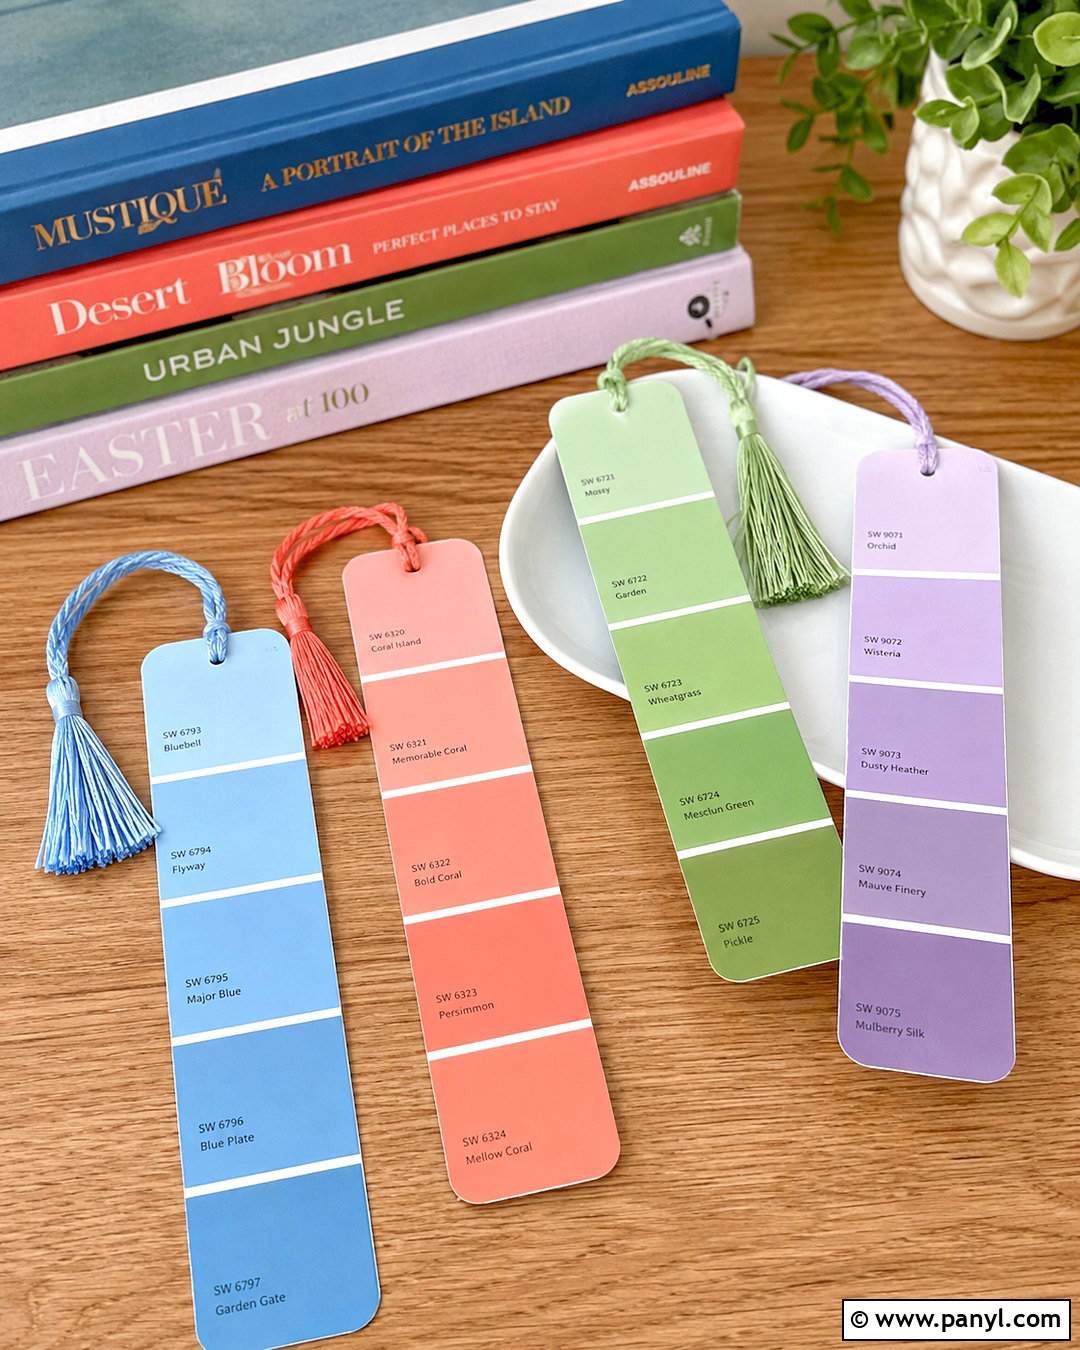
Turn long paint sample strips into sturdy bookmarks with decorative corners and coordinated tassels. Trim each chip to approximately two inches wide, then round the corners with a punch for a finished appearance. Layer the back with cardstock if the sample feels thin. Punch one centered hole near the top and add cotton cord, narrow ribbon, or embroidery floss that matches one of the printed shades. Small stamped patterns, metallic pen borders, or simple paper cutouts can personalize the front without hiding the color gradient. For greater durability, cover both sides with clear adhesive film before adding the tassel. Make several in related palettes and package them with a favorite book as an inexpensive handmade gift.
4. Paint Chip Perpetual Calendar
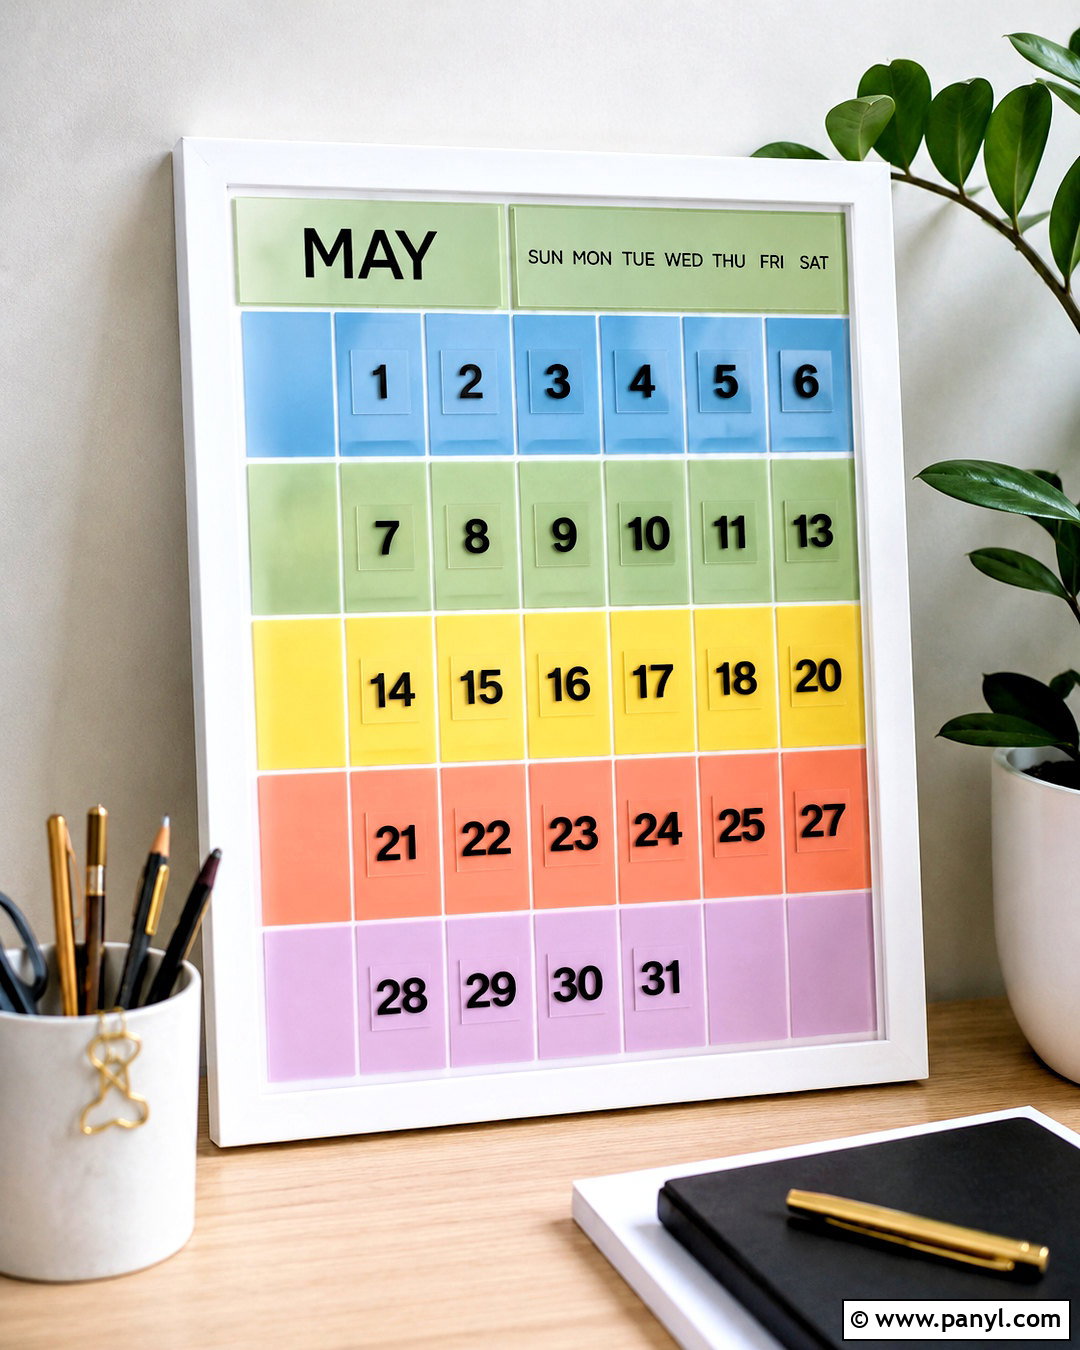
Build a reusable desk calendar with paint chip squares, number stickers, and a compact frame. Choose seven coordinating colors for the days of the week, then cut 31 smaller tiles for the dates. Mount a pale neutral paint sample as the background and place the colorful pieces in a clean grid. Add removable adhesive dots behind the numbers so the layout can be changed every month. A narrow strip across the top can display the month using reusable letter stickers. Place the design inside a glass-front frame and use a dry-erase marker for appointments and reminders. This calendar works especially well in a home office, kitchen command center, or craft room where practical organization can still feel bright and creative.
5. Paint Chip Rainbow Garland
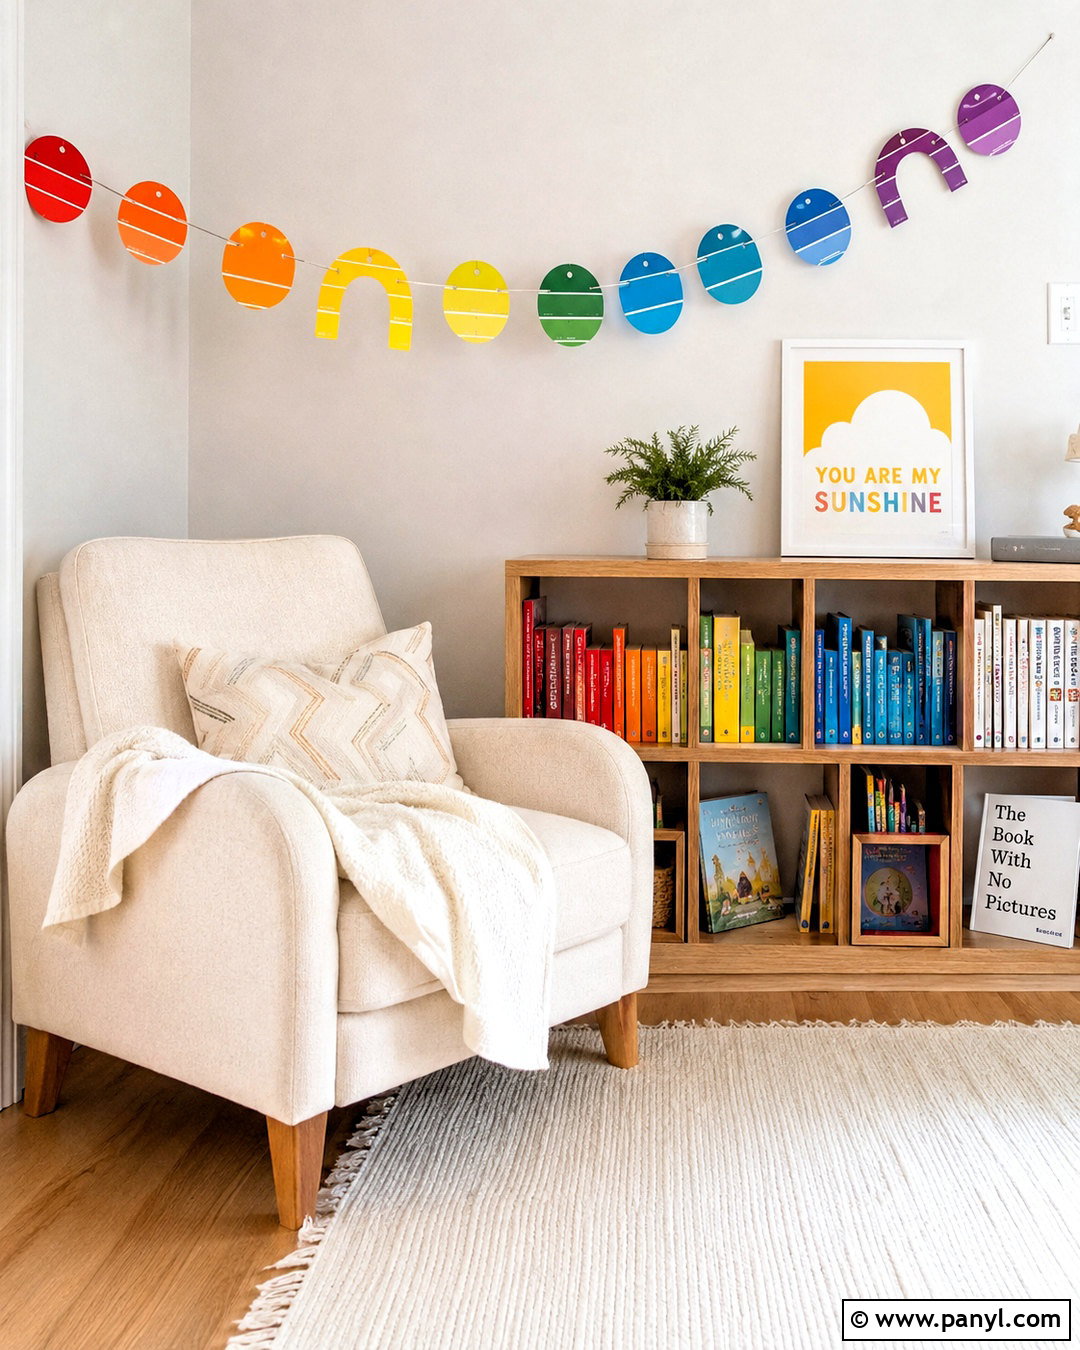
A rainbow garland brings an easy burst of color to a playroom, reading corner, craft space, or casual celebration. Gather paint chips in red, orange, yellow, green, blue, and purple, including several shades within each family. Cut them into circles, arches, flags, or rounded rectangles. Arrange the pieces in gradual color order before attaching them to cotton twine. You can sew directly through the paper with a long machine stitch or punch two small holes and thread each shape by hand. Leave even spacing so the garland hangs neatly rather than twisting. Create a layered display by making two strands with different shapes and hanging them at slightly different heights against a simple white wall.
6. Paint Chip Cork Coasters
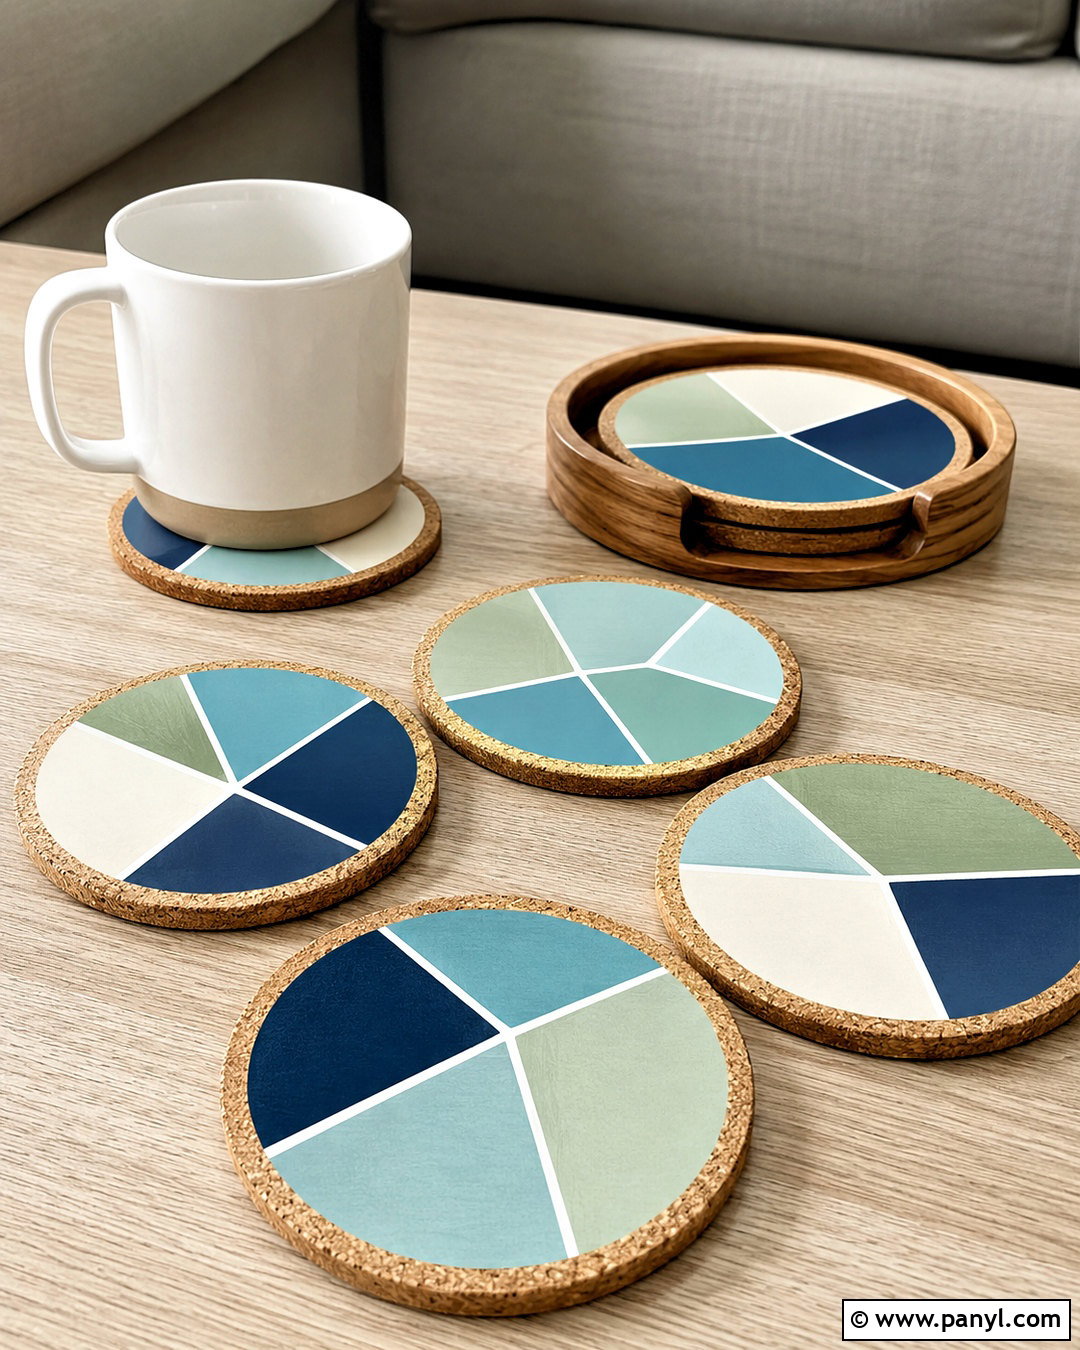
Paint chip coasters combine colorful paper with a practical cork base. Cut four-inch squares from thick cork sheets, then trim selected paint samples slightly smaller so a narrow cork border remains visible. Create each top with a single gradient card or combine several smaller pieces into stripes, checkerboards, or diagonal blocks. Glue the paper smoothly to the cork and press it under a heavy book while drying. Protect the surface with clear adhesive laminate or several light coats of water-resistant decoupage sealer, allowing every layer to dry completely. Coordinate a set of four to six coasters in one palette, then stack them inside a shallow wood holder for a tidy, useful addition to a desk or coffee table.
7. Paint Chip Layered Gift Tags
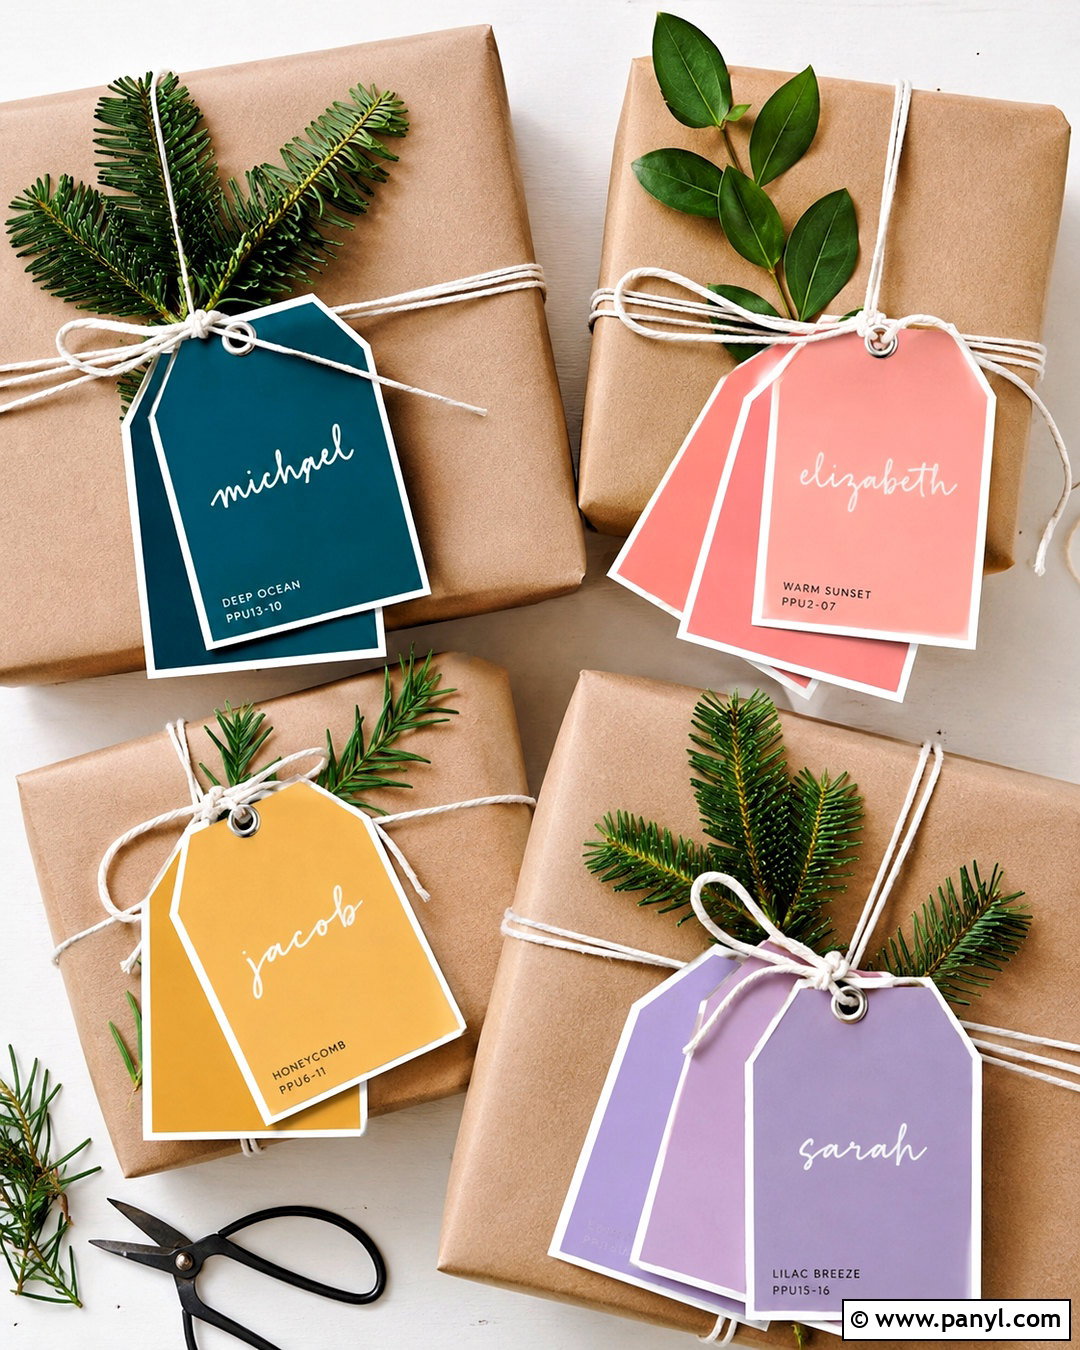
Layered gift tags make simple kraft paper wrapping feel thoughtful and custom. Begin with medium or dark paint chips so handwritten names remain easy to see. Cut classic tag shapes, rounded rectangles, leaves, or simple arches. Layer a smaller contrasting piece over each base to create a two-tone border, then attach it with a glue stick or foam square. Add the recipient’s name using a white gel pen, alphabet stamp, or fine metallic marker. Punch a clean hole at the top and tie the tag onto the package with cotton cord or narrow fabric ribbon. Complete the presentation with plain paper, natural twine, and one small greenery sprig so the colorful tag becomes the clear focal point.


8. Paint Chip Matchbook Notepad
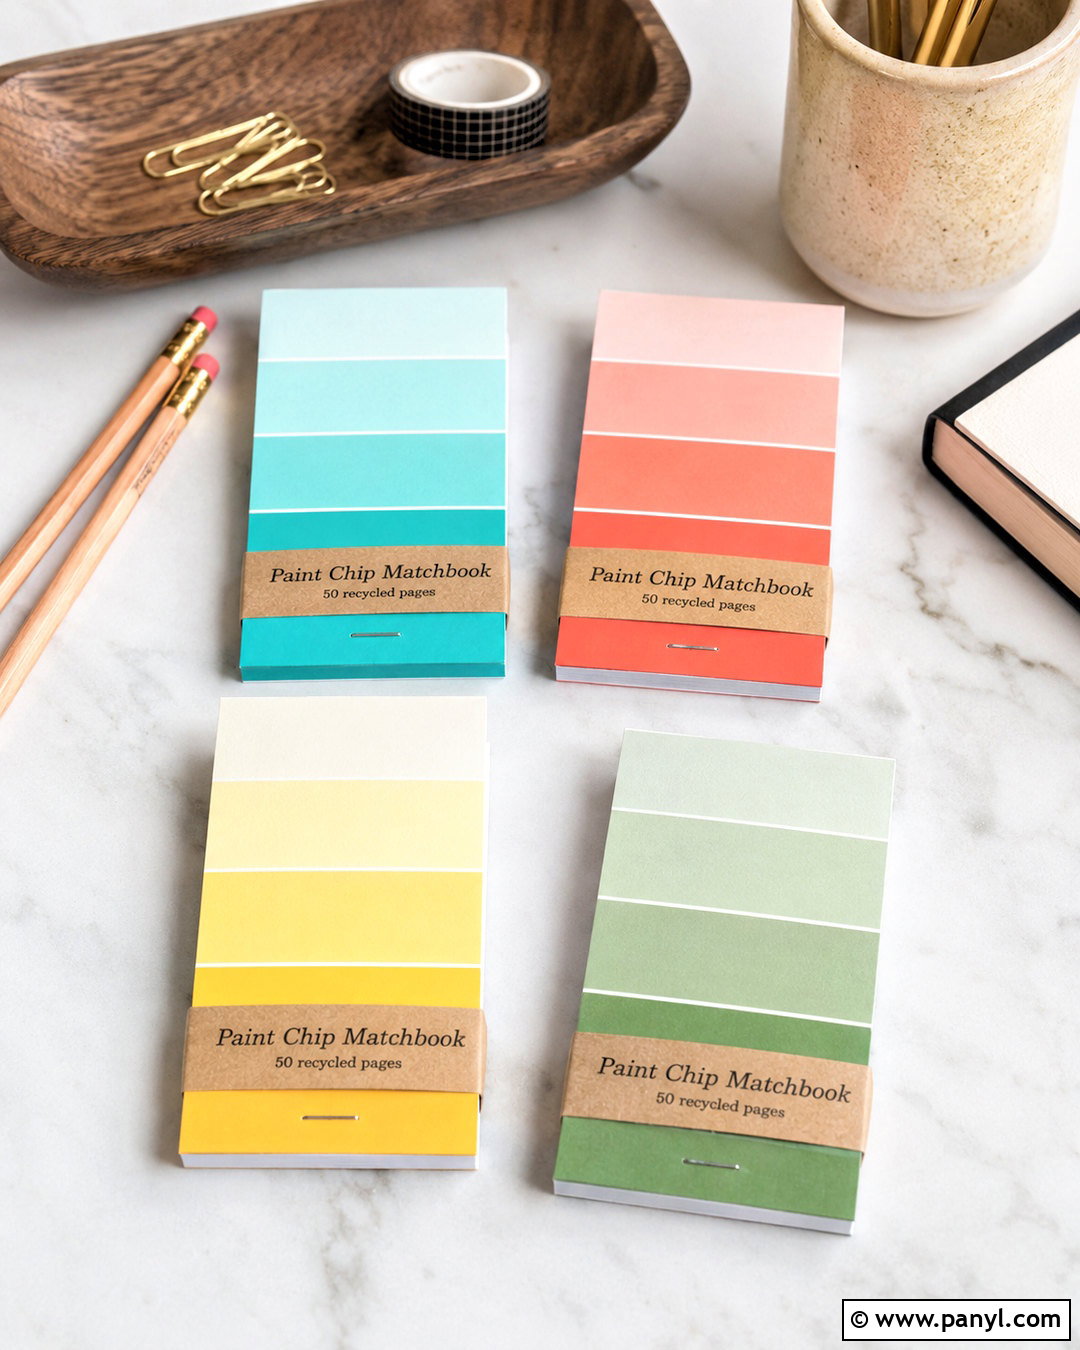
Make a pocket-size notepad by folding a large paint chip around a stack of small paper sheets. Choose a card with an attractive gradient, then cut plain recycled paper slightly narrower than the cover. Stack 15 to 20 sheets and align them along the lower inside edge. Secure the stack and cover together with two neat staples, leaving enough space for the front flap to tuck beneath the stapled section. Cover the staples with a narrow strip of coordinating paint chip for a cleaner finish. Add a small label or stamped symbol to the front. These compact notebooks fit easily inside a bag, desk drawer, or kitchen command station and work well for lists, measurements, and quick reminders.
9. Paint Chip Color Matching Game
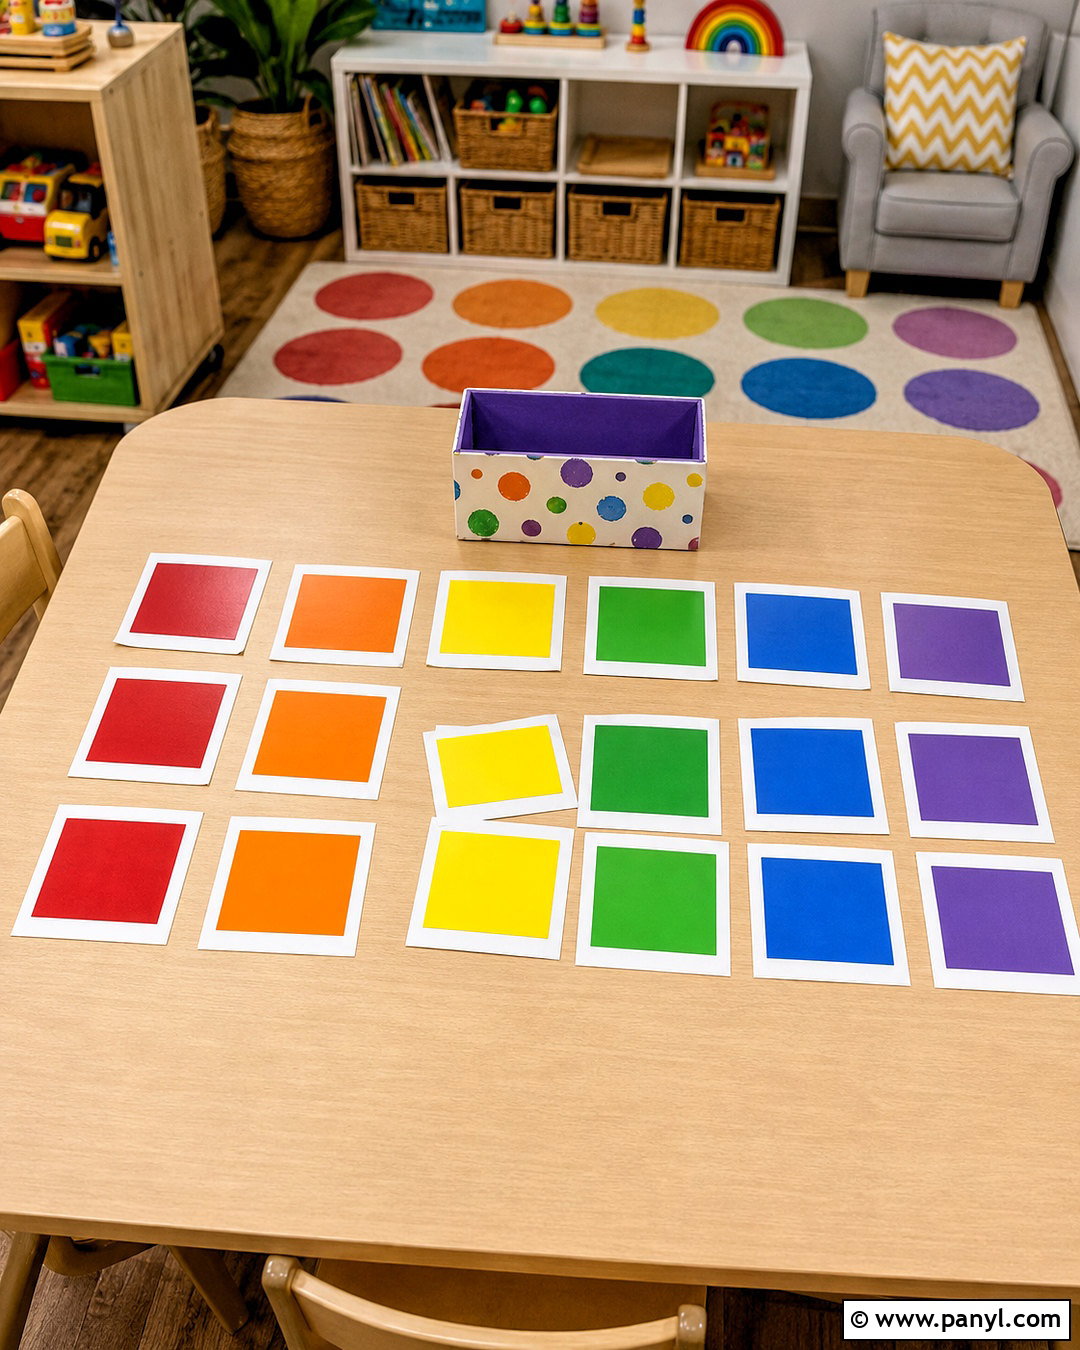
Create a reusable matching game that helps children recognize colors, gradients, and visual patterns. Select pairs of identical or closely related paint samples, then cut them into uniform squares. Glue each piece onto thicker cardstock or lightweight chipboard so the backs look the same and the pieces are easier to handle. Cover the cards with clear laminate for durability, especially if younger children will use them frequently. Start with six simple color pairs, then introduce harder combinations containing similar blues, greens, or neutrals. Store the finished game in a small painted box with a matching paint chip label. The complete set offers quiet play while keeping loose cards organized between activities.

10. Paint Chip Paper Flowers
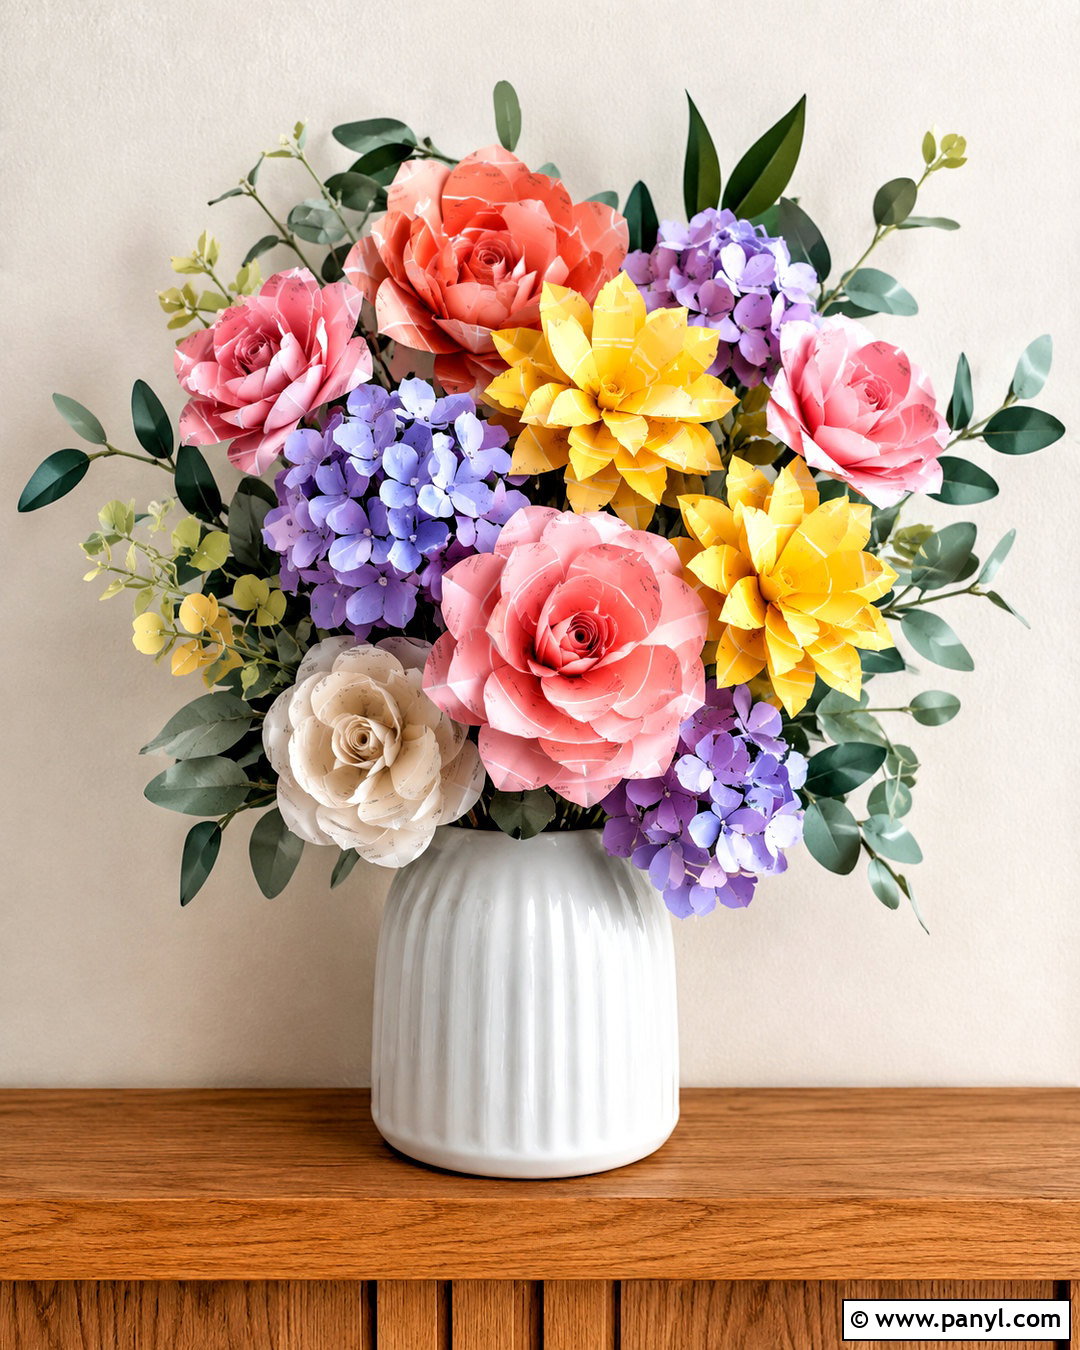
A bouquet of paint chip flowers creates cheerful, lasting color for a desk, shelf, or child’s room. Choose samples in pink, peach, yellow, lavender, and cream, then cut several petal shapes in graduating sizes. Curl the edges gently around a pencil and layer the petals around a small paper circle. Add a contrasting center made with a round punch. Attach each flower to floral wire wrapped in green paper tape, then cut leaves from sage, emerald, and olive paint chips. Arrange the stems inside a small ceramic vase with different flower heights and shapes. Mixing open daisies, layered roses, and simple tulips gives the finished bouquet a fuller and more natural appearance.
11. Paint Chip Leaf Wreath
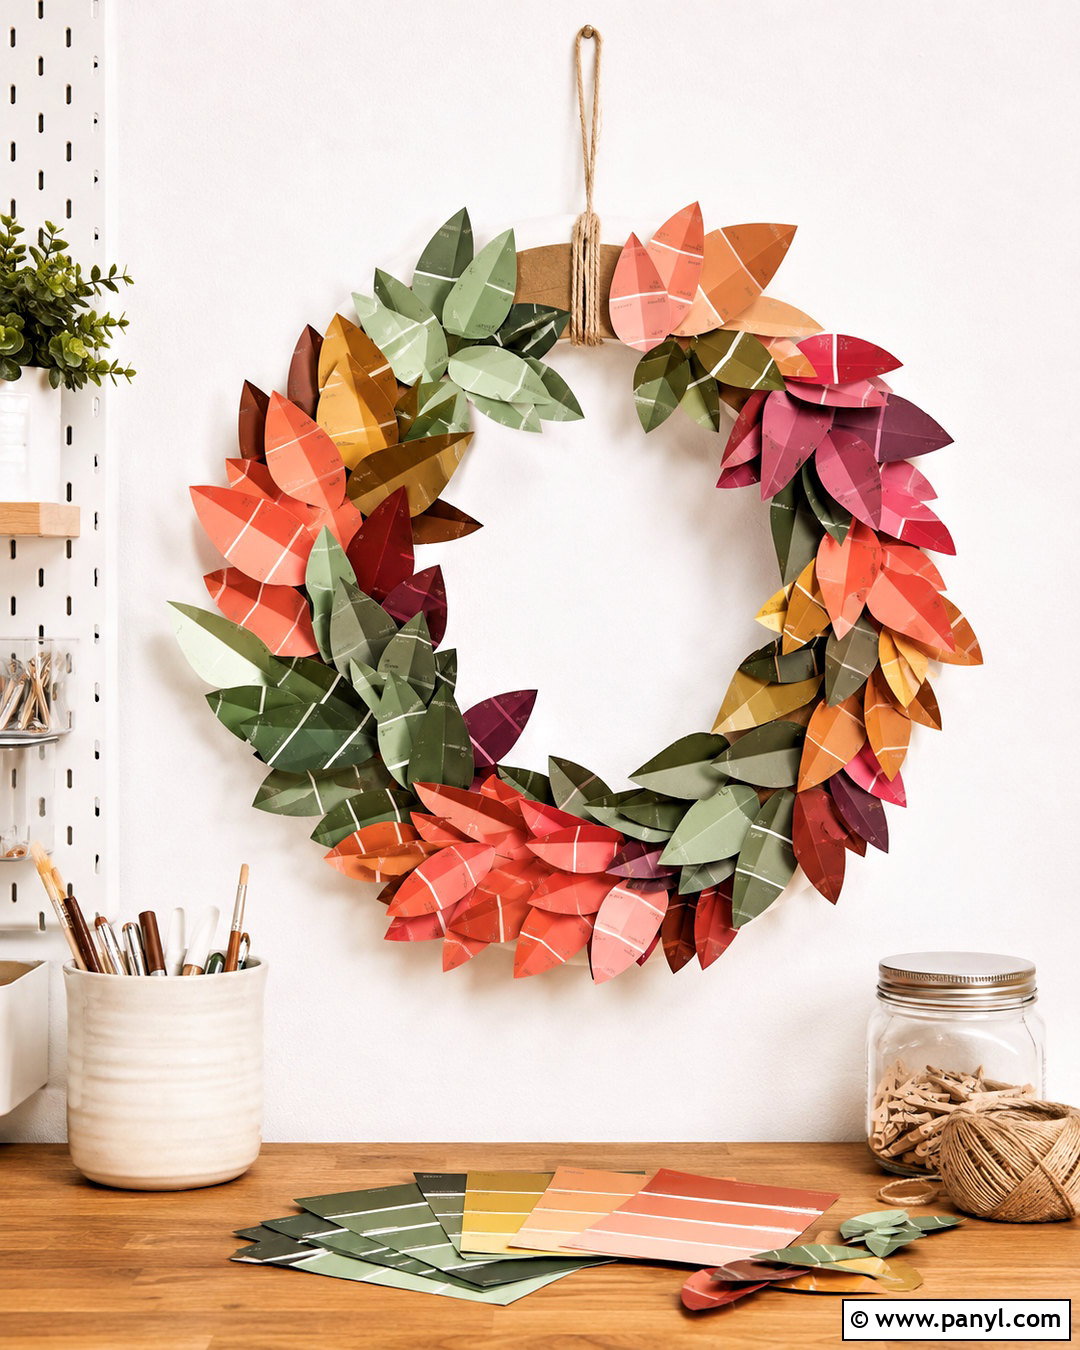
Bring color to a craft room or home office with a lightweight paint chip leaf wreath. Cut a sturdy ring from cardboard, then cover it with kraft paper, ribbon, or a neutral paint sample. Choose green chips for a botanical look, or use a seasonal palette of coral, gold, rust, and burgundy. Cut leaves in several sizes and gently fold each one down the center for dimension. Glue the larger leaves around the base first, overlapping them in one direction, and fill gaps with smaller pieces. Add a simple cotton hanging loop rather than an oversized bow. The completed wreath should look layered and full while remaining light enough to hang from a removable wall hook.
12. Paint Chip Hanging Mobile
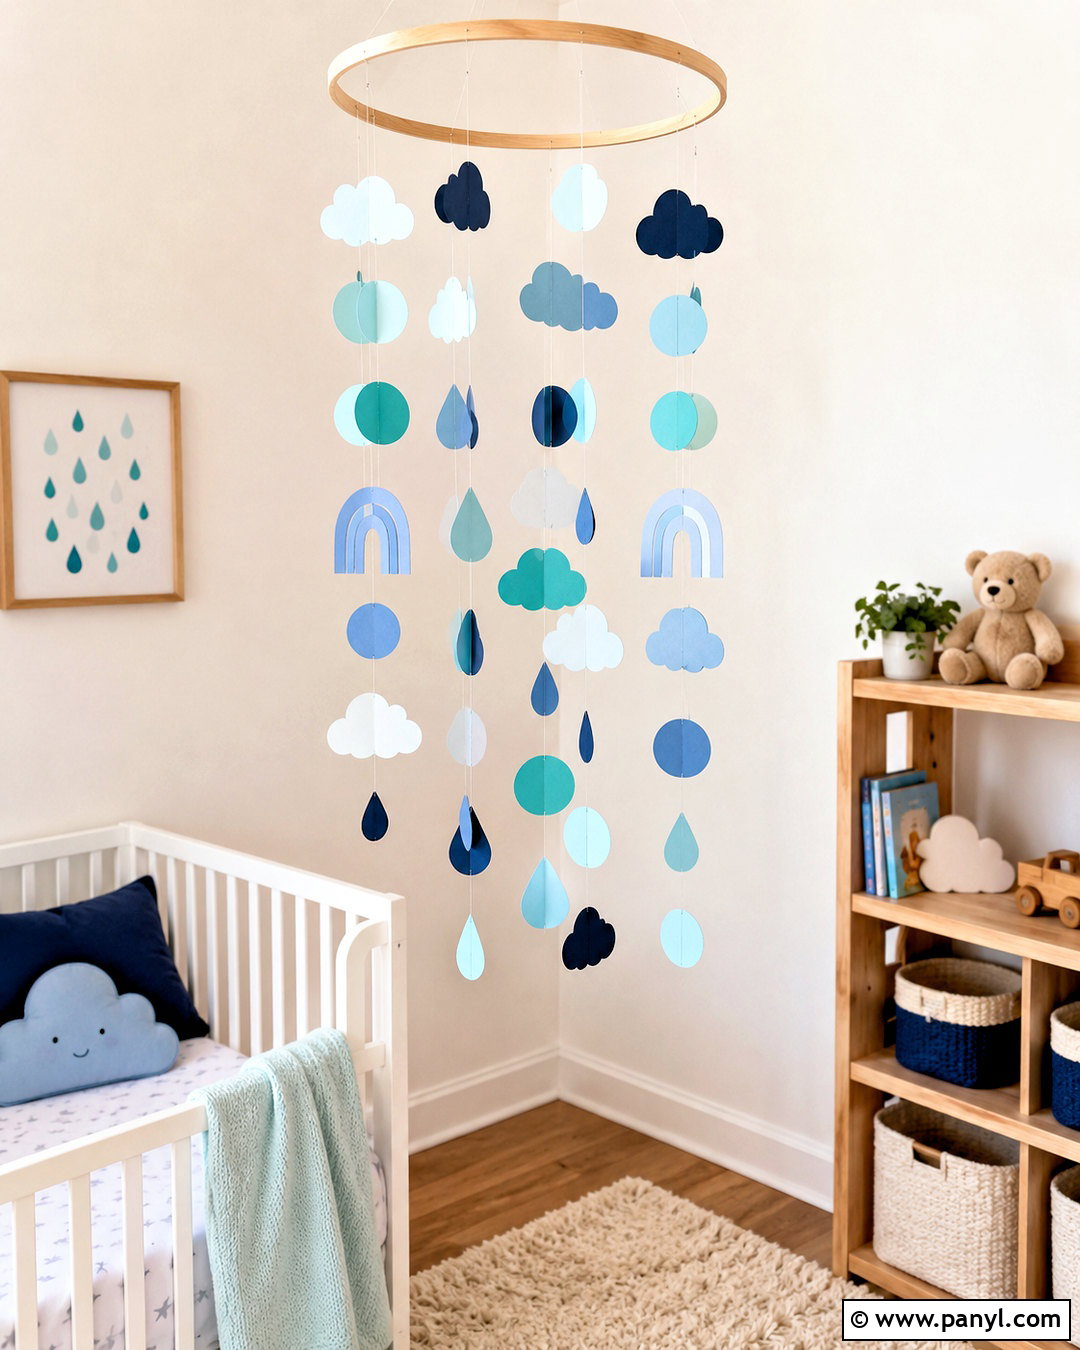
A hanging mobile allows paint sample colors to move gently and catch the light. Cut circles, raindrops, clouds, birds, or abstract arches from a coordinated group of paint chips. Use several shades of blue and green for a calm look, or combine the full rainbow for a playful nursery or craft room. Attach the shapes to clear thread at varied distances, then tie each strand to a wood embroidery hoop or two crossed dowels. Balance the pieces before securing every knot with a small drop of glue. Keep the lowest shapes well above beds, chairs, and walking areas. The finished mobile should feel airy, evenly weighted, and interesting from every viewing angle.
13. Paint Chip Photo Frame
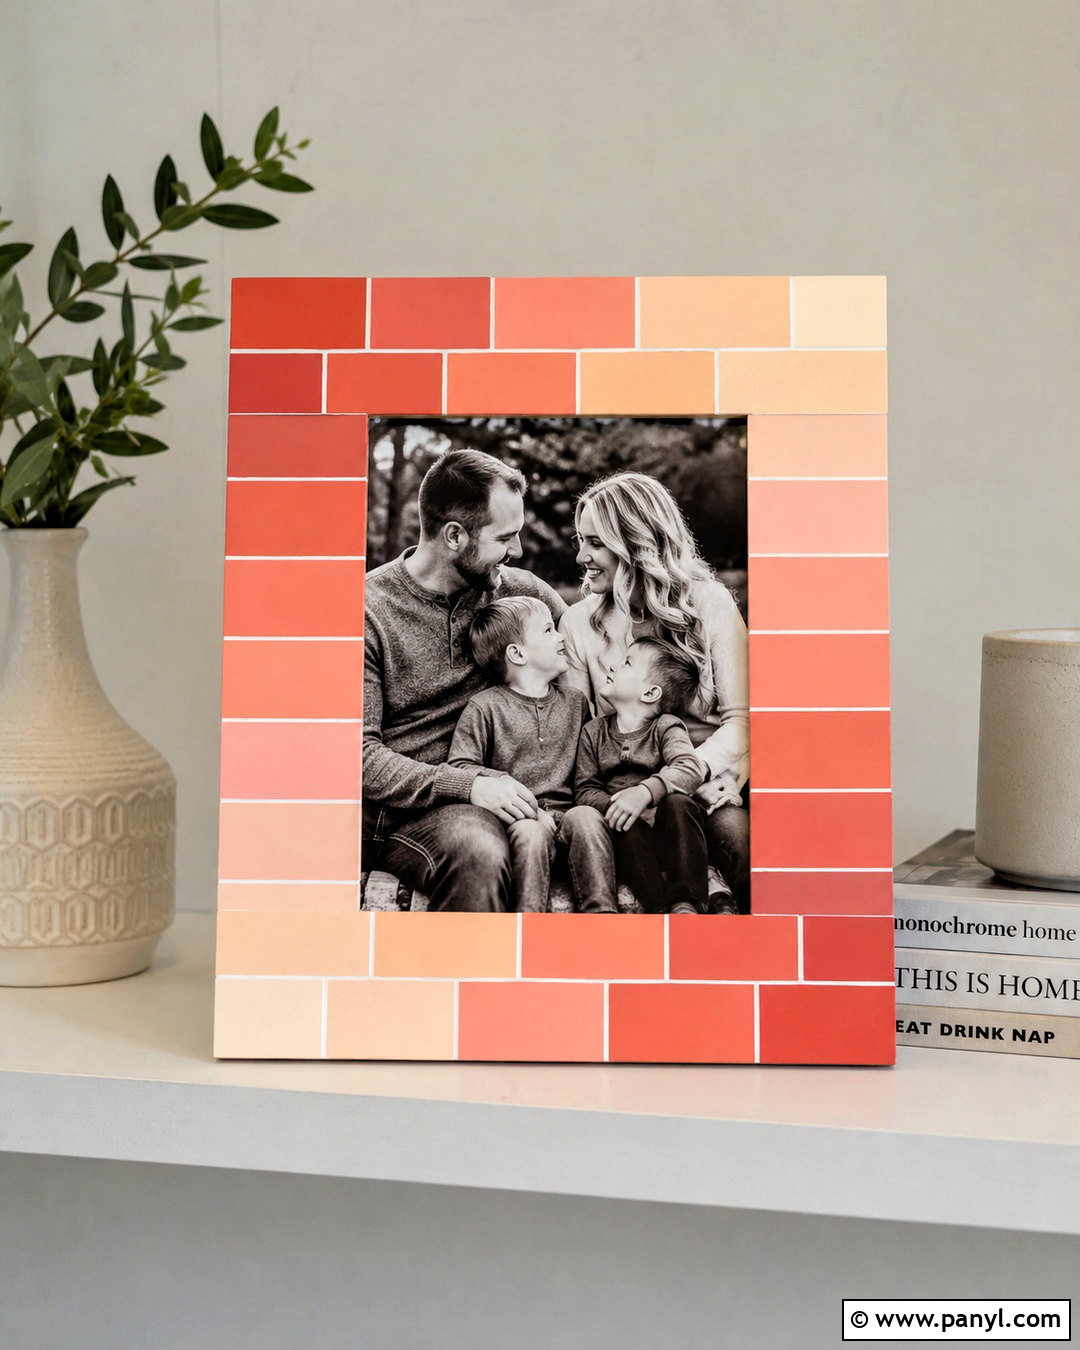
Refresh a plain wood frame with a border of neatly arranged paint chip pieces. Choose colors that complement the photograph or the room where the frame will be displayed. Cut the samples into narrow rectangles, tiny squares, or angled strips, then plan the complete pattern before applying glue. An ombre border feels calm and modern, while alternating bright shades creates a playful result. Keep the inside and outside edges straight so the frame does not look uneven. Seal the paper with clear matte decoupage medium and allow it to cure fully. Pair the colorful border with a simple black-and-white photograph, then display the frame against a neutral wall or on an uncluttered shelf.
14. Paint Chip Table Runner
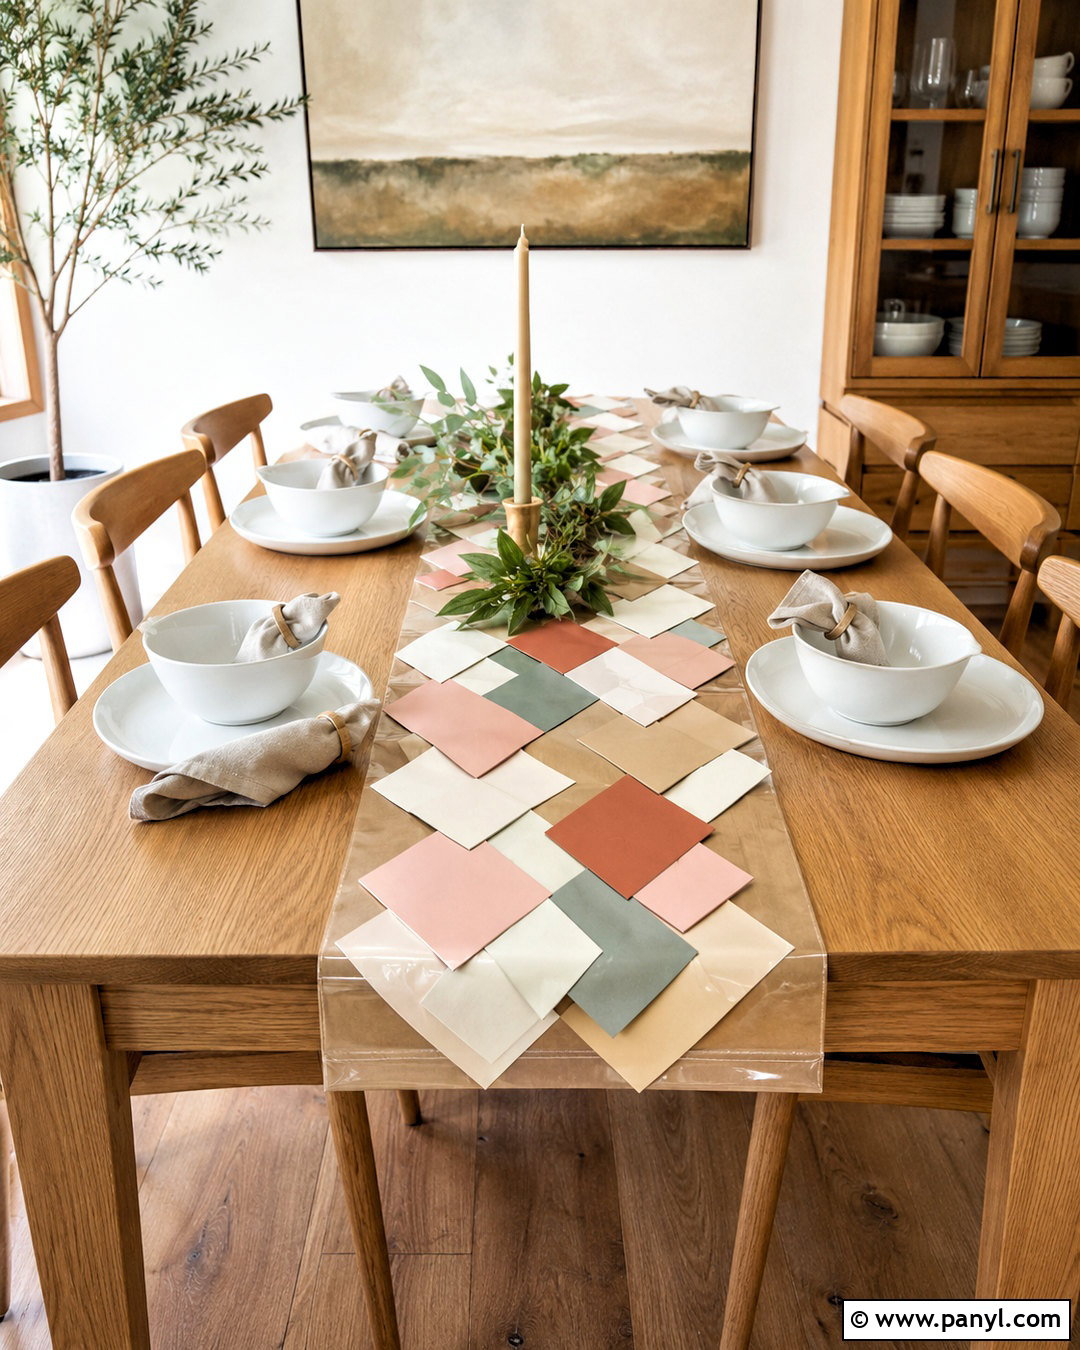
Design a temporary table runner by combining paint chips into a long, colorful paper arrangement. Select a controlled palette that suits the room, such as terracotta, blush, cream, and muted green. Cut the samples into equal rectangles or diamonds and arrange them in overlapping rows on a strip of heavyweight kraft paper. Glue each piece securely, keeping the overall width narrow enough for place settings. Cover the finished runner with clear contact film if it will be used near food or drinks. Add plain ceramic dishes, natural linen napkins, and a low arrangement of greenery. This balanced styling prevents the paint chip pattern from overwhelming the table while still making it noticeable.
15. Paint Chip Napkin Holder
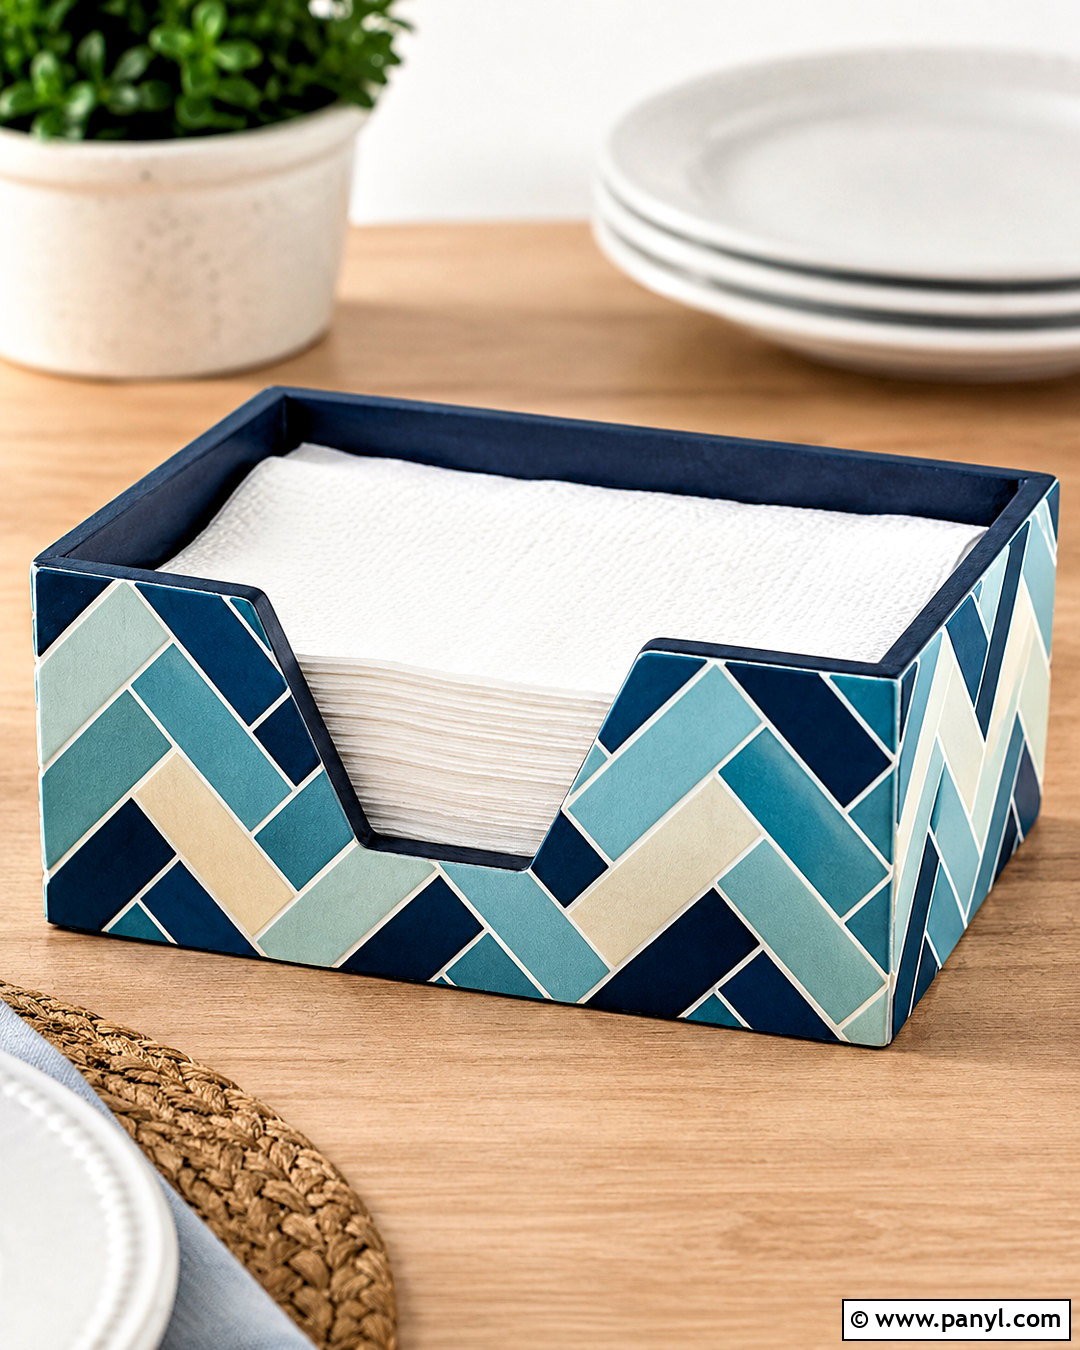
Create a coordinated napkin holder from sturdy cardboard covered with colorful paint samples. Construct a simple open-top box sized for standard paper napkins, reinforcing the corners with kraft tape. Select three to five paint chip shades and cut them into equal strips. Apply the strips vertically, horizontally, or in a clean herringbone pattern across the exterior. Cover the inside with solid cardstock in one matching color for a polished finish. Seal the outside with matte decoupage medium so the paper resists everyday handling. Fill the holder with plain white napkins and place it beside neutral dishes or office supplies. The finished container can also organize mail, memo paper, or small craft materials.
16. Paint Chip Storage Labels
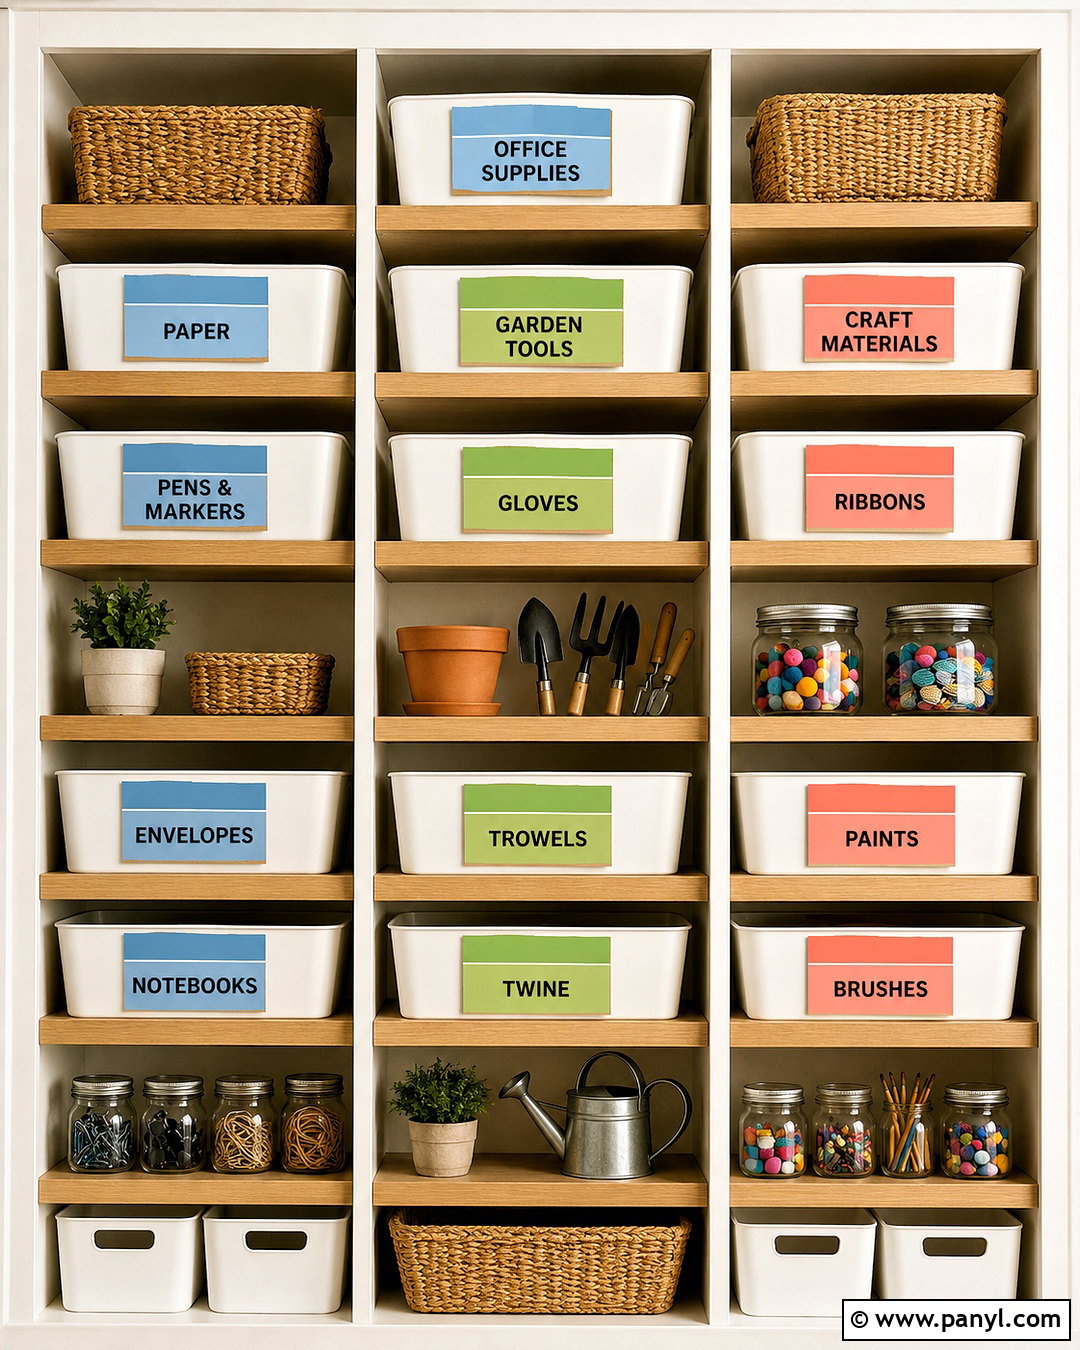
Color-coded storage labels can make shelves easier to scan while adding a coordinated decorative touch. Choose one paint chip family for each category, such as blue for office supplies, green for gardening items, and warm coral for craft materials. Cut identical label shapes and mount them onto white or kraft cardstock borders. Write each category with a bold black marker, alphabet stamps, or printed adhesive letters. Punch holes for baskets or add removable mounting squares for boxes and jars. Repeat the same lettering and shape throughout the room so the system feels intentional. Pair the labels with matching bins in neutral colors, allowing the paint chips to provide useful color without making the shelves look cluttered.
17. Paint Chip Greeting Cards
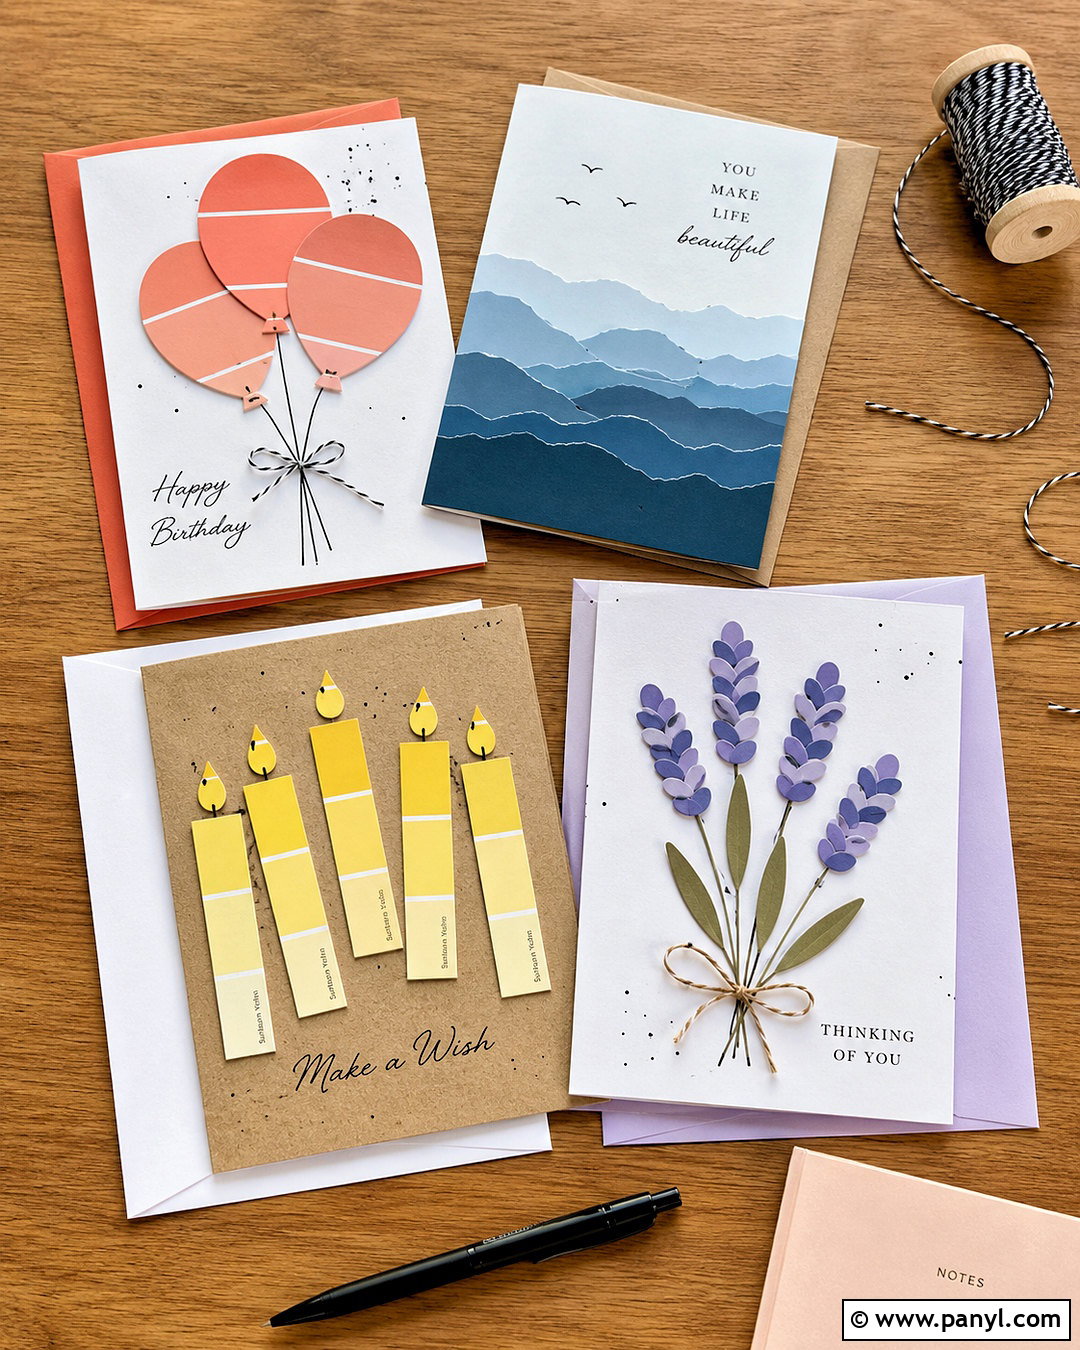
Handmade greeting cards look clean and contemporary when paint chips supply the main color. Fold heavyweight white or kraft cardstock into a standard card base. Cut the samples into candles, balloons, flowers, arches, or a simple layered landscape. Arrange one complete scene on the front, leaving enough open space to keep the composition balanced. Add details with a fine black pen, such as strings, stems, or small outlines. Foam adhesive can lift one or two shapes for subtle dimension. Coordinate the envelope with a narrow paint chip strip or punched circle. Creating several cards in one session provides a ready-to-use collection for birthdays, thank-you notes, congratulations, and friendly messages throughout the year.
18. Paint Chip Mini Puzzle
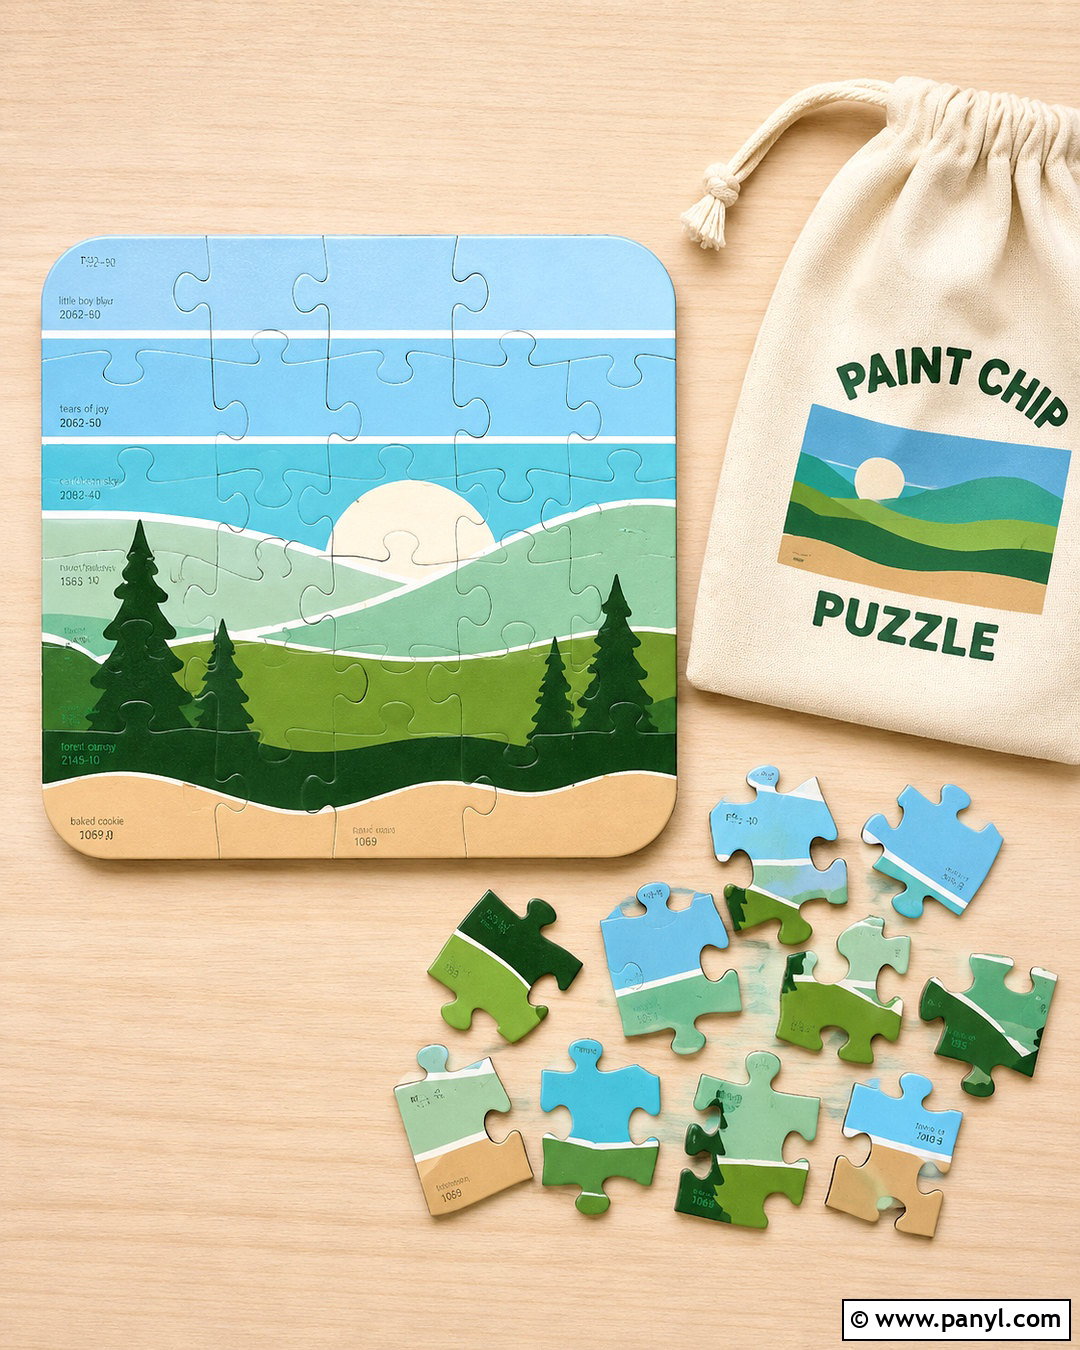
Make a mini puzzle by turning an ombre paint chip collage into a simple reusable game. Glue several coordinating samples onto thin chipboard, arranging them as a landscape, rainbow, geometric pattern, or abstract color gradient. Allow the adhesive to dry under a flat weight so the board does not curl. Draw six to twelve large puzzle pieces on the back, keeping the shapes manageable for the intended age group. Cut carefully with strong scissors or a craft knife used by an adult. Seal the front with clear laminate before separating the pieces. Store the completed puzzle inside a small drawstring bag or envelope decorated with a matching miniature image of the finished design.
19. Paint Chip Refrigerator Magnets
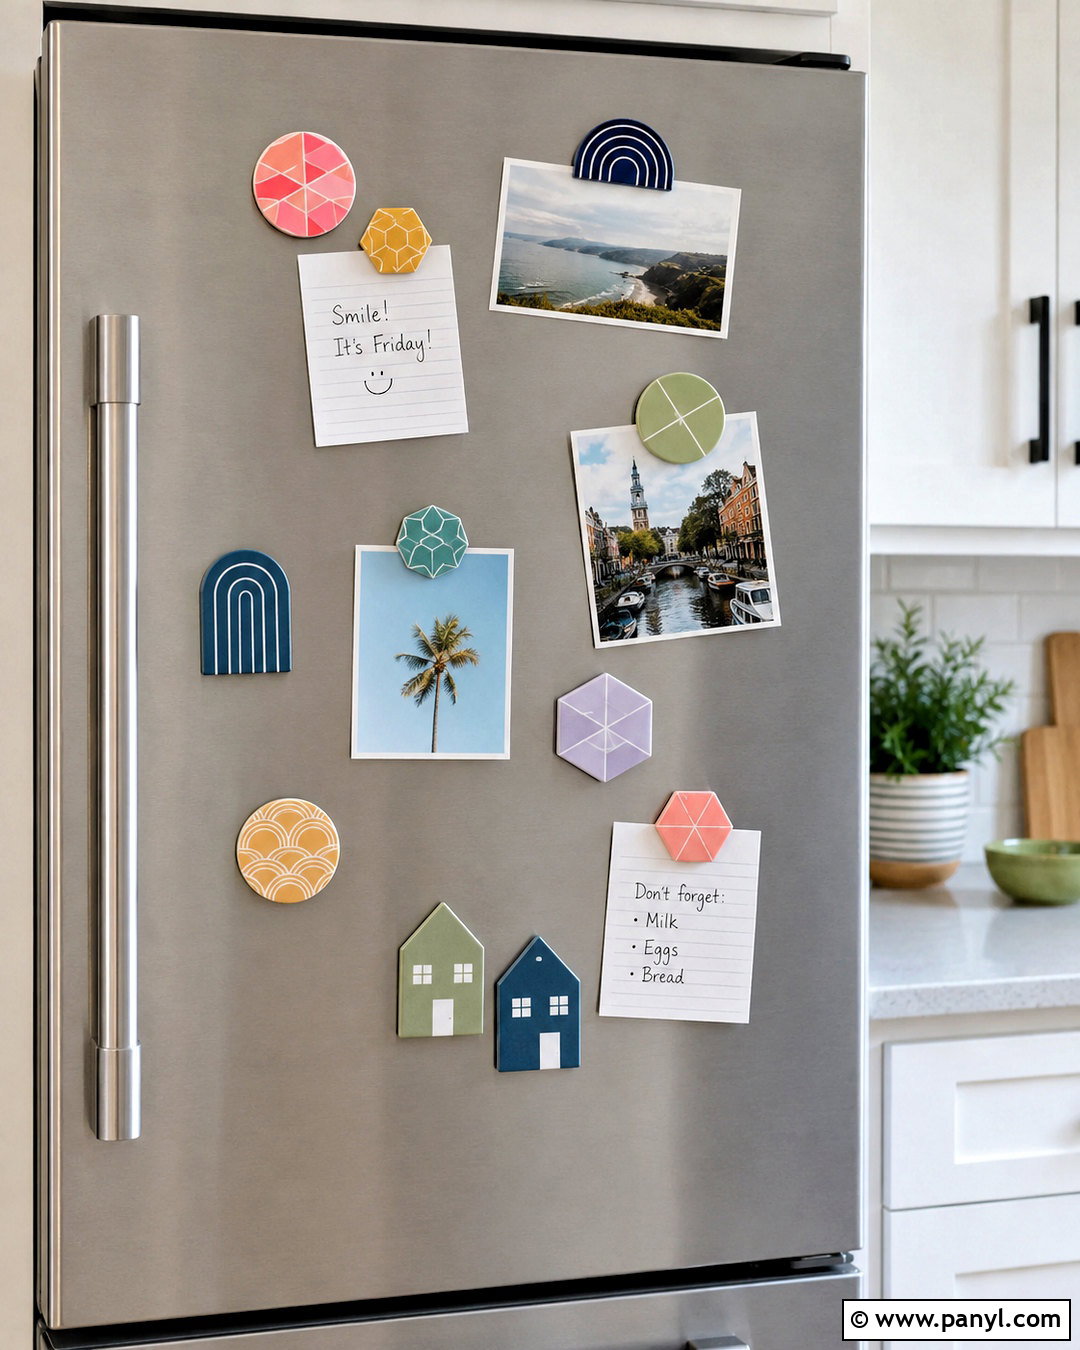
Paint chip magnets add useful color to a refrigerator, memo board, or metal filing cabinet. Cut the samples into circles, arches, hexagons, or small house shapes, then mount them onto lightweight wood blanks or thick cardboard. Combine two or three shades on each piece to create stripes or simple geometric patterns. Seal the fronts with clear decoupage medium and attach strong flat magnets securely to the backs. Make a coordinated set that includes several solid colors and a few patterned pieces. Display them with a small weekly menu, photographs, and plain note cards. Keeping the surrounding papers neutral allows the colorful magnets to look decorative while still serving a practical purpose.
20. Paint Chip Shadow Box Landscape
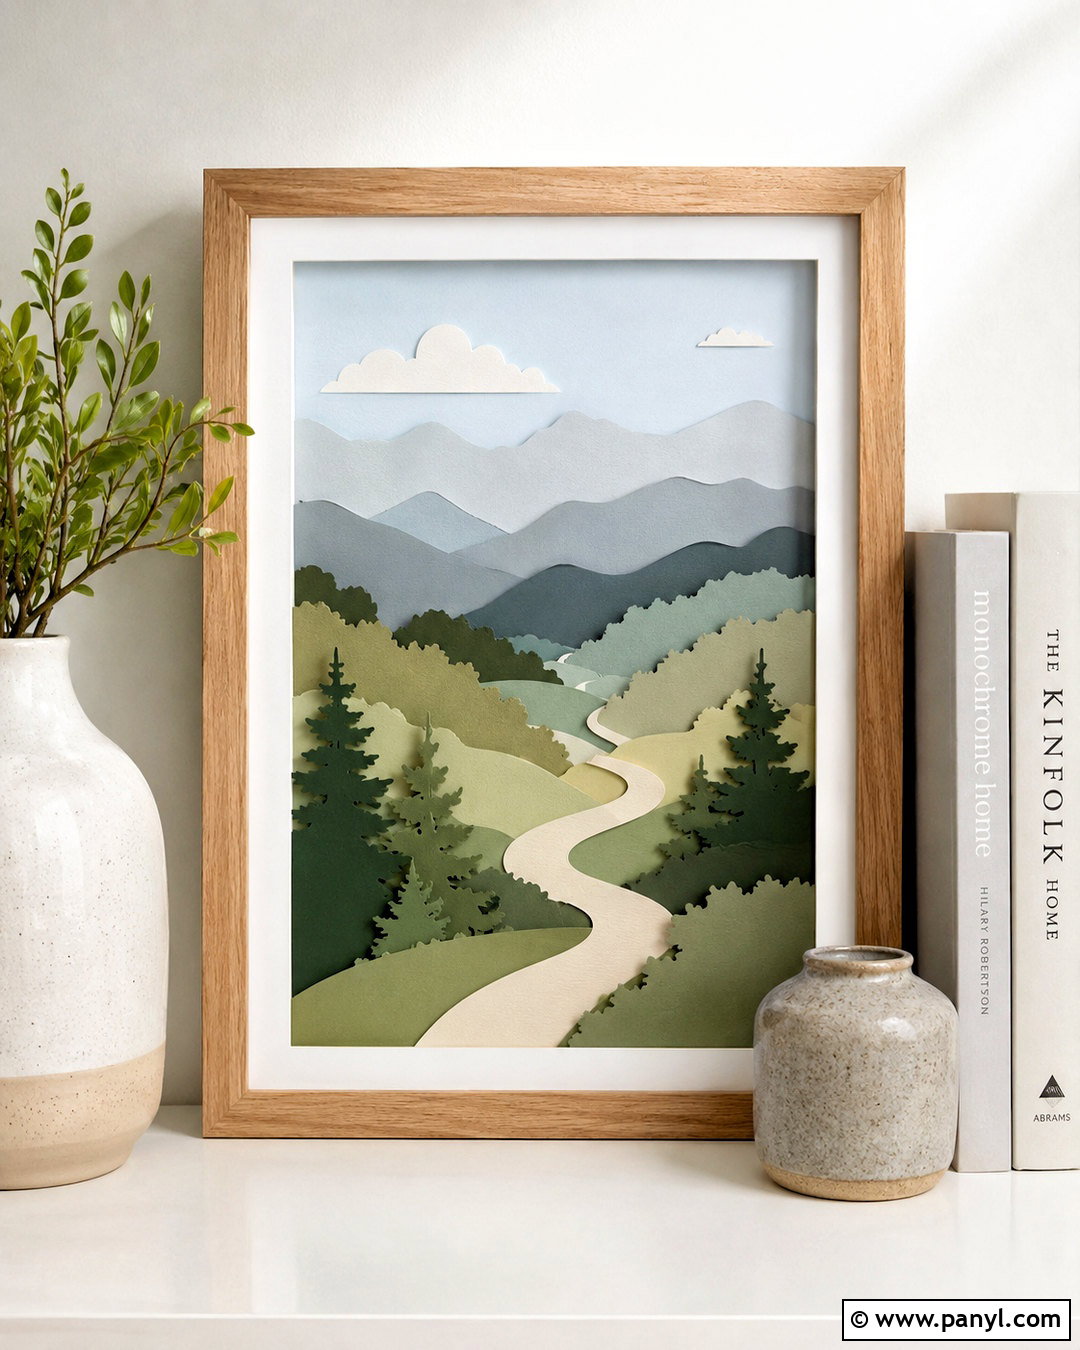
Finish the collection with layered landscape art inside a deep shadow box frame. Choose paint chips in sky blue, misty gray, forest green, and muted earth tones. Cut the lightest blue piece into a full background, then layer rolling hills, trees, and distant mountains over it. Use thin foam squares between selected layers to create depth and realistic shadows. A small paper sun, moon, or winding path can become the focal point without making the scene too detailed. Mount the finished landscape on white mat board and place it inside a natural wood shadow box. Display it on a shelf with simple pottery and greenery for a calm, handcrafted vignette.
Conclusion:
These 20 paint chip crafts show how a small collection of leftover color samples can become useful accessories, personalized gifts, playful activities, and polished home decor. Begin with an easy project, such as bookmarks or gift tags, before trying detailed mosaics, layered flowers, or shadow box art. A limited color palette, accurate cutting, and careful spacing will make even an inexpensive paper craft appear thoughtfully designed. Save tiny offcuts for card decorations, labels, and future collages instead of discarding them. Most importantly, use paint samples you already own or obtain extras with store permission. With basic tools and a little planning, 20 paint chip crafts can provide hours of colorful, budget-friendly creativity.

Related Ideas and Inspiration:



Leave a Reply