
A DIY champagne wall turns a simple beverage station into a polished focal point for weddings, showers, birthdays, and backyard celebrations. The best versions combine secure glass holders, a stable freestanding base, an attractive backdrop, and decorations that match the event. You can build one from plywood, acrylic, pegboard, pallets, folding screens, or even a small tabletop panel. Before cutting materials, count the glasses, measure their widest points, and test your shelf spacing. Also consider transportation, refilling access, and outdoor wind conditions. From modern arches to rustic greenery displays, these complete looks offer options for different skill levels, themes, spaces, and budgets. Use these practical designs to find the right finish, structure, and layout among these **20 DIY champagne wall ideas**.
1. Boxwood Champagne Wall
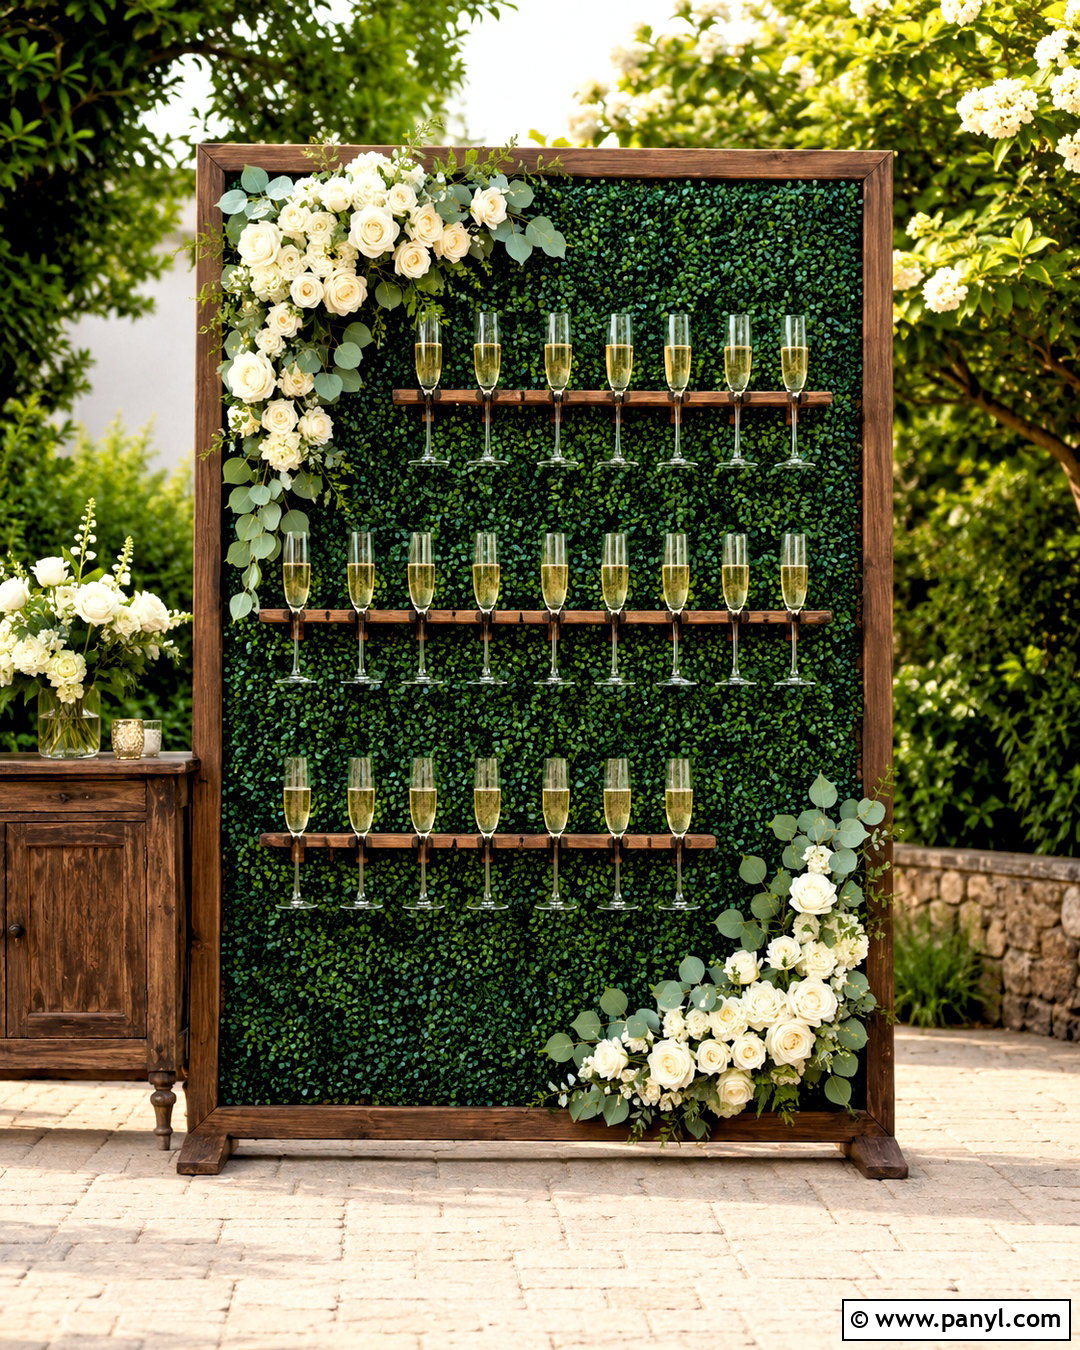
Create a lush event backdrop by attaching artificial boxwood panels to a sturdy plywood board. Frame the edges with medium-stained wood so the greenery looks finished rather than temporary. Add three or four evenly spaced rows of wooden flute holders, staining them to match the frame. A wide base with rear support braces will keep the wall upright, while concealed sandbags can provide extra stability outdoors. Finish the arrangement with white roses, eucalyptus, and small cream flowers placed asymmetrically across one upper corner. Position a simple console beside the wall for napkins and extra glasses. This complete champagne wall works especially well with garden weddings, bridal showers, and spring parties because it doubles as a beverage station and a rich photo backdrop.
2. White Arch Champagne Wall
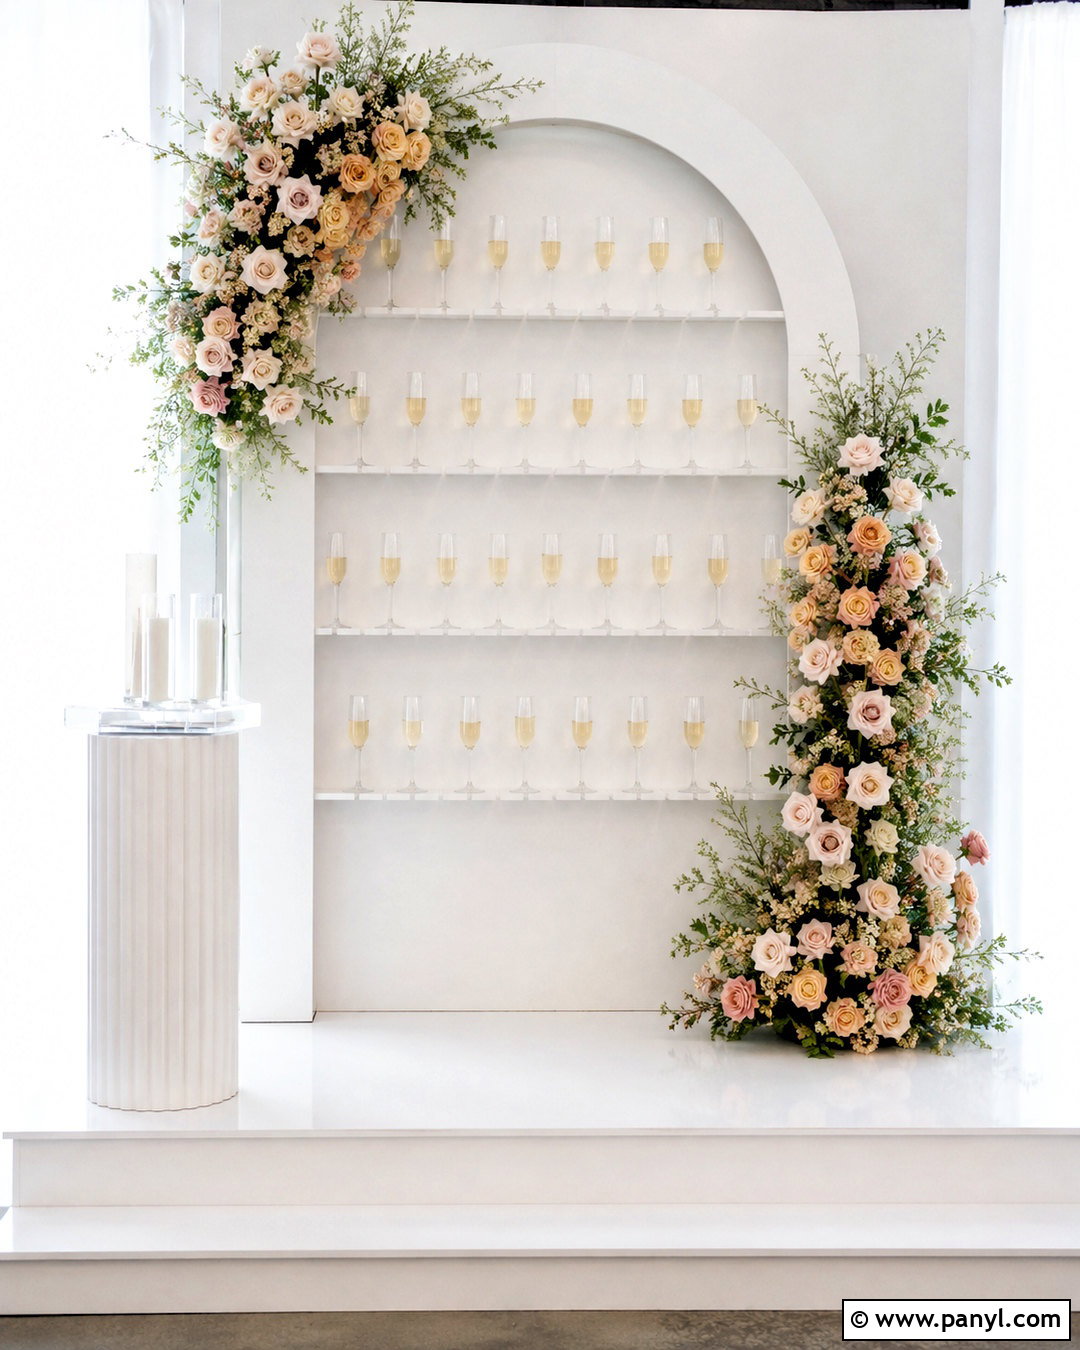
Soft curves can make a homemade display feel modern and professionally styled. Cut a tall plywood panel with a rounded top, sand every edge, and coat it with smooth white paint in a satin finish. Install slim white holders in balanced rows, leaving open space near the arch for a decorative focal point. Add a restrained arrangement of blush roses, pale peach flowers, and airy greenery along one side. A matching white platform base creates a clean foundation and can conceal sturdy rear supports. Complete the setting with neutral flooring, a small fluted pedestal, and clear acrylic accessories. The finished champagne wall feels light and elegant without requiring elaborate construction, making it suitable for showers, engagement parties, and compact indoor receptions.
3. Black Champagne Wall
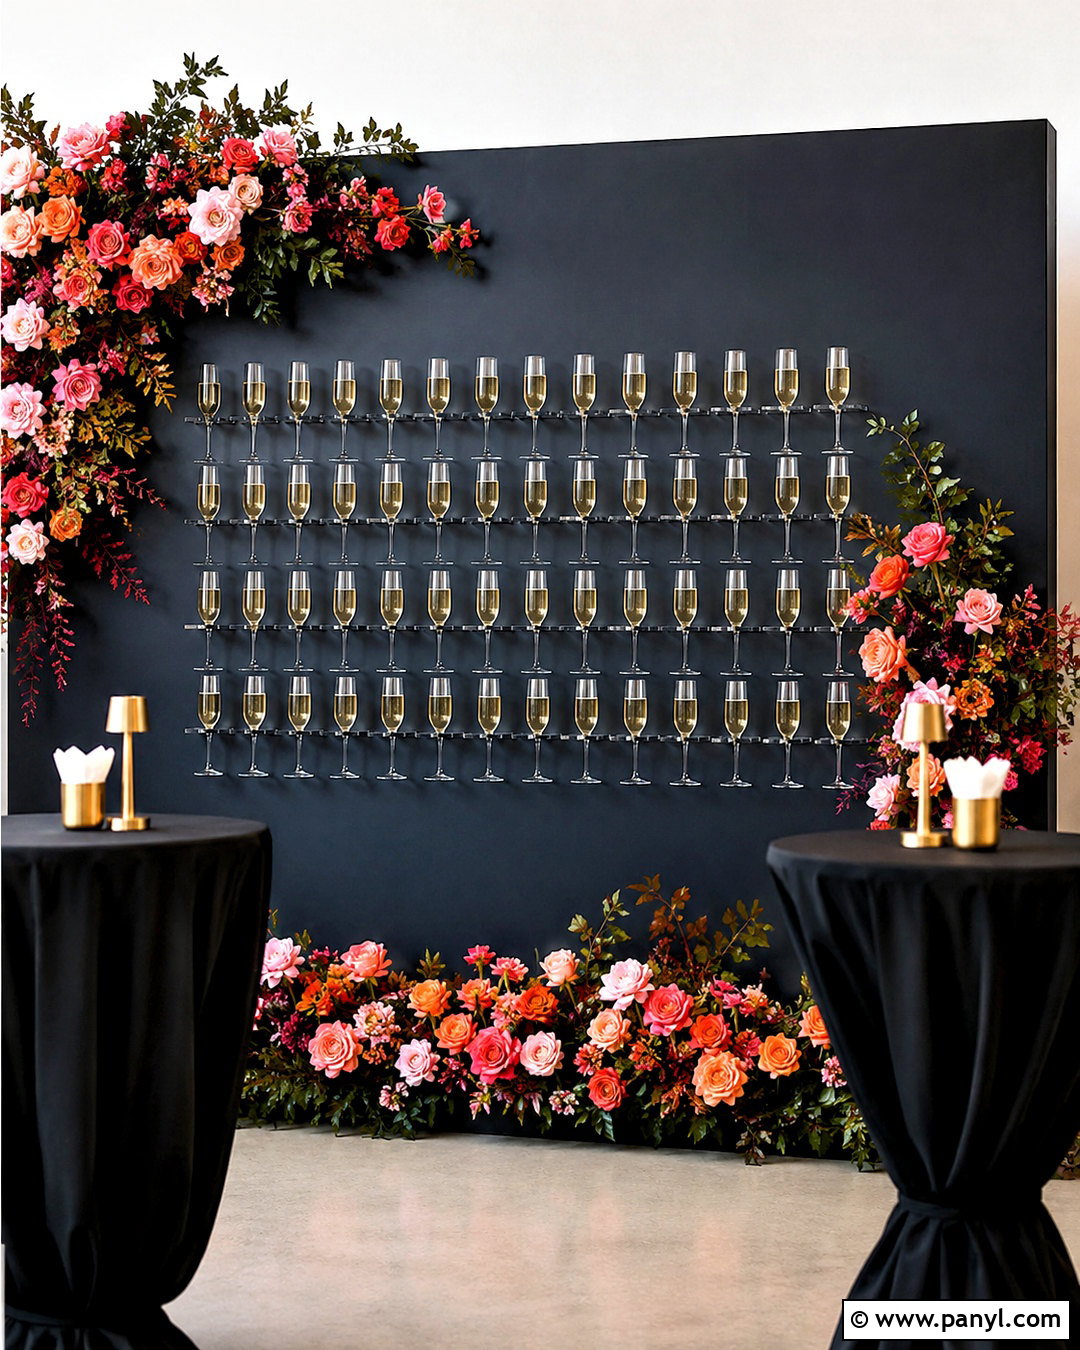
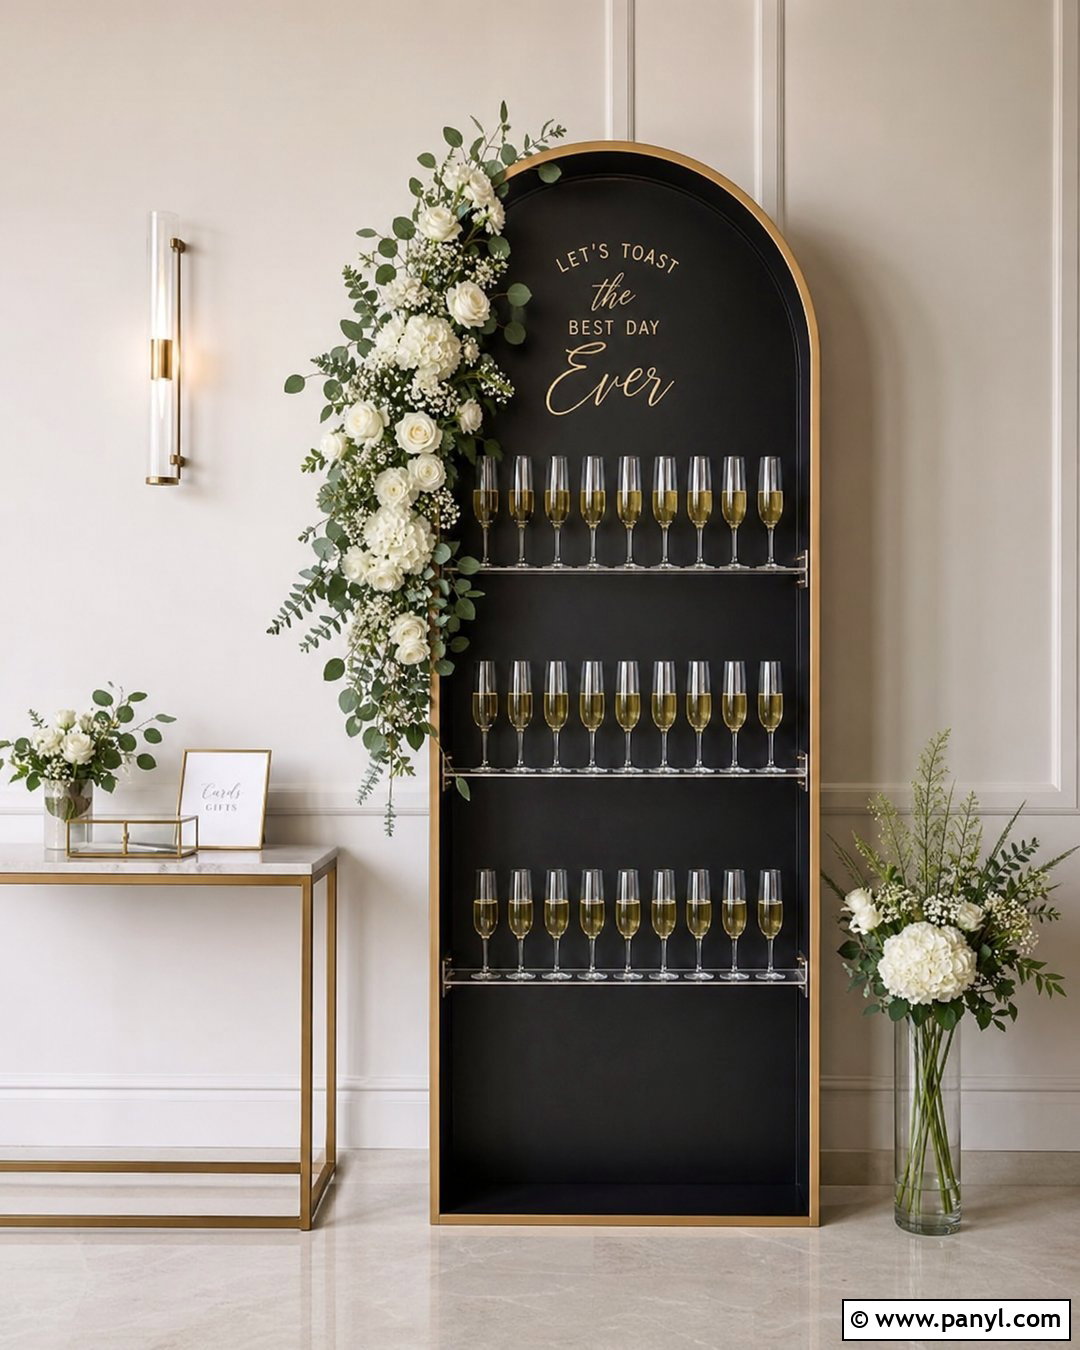
A matte black backdrop makes clear glassware and colorful flowers stand out immediately. Build the wall from smooth plywood, fill visible screw holes, and apply two coats of durable black paint. Use clear acrylic holders to create the illusion that the flutes are floating across the surface. For contrast, decorate one upper corner with coral, hot pink, and soft orange flowers mixed with fresh-looking foliage. Ground the display with a wide black base and two discreet support legs behind it. Nearby black cocktail tables, white napkins, and brushed gold serving accessories complete the coordinated setup. This dramatic champagne wall suits modern parties and evening receptions, but it can still look bright when placed against a pale wall with strong, even event lighting.
4. Rustic Pallet Champagne Wall
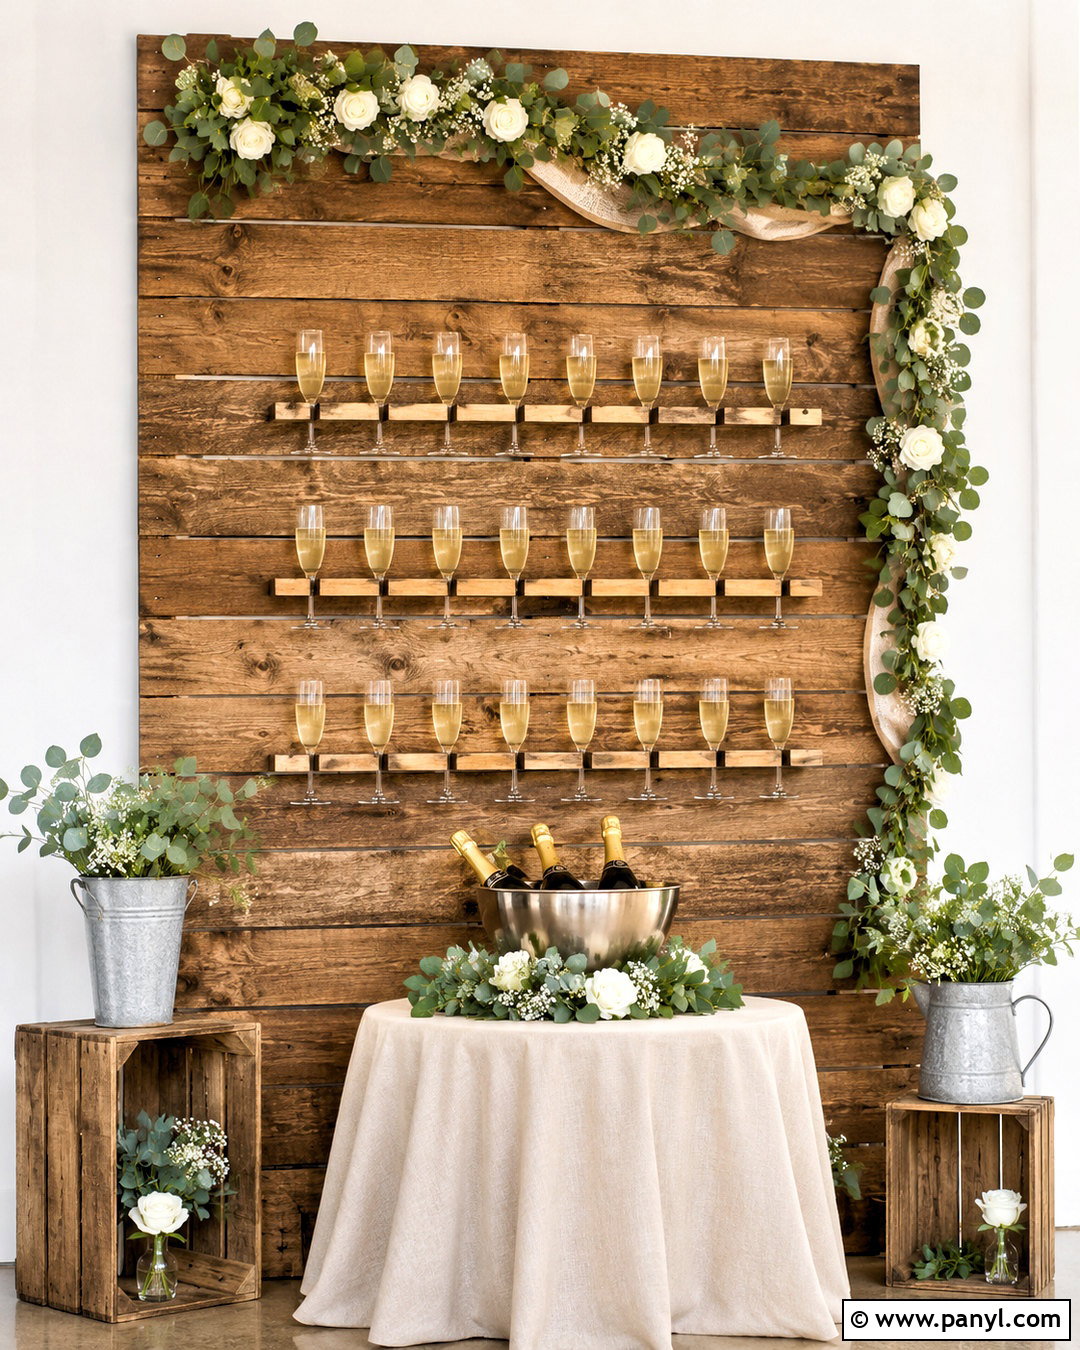
Turn clean, heat-treated pallet boards into a warm champagne wall with plenty of natural character. Disassemble the pallet, sand each board thoroughly, and rebuild the surface over a strong internal frame. Use a light walnut stain that allows knots and grain variations to remain visible. Attach simple wood ledges with evenly spaced openings for the stems, then frame the display with eucalyptus, ivory flowers, and soft beige ribbon. A pair of triangular rear feet provides stability while maintaining the handcrafted look. Complete the surrounding station with wooden crates, a linen-covered refill table, and small galvanized containers holding greenery. This full rustic setup feels right at home in a barn, garden, farmhouse, or relaxed backyard celebration.
5. Clear Acrylic Champagne Wall
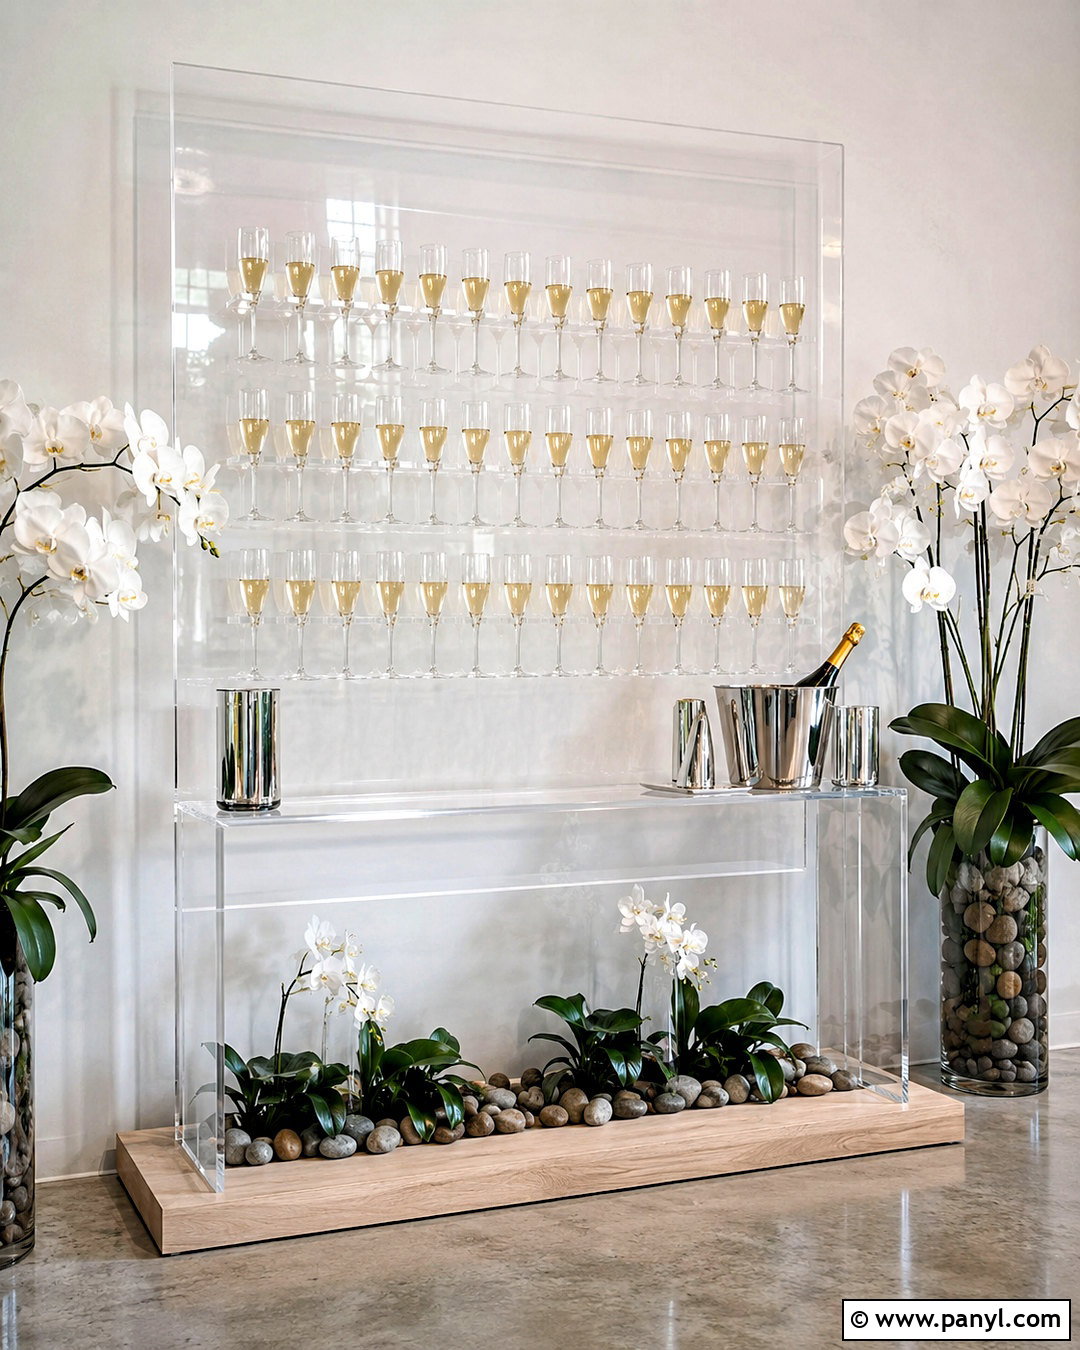
For a clean contemporary display, use a thick clear acrylic panel secured inside a pale oak base. Laser-cut or carefully drilled acrylic holders can be attached in precise rows, allowing the glasses to become the main visual feature. Keep decorations minimal with a low arrangement of white orchids, green leaves, and smooth river stones near the base. A narrow clear console positioned behind or beside the wall can hold replacement glasses without interrupting the transparent effect. Choose colorless accessories and polished silver accents to maintain the streamlined look. Because fingerprints show easily, clean every surface shortly before guests arrive. The finished champagne wall appears airy and uncluttered, making it especially useful in small venues where a solid backdrop could feel visually heavy.
6. Gold Frame Champagne Wall
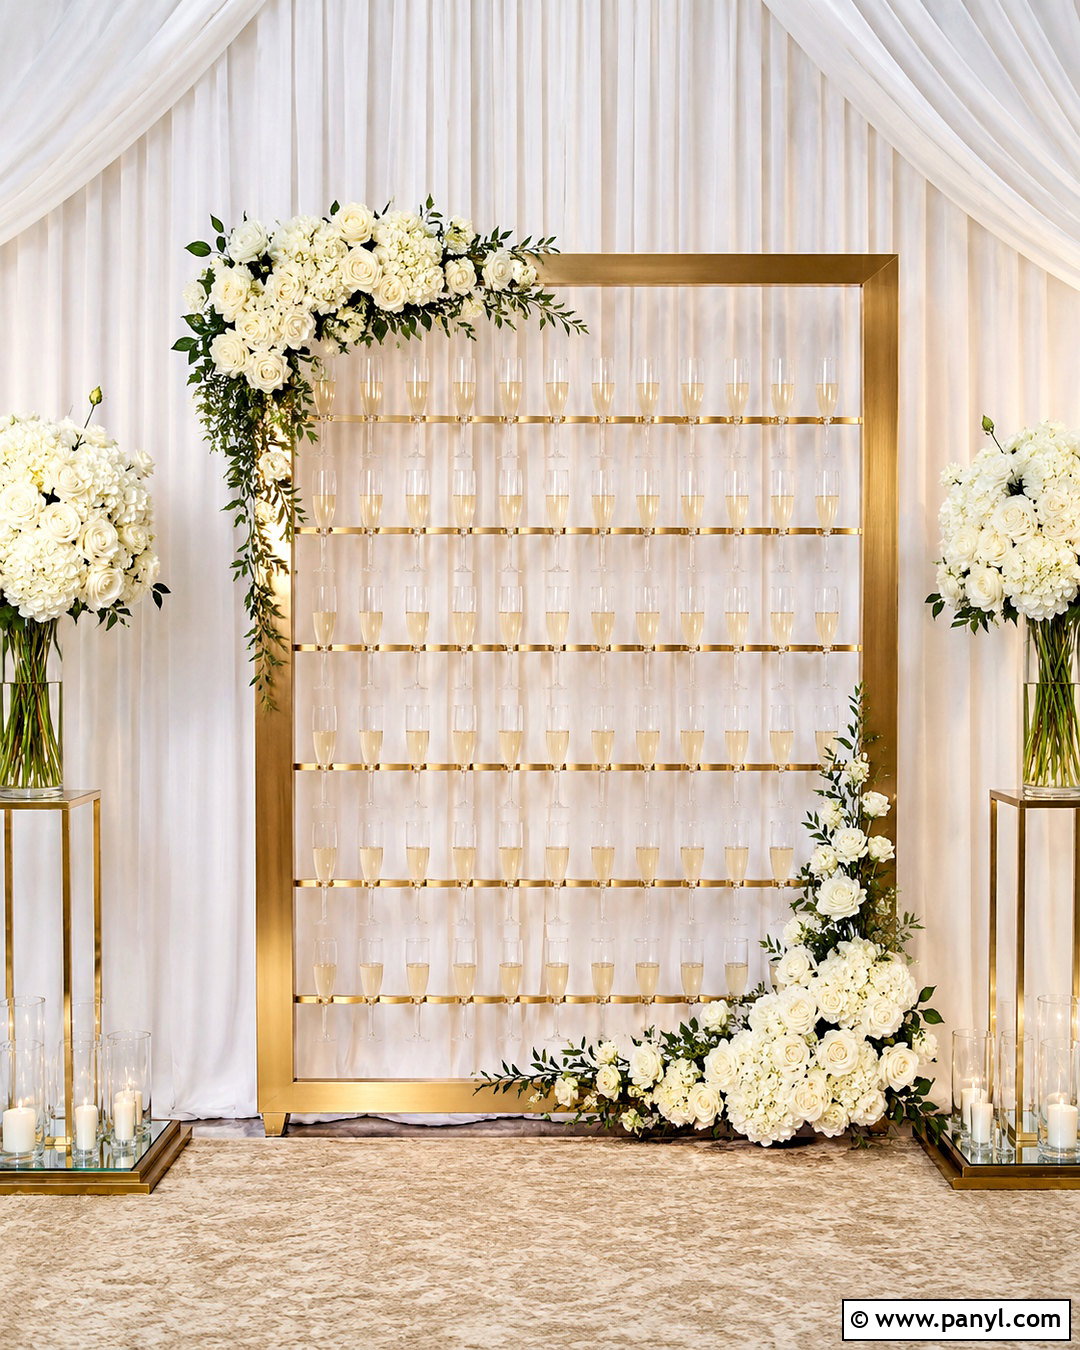
A slim metallic frame creates a glamorous wall without requiring a large solid panel. Build a rectangular structure from wood strips or square metal tubing and finish it with brushed gold paint. Fill the center with clear acrylic, then install matching gold holders in neat horizontal rows. Decorate the upper edge with ivory roses, white hydrangeas, and trailing greenery, keeping the center open so the glassware remains visible. Wide gold feet and concealed rear braces provide dependable support. Style the area with cream drapery, mirrored serving trays, and a neutral rug to create a complete reception vignette. This champagne wall feels refined but not overly ornate, and the open construction helps it coordinate with ballrooms, modern venues, and bright home interiors.
7. Folding Champagne Wall
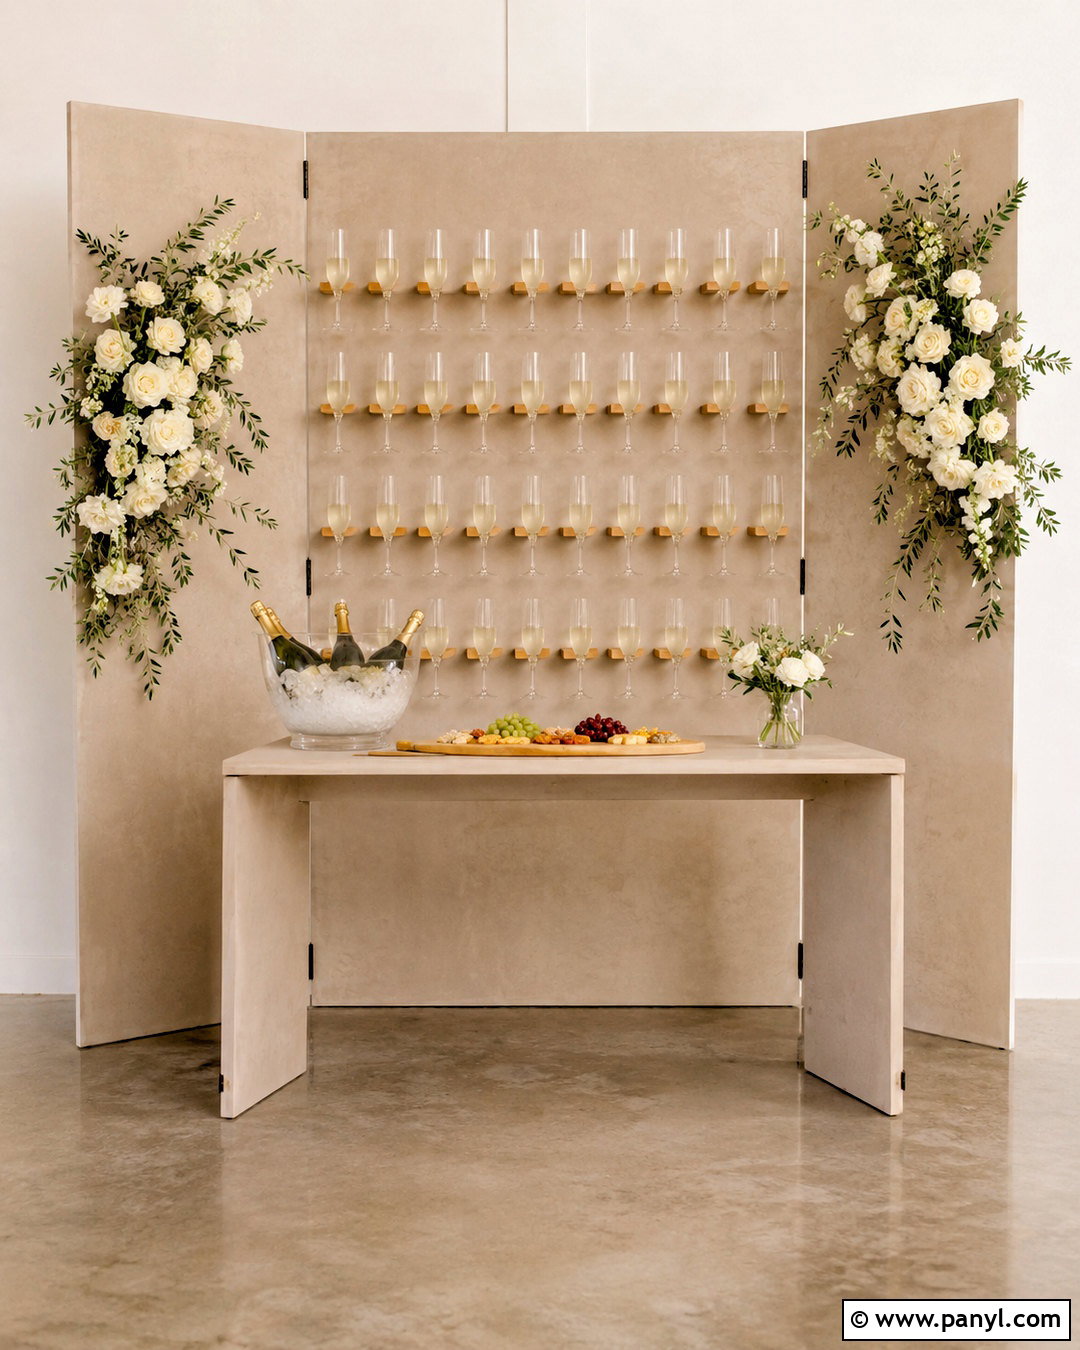
A hinged design is practical when the display must fit inside a car or be stored after the event. Construct three narrow plywood panels connected with strong folding hinges. Paint all panels soft greige and attach short oak flute holders at consistent heights. Angle the side panels slightly forward so they act as built-in supports, then add removable weights behind them for extra security. Decorate the center with cream flowers and olive branches while leaving the hinges accessible. A matching folding table can hold refills, napkins, and nonalcoholic sparkling drinks nearby. When closed, the wall requires far less storage space than a single oversized board. The finished setup looks intentional, balanced, and attractive while solving common transportation and setup challenges.
8. Tabletop Champagne Wall
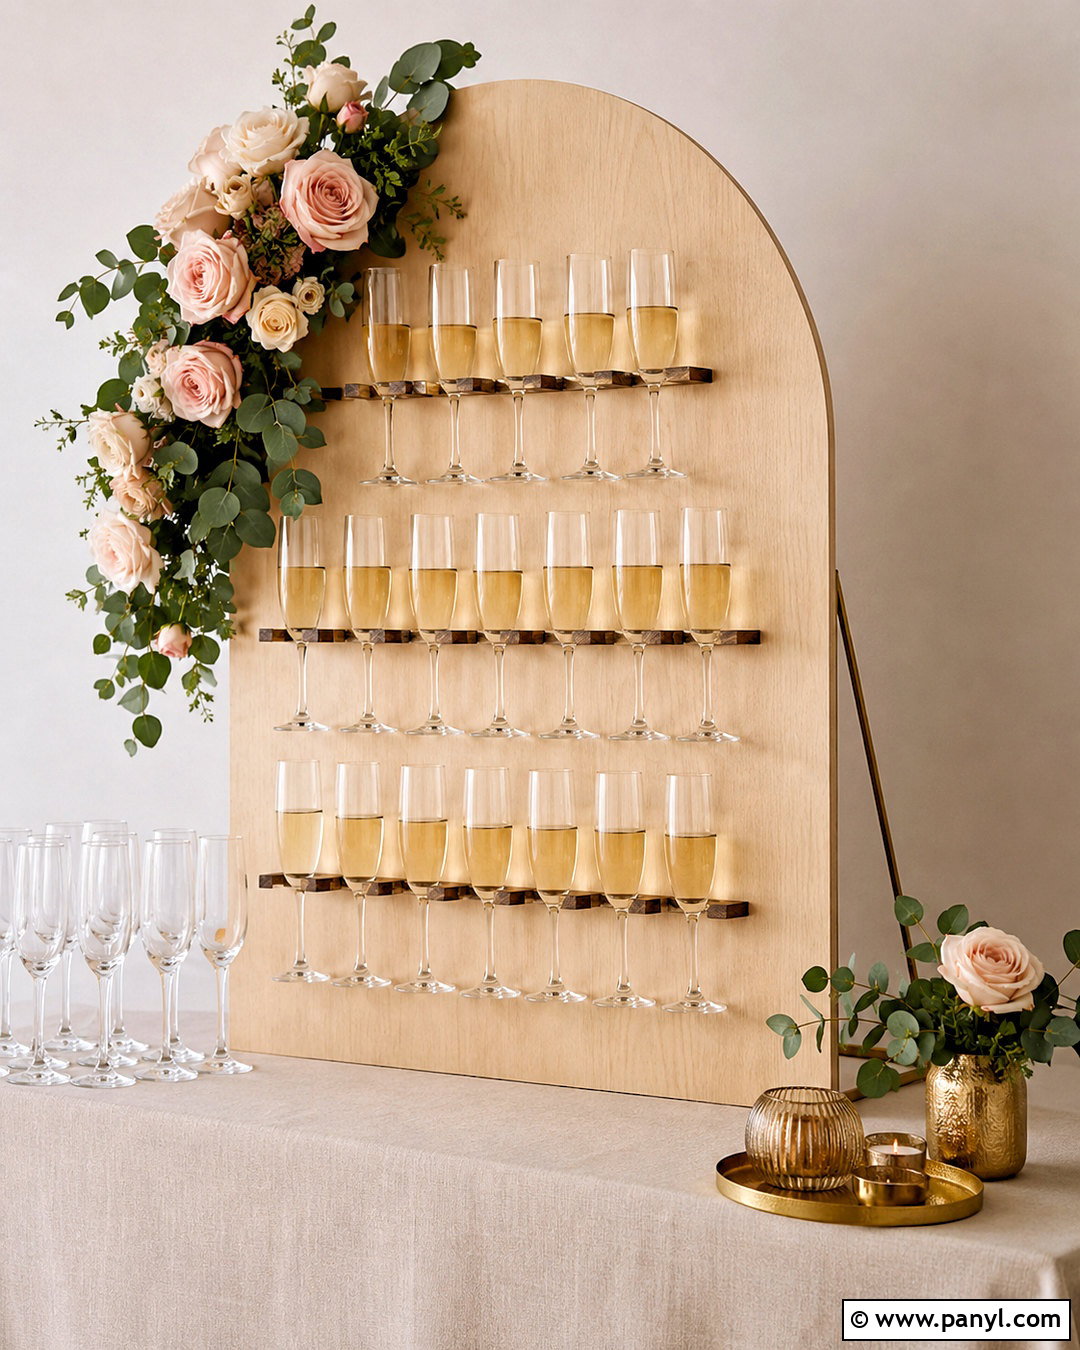
Small celebrations can still have a memorable display without sacrificing floor space. Cut a rounded plywood panel approximately the size of a large tabletop sign and paint it warm ivory. Add two or three rows of compact holders, carefully spacing them for smaller flutes. Secure the panel to a wide wooden base and reinforce the back with a triangular brace. Place it on a sturdy console covered with a fitted neutral cloth, leaving room for napkins and extra beverages. Decorate the base with blush flowers, eucalyptus, and a few brushed brass accents. This miniature champagne wall is ideal for showers, dinner parties, and apartment events. Its manageable size also makes construction, transportation, cleaning, and storage much easier for first-time DIY builders.
9. Pegboard Champagne Wall
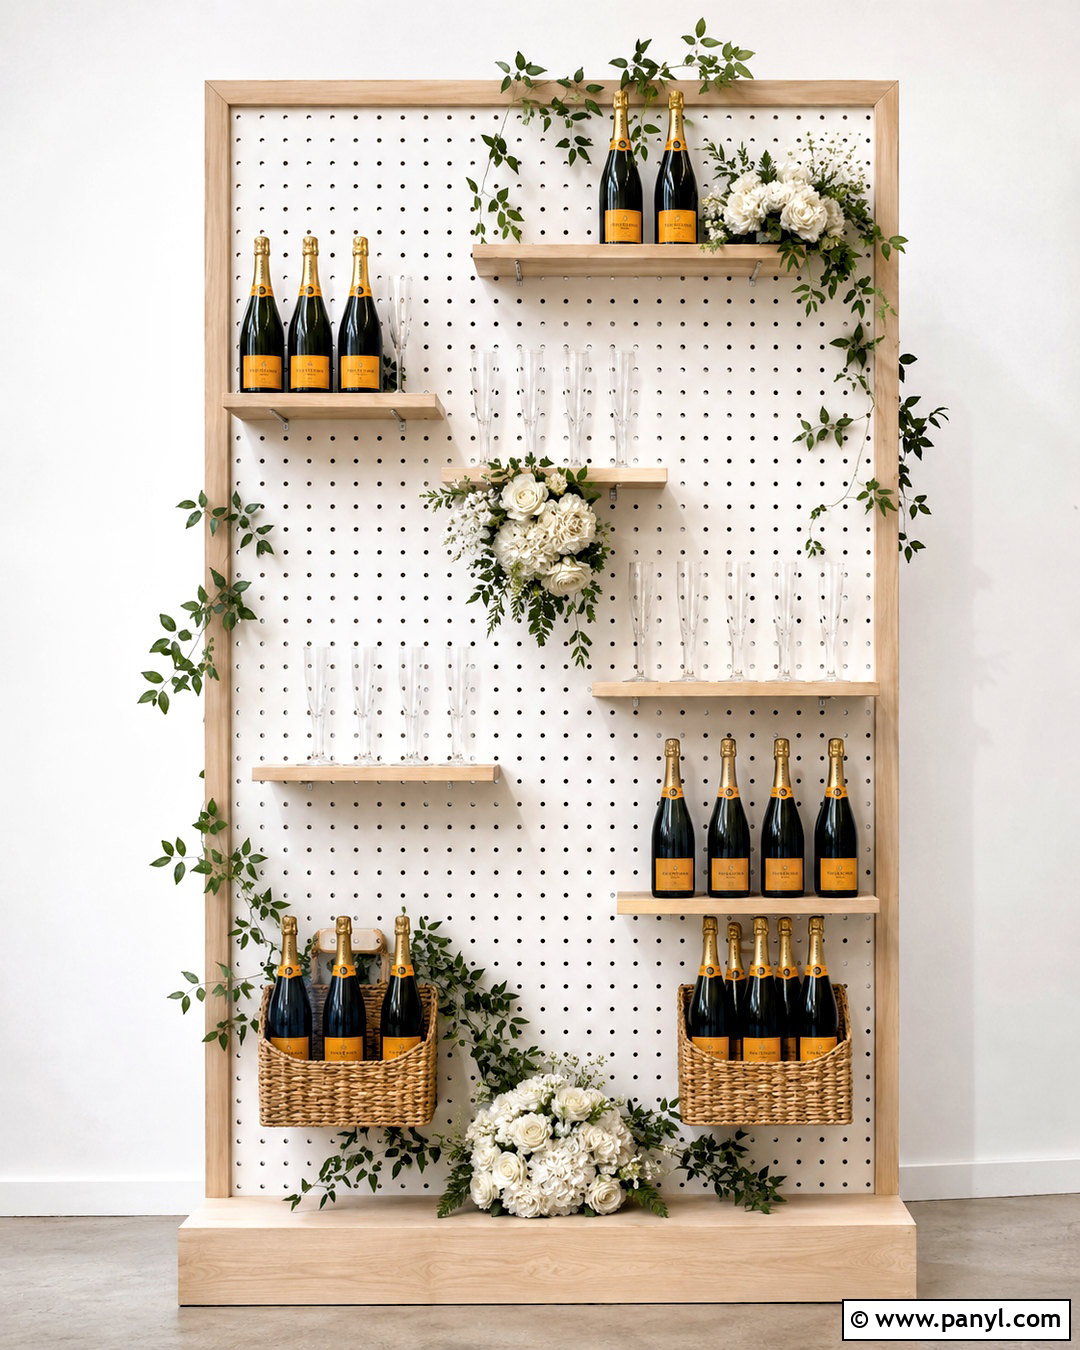
Pegboard offers flexibility because shelves and decorations can be rearranged for future events. Frame a large wooden pegboard with natural maple trim and paint the perforated surface crisp white. Use sturdy metal brackets to support narrow maple shelves with grooves or openings that keep the glasses separated. Add small removable baskets for napkins and decorative greenery, but avoid overloading the board. Mount the finished panel on a deep freestanding base with strong rear braces rather than relying on a venue wall. Complete the look with white flowers, pale green foliage, and simple wood serving pieces. This champagne wall has a practical modern appearance, and the adjustable layout allows it to hold different glass sizes or become a general party display later.
10. Boho Champagne Wall
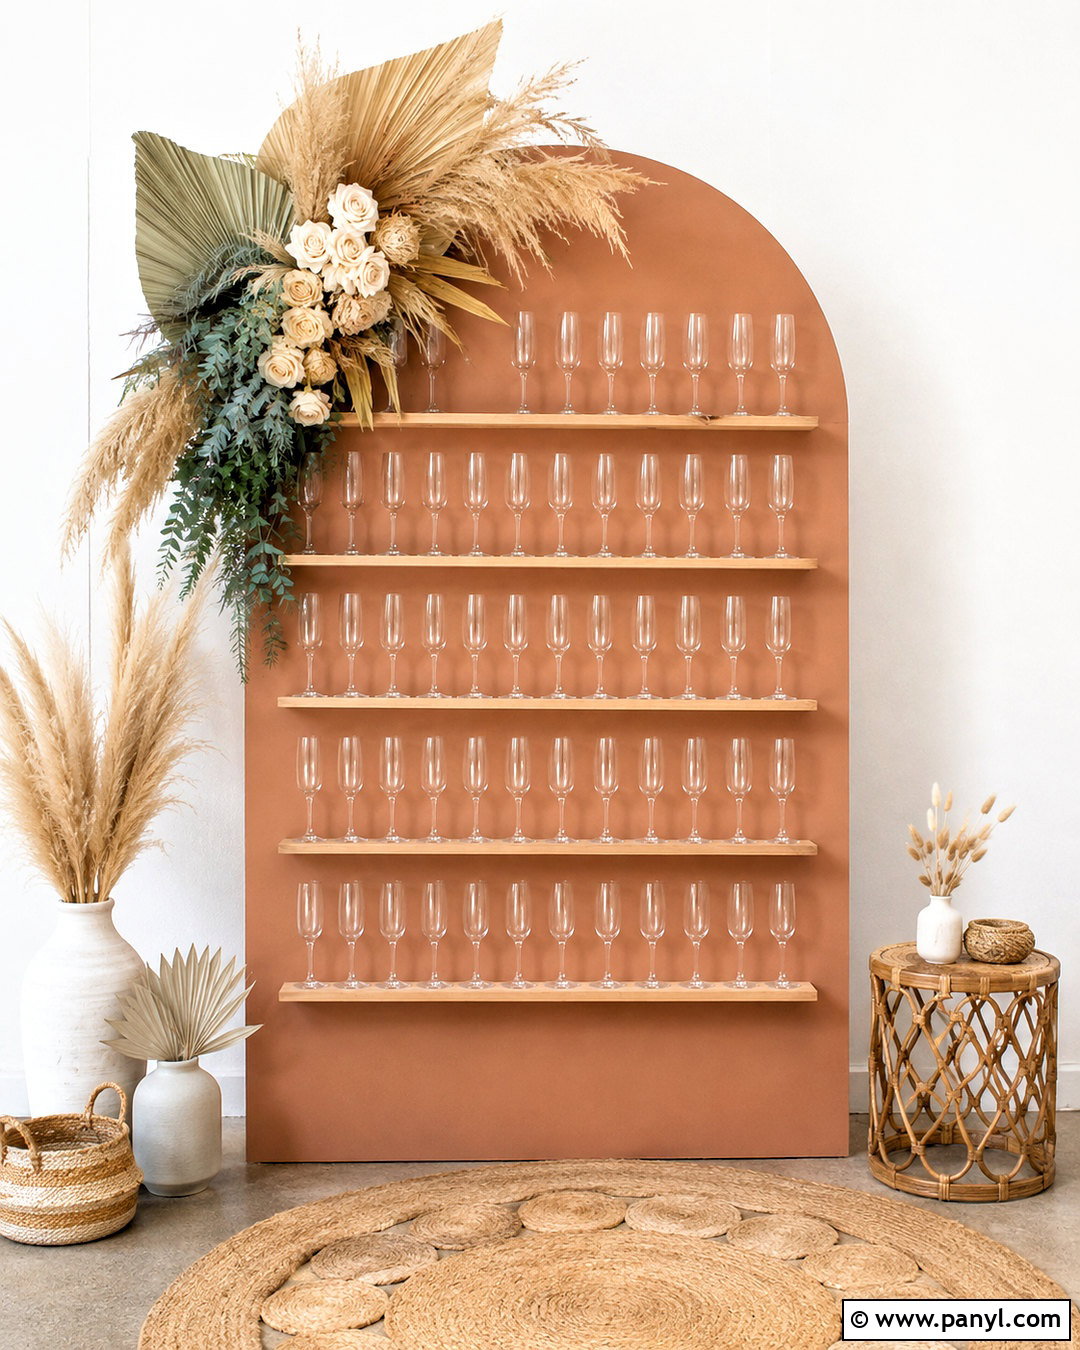
Warm neutrals, woven textures, and natural materials give this wall a relaxed bohemian appearance. Shape the plywood backdrop into a broad arch and paint it muted terracotta. Add light wood holders that contrast gently with the earthy surface. Arrange dried palm leaves, cream-colored faux flowers, pampas-style stems, and eucalyptus along one side, keeping loose fibers away from the glasses. A woven jute rug, rattan side table, and low ceramic vases make the surrounding area feel complete. Stabilize the wall with a substantial wood base hidden behind baskets or decorative planters. This champagne wall works beautifully for casual outdoor gatherings and neutral celebrations. The layered textures create visual interest while the limited color palette keeps the overall design calm and coordinated.
11. Floral Champagne Wall
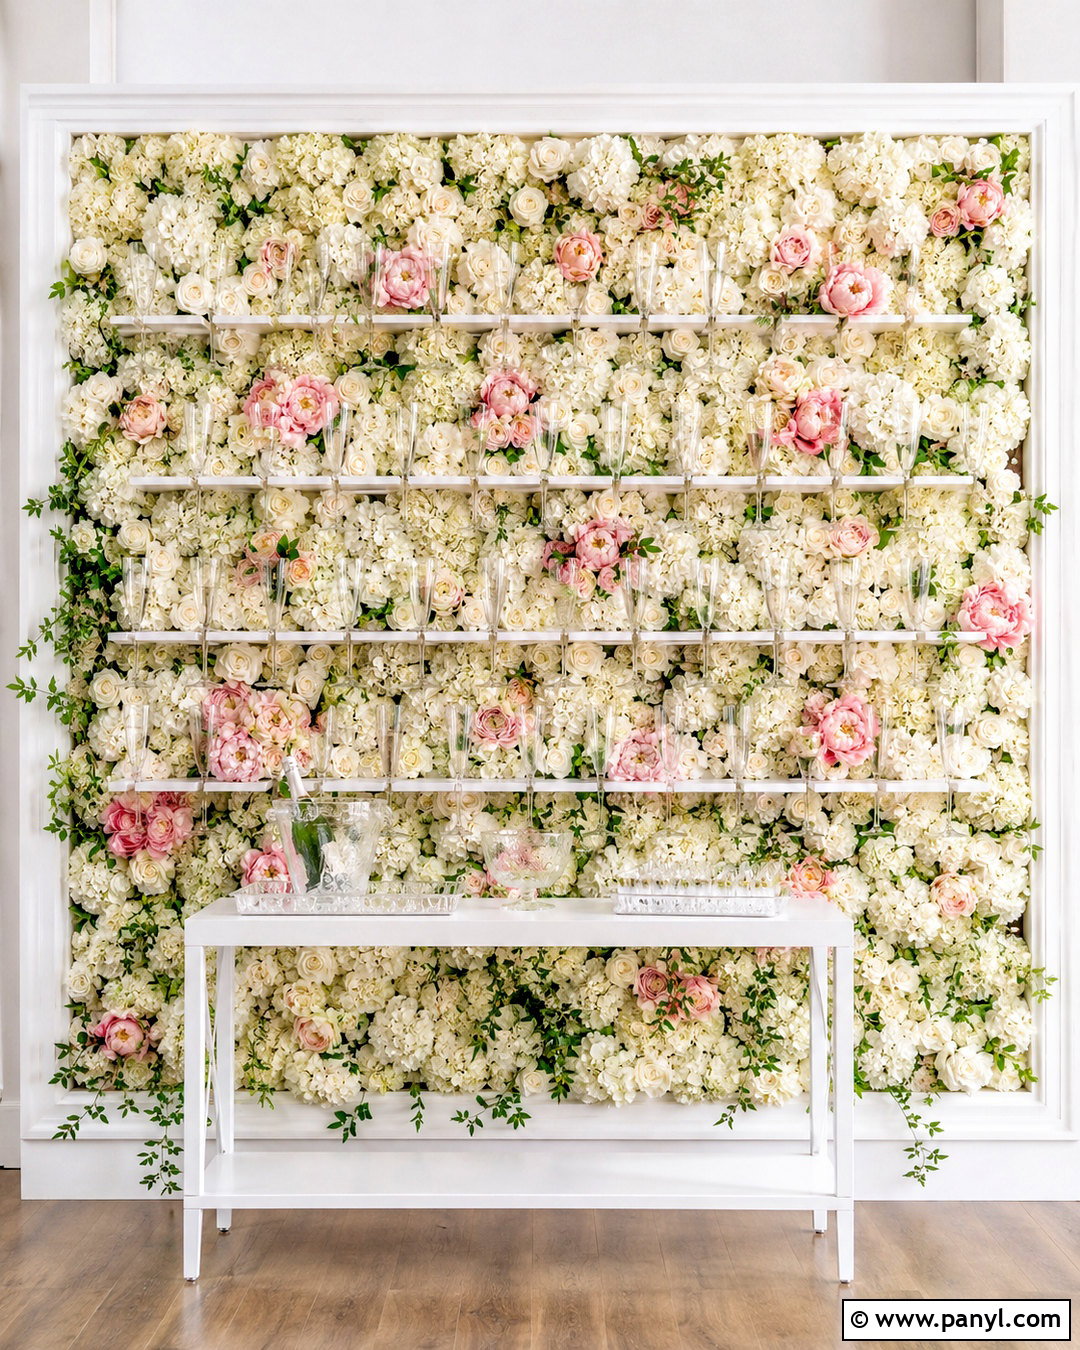
Build a romantic statement wall by covering a lightweight framed panel with dense artificial flowers. Use a foundation of ivory hydrangeas, white roses, blush peonies, and soft greenery, attaching everything firmly to wire mesh over plywood. Leave several clean horizontal areas for white wooden holders so the glasses do not disappear among the petals. Frame the installation with narrow white trim and support it using wide rear feet. Keep the nearby furnishings simple with a white console, clear accessories, and pale flooring. Since the floral surface already provides abundant detail, additional balloons or large signs are unnecessary. The completed champagne wall functions as a beverage display and photo background, creating a full decorative moment for showers, weddings, anniversaries, or elegant birthday celebrations.
12. Industrial Pipe Champagne Wall
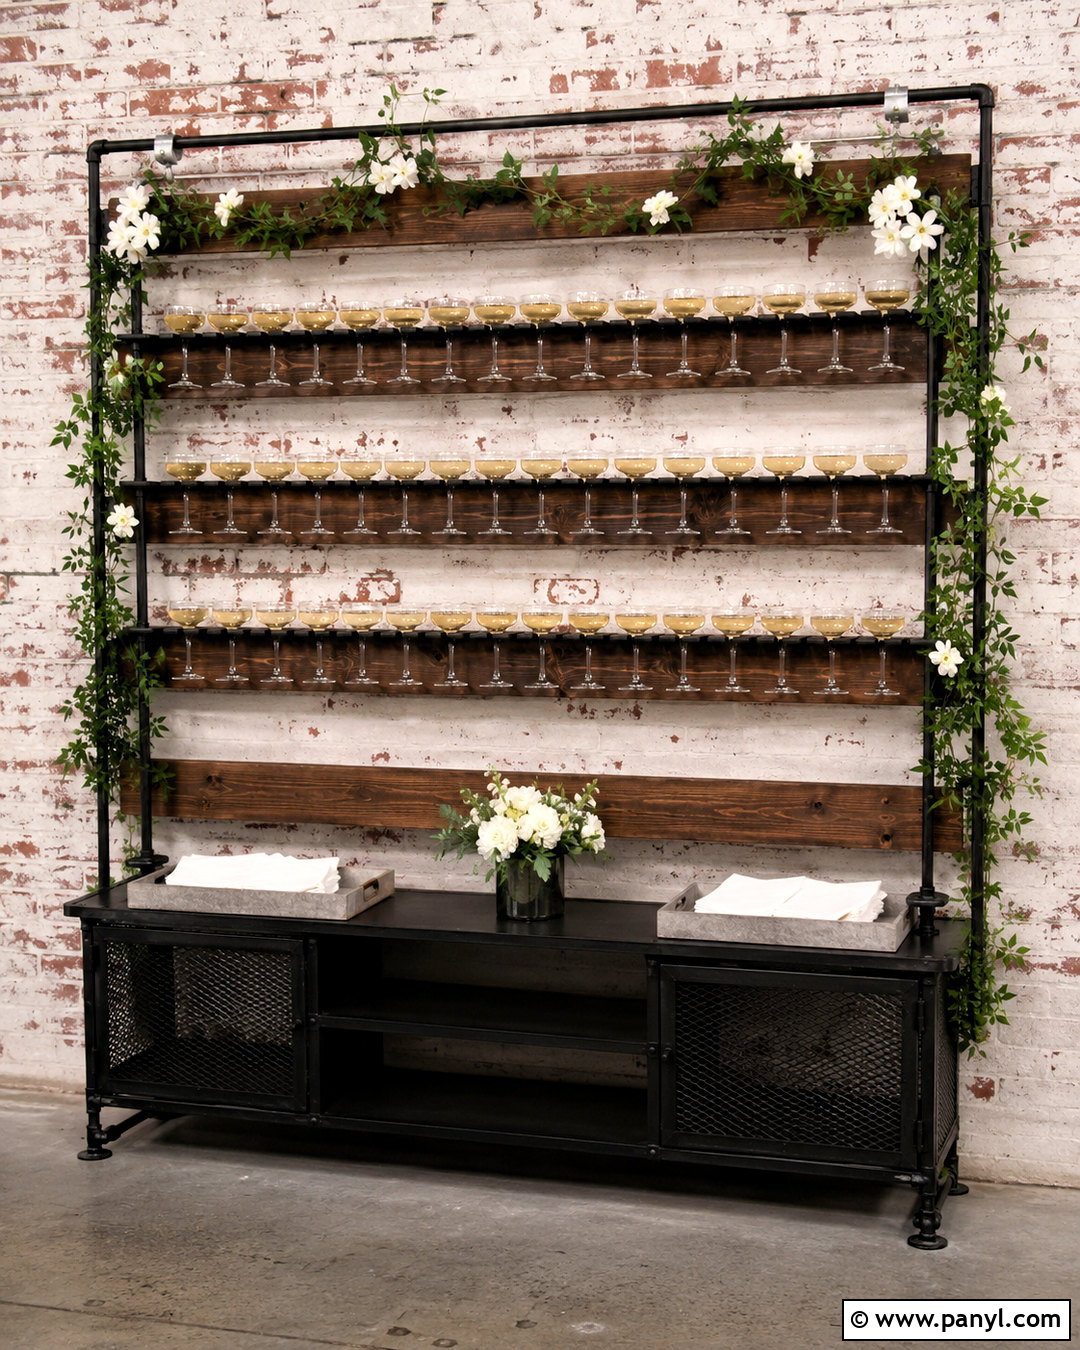
Combine black metal pipes and warm wood for an industrial display that feels strong and streamlined. Build a freestanding pipe frame with broad floor feet, then mount dark walnut boards horizontally across the center. Attach black metal stemware holders beneath each board, leaving enough vertical clearance for easy removal. Add a few restrained vines and white flowers to soften the hard materials without hiding them. Complete the station with a black metal console, concrete-look serving trays, and crisp white napkins. Tighten every pipe connection and test the balance before placing glassware on the structure. This champagne wall fits loft venues, converted warehouses, and modern patios, offering a distinctive alternative to heavily floral or traditionally romantic event decor.
13. Vintage Door Champagne Wall
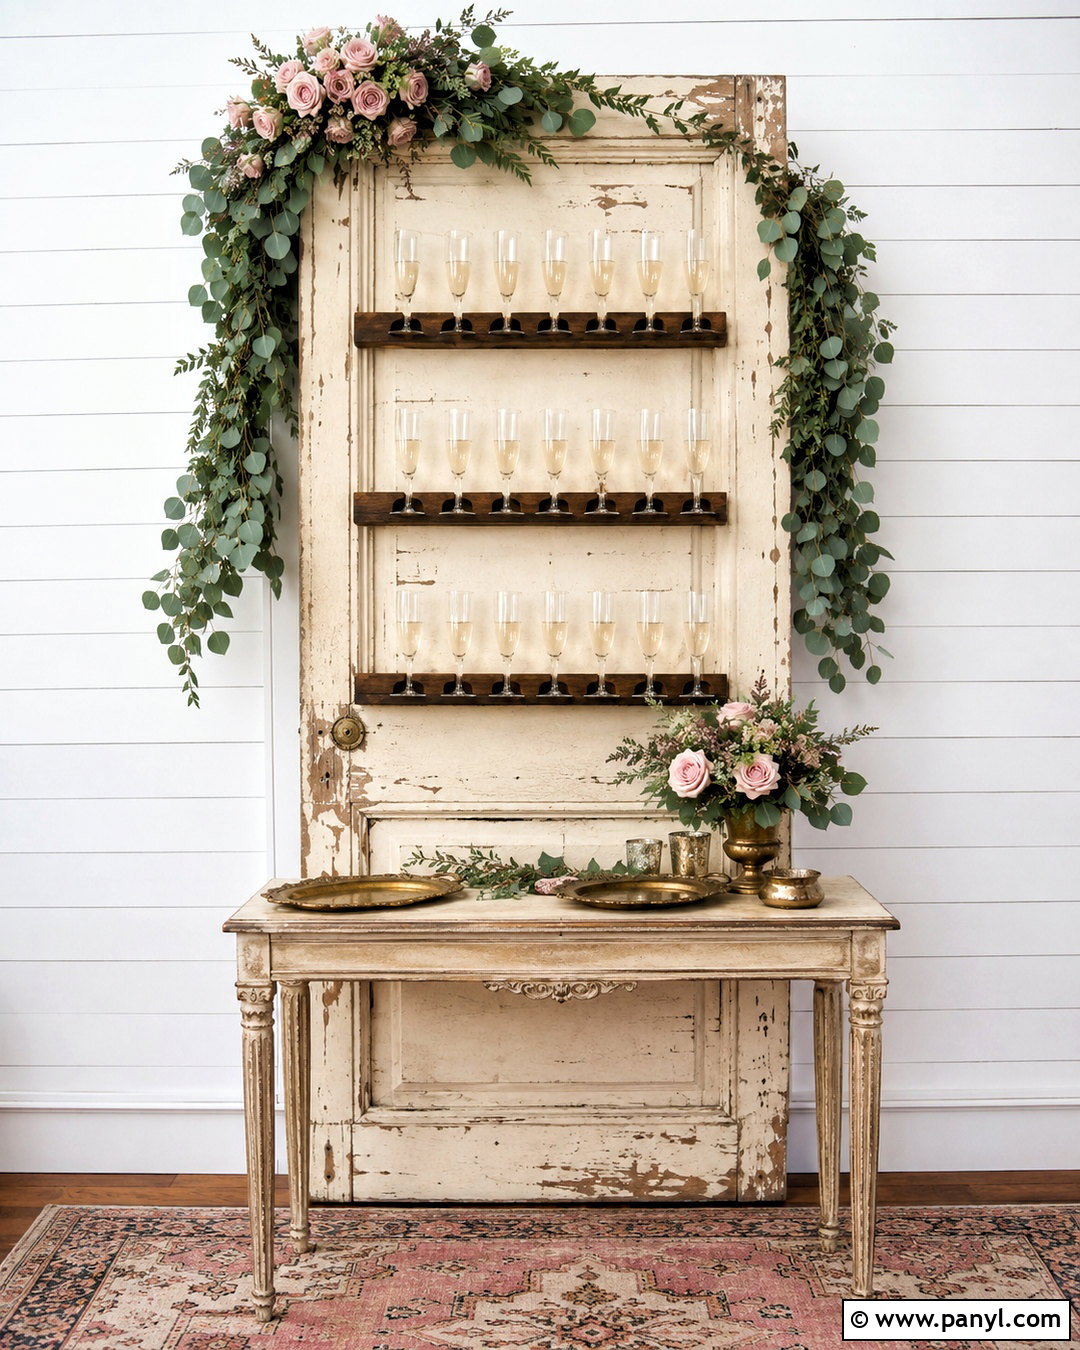
An old paneled door can become an appealing champagne wall when it is carefully repaired and supported. Choose a solid wood door, remove unsafe hardware, fill damaged areas, and apply a softly distressed cream finish. Install narrow stained-wood holders across the center panels, ensuring every screw reaches solid material. Add an arrangement of dusty pink roses, eucalyptus, and trailing greenery near the top. Mount the door to a deep platform base with strong braces behind it, especially if the original wood is heavy. Style the setting with an antique-look side table, brass trays, and a faded floral rug. The complete display has a collected vintage character that suits garden parties, historic venues, and romantic celebrations without appearing overly formal.
14. Slatted Wood Champagne Wall
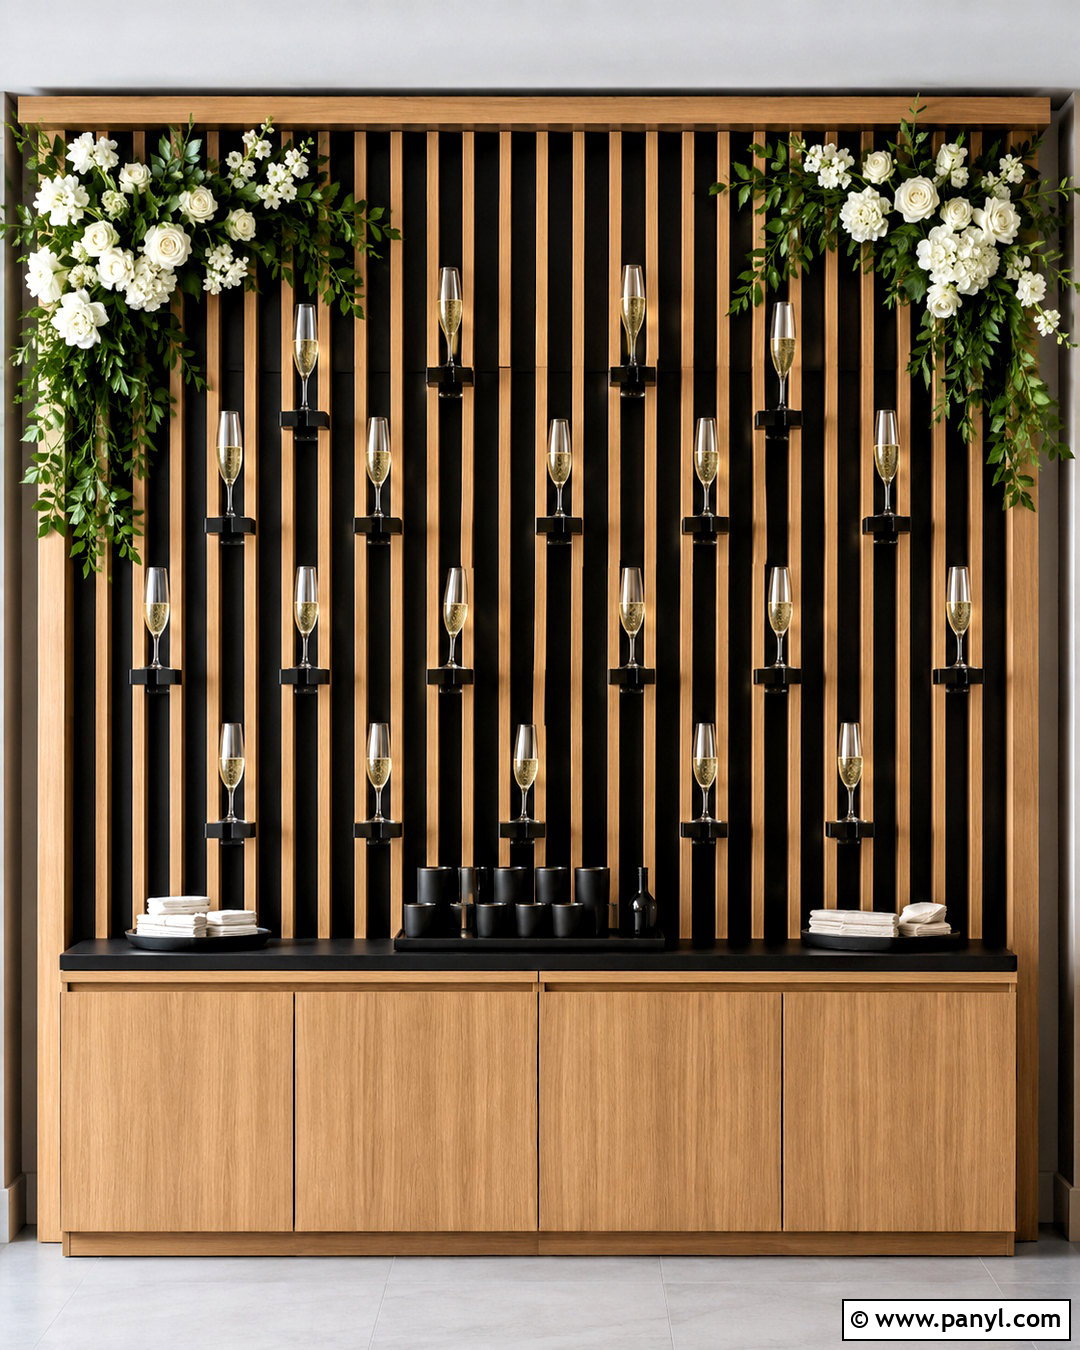
Vertical wood slats create texture while keeping the design simple and architectural. Attach narrow oak boards to a dark backing panel, leaving small, consistent gaps between them. Install matte black glass holders across the slats in orderly rows, using the internal frame for secure attachment. Add a compact arrangement of white flowers and green leaves to one lower corner rather than covering the patterned surface. A black platform base and two rear braces visually connect with the holders. Finish the area with an oak console, black serving accessories, and neutral linen napkins. This champagne wall looks polished in modern homes and venues because it balances natural wood with clean lines. It can also be reused as a general backdrop after the celebration.
15. Copper Grid Champagne Wall
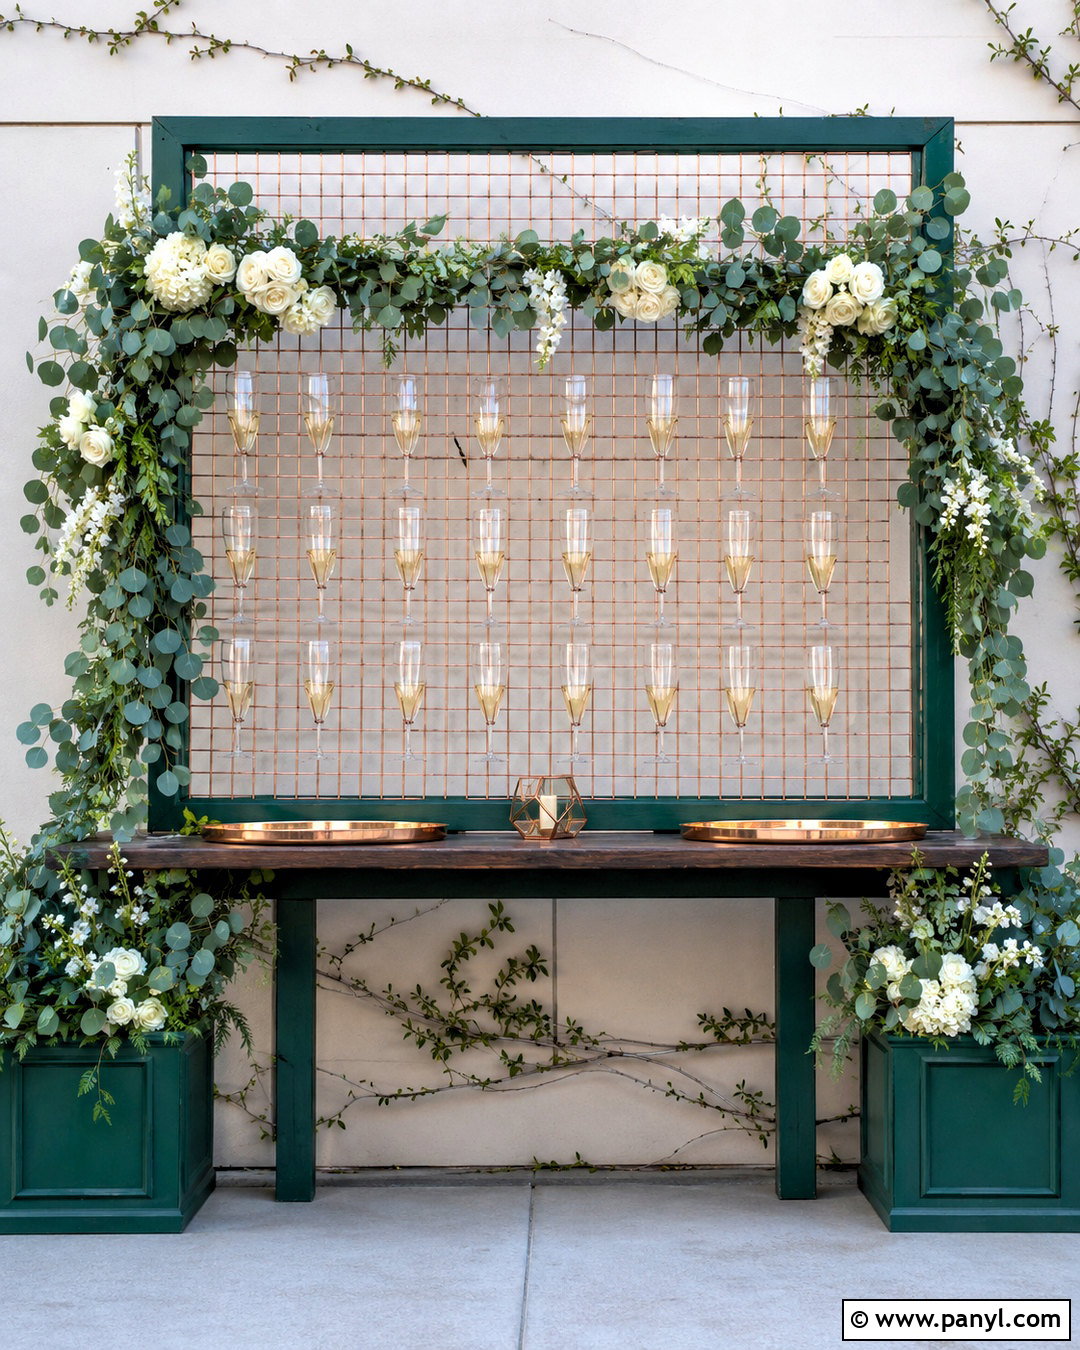
A copper-colored wire grid offers an affordable structure with a light, open appearance. Secure the grid inside a freestanding wood frame painted deep forest green. Attach purpose-made stemware hooks evenly across the metal, checking that each one holds a filled glass without shifting. Weave eucalyptus branches and small ivory flowers through the outer edges while keeping foliage away from the serving area. Place weighted planters around the wide base to reinforce stability and continue the green color scheme. A slim wood console with copper trays completes the station. This champagne wall works especially well in garden settings, conservatories, and modern indoor parties. The combination of metallic warmth, rich green paint, and organic foliage feels coordinated and visually distinctive.
16. Scalloped Champagne Wall
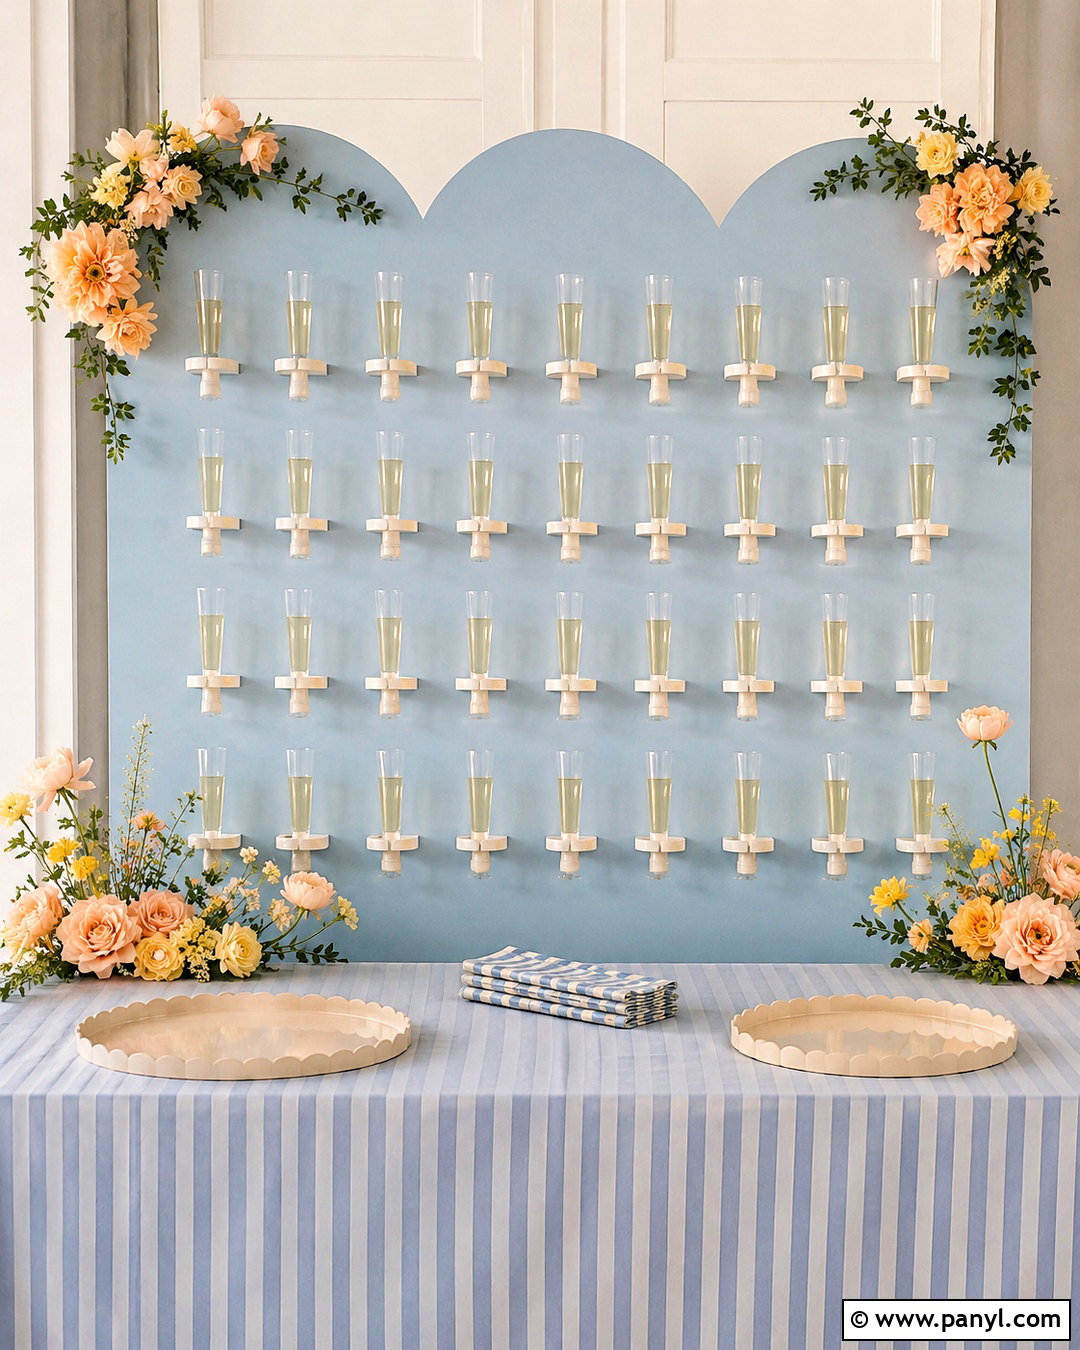
A scalloped top can give a basic plywood project a cheerful, custom appearance. Draw a repeating curved pattern across the upper edge, cut it carefully, and sand every curve until smooth. Paint the wall soft lavender or dusty blue, then add cream-colored holders in straight, evenly spaced rows. Keep the decorations playful but controlled with peach flowers, pale yellow blooms, and small green leaves arranged near one side. Use a deep painted base and concealed rear braces to support the decorative shape. Coordinate the surrounding station with a striped tablecloth, simple ceramic trays, and matching napkins. This champagne wall has enough personality for birthdays and showers while maintaining a polished layout that photographs clearly and keeps the glasses easy to reach.
17. Mirror Champagne Wall
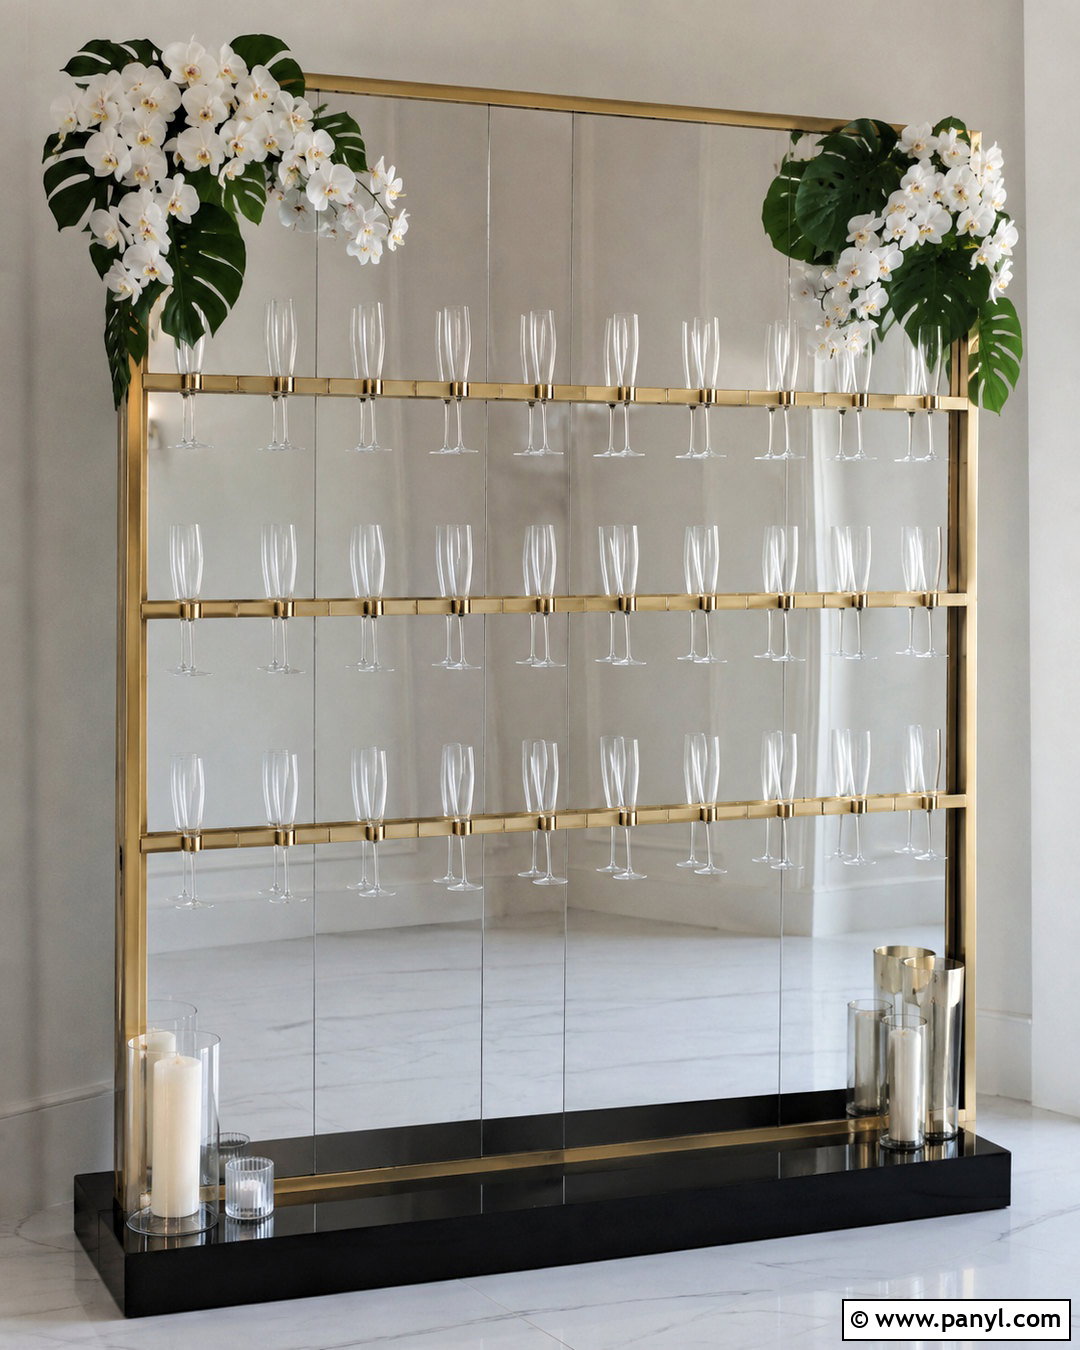
Mirrored panels can create a bright, reflective backdrop when used carefully within a solid frame. Start with plywood and attach lightweight acrylic mirror sheets rather than heavy glass mirrors. Border the panel with black or brushed gold trim, then install clear holders using hardware suitable for the underlying wood structure. Keep decorations limited to a small arrangement of white orchids and glossy green leaves. A wide black base prevents the reflective surface from appearing visually disconnected. Place the wall where it reflects attractive decor instead of busy service areas, and use bright, diffused lighting to reduce glare. The completed champagne wall feels sleek and spacious, making it effective in compact rooms, modern venues, and polished celebrations with a simple monochromatic palette.
18. Balloon Champagne Wall
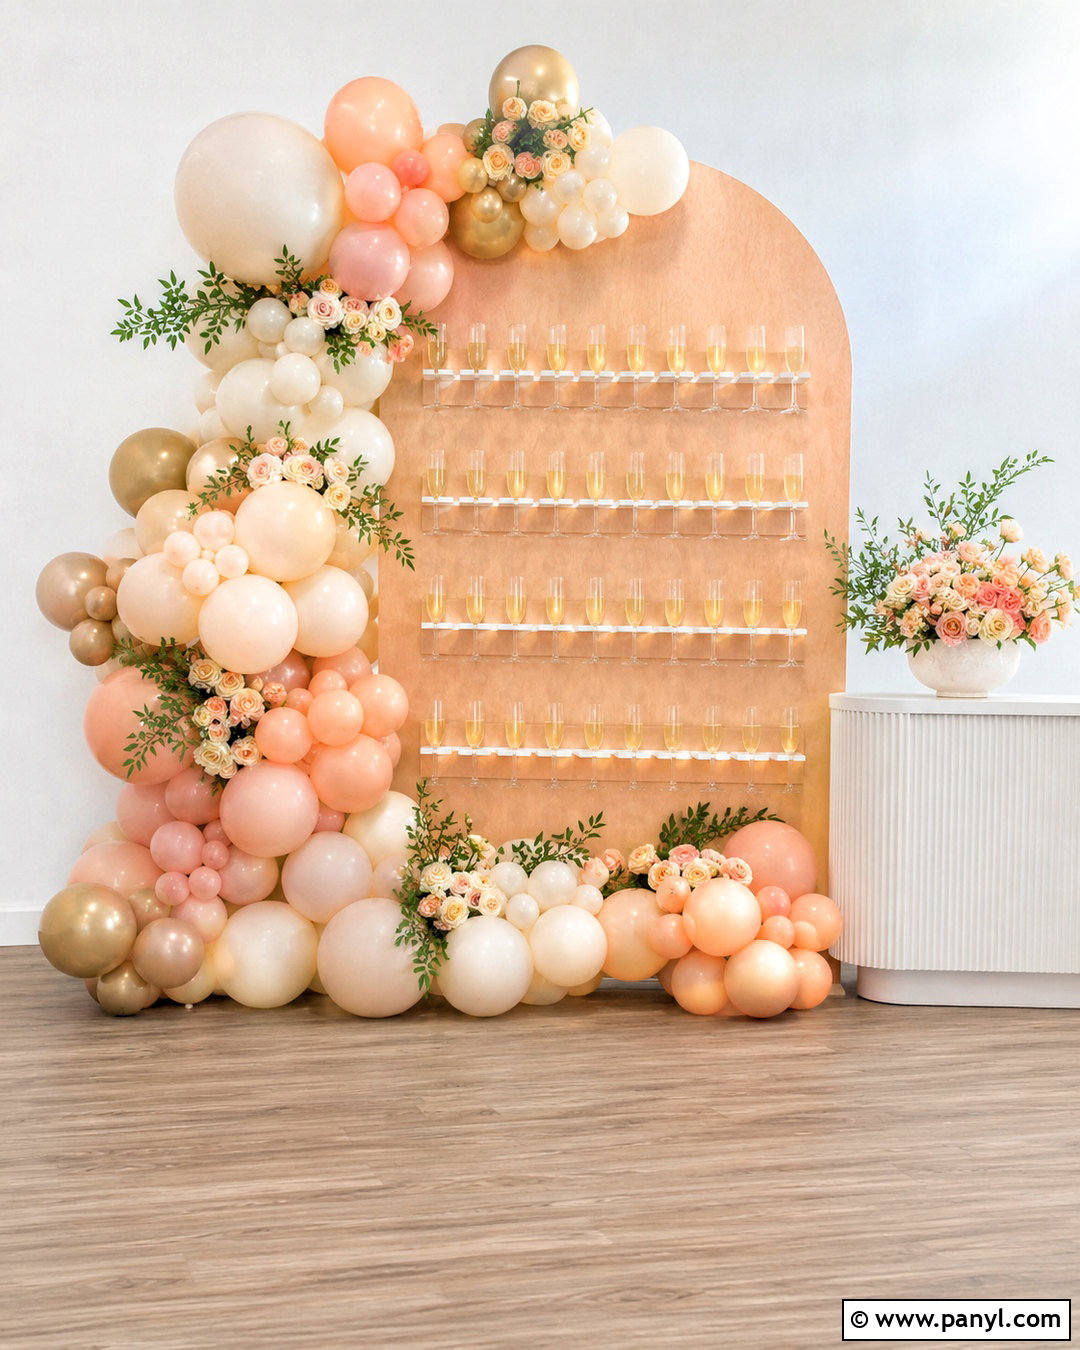
Integrate a balloon garland into the full wall design rather than attaching a few balloons as an afterthought. Paint a rounded plywood backdrop pale peach and install white holders in four clean rows. Build an asymmetrical garland using cream, blush, peach, and muted gold balloons in several sizes. Run it from one upper corner toward the opposite lower edge without blocking access to the flutes. Add small clusters of greenery and matching flowers between selected balloons for a finished transition. Support the wall with a broad platform and weighted rear braces. A white side console and neutral floor covering complete the arrangement. This champagne wall creates a lively party focal point while preserving a clear, practical serving zone for guests.
19. Reclaimed Wood Champagne Wall
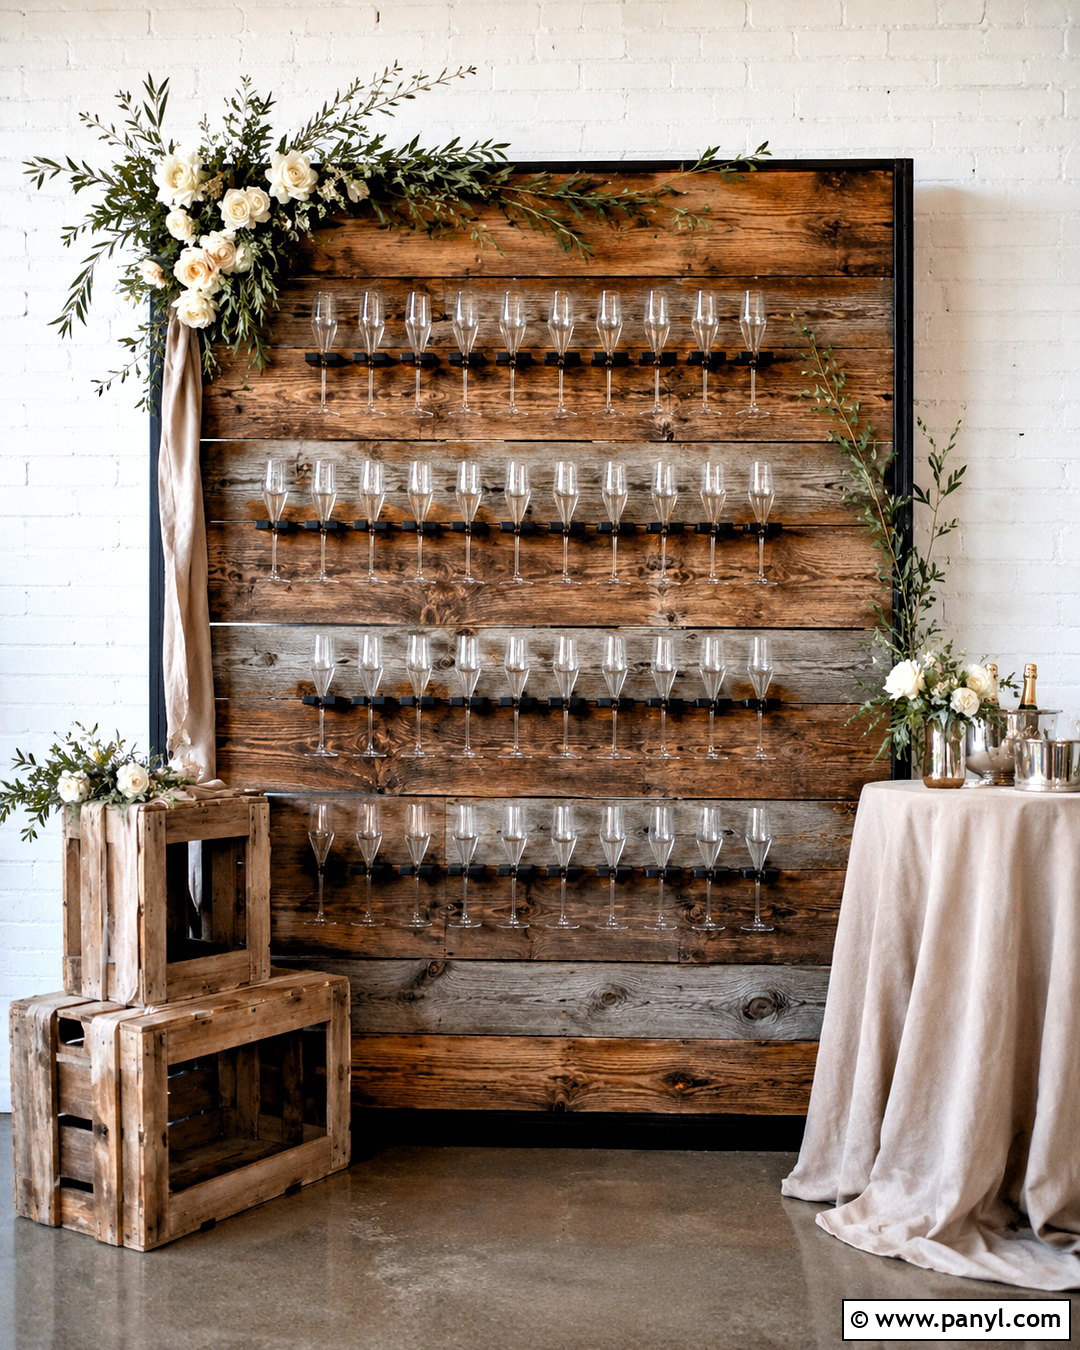
Weathered lumber gives a champagne wall depth and history, but each board should be cleaned, sanded, and checked for protruding nails before use. Arrange reclaimed planks horizontally across a strong framed backing, mixing warm brown and faded gray tones. Add matte black holders and a matching outer frame to unify the varied boards. Decorate one corner with cream flowers, olive leaves, and linen ribbon. Build wide black feet that echo the hardware and keep the installation stable. Complete the station with vintage wooden boxes, neutral napkins, and a simple refill table. The finished wall feels rustic without looking rough or unfinished. It is particularly suited to barns, patios, and casual venues where natural materials are already part of the setting.
20. Art Deco Champagne Wall
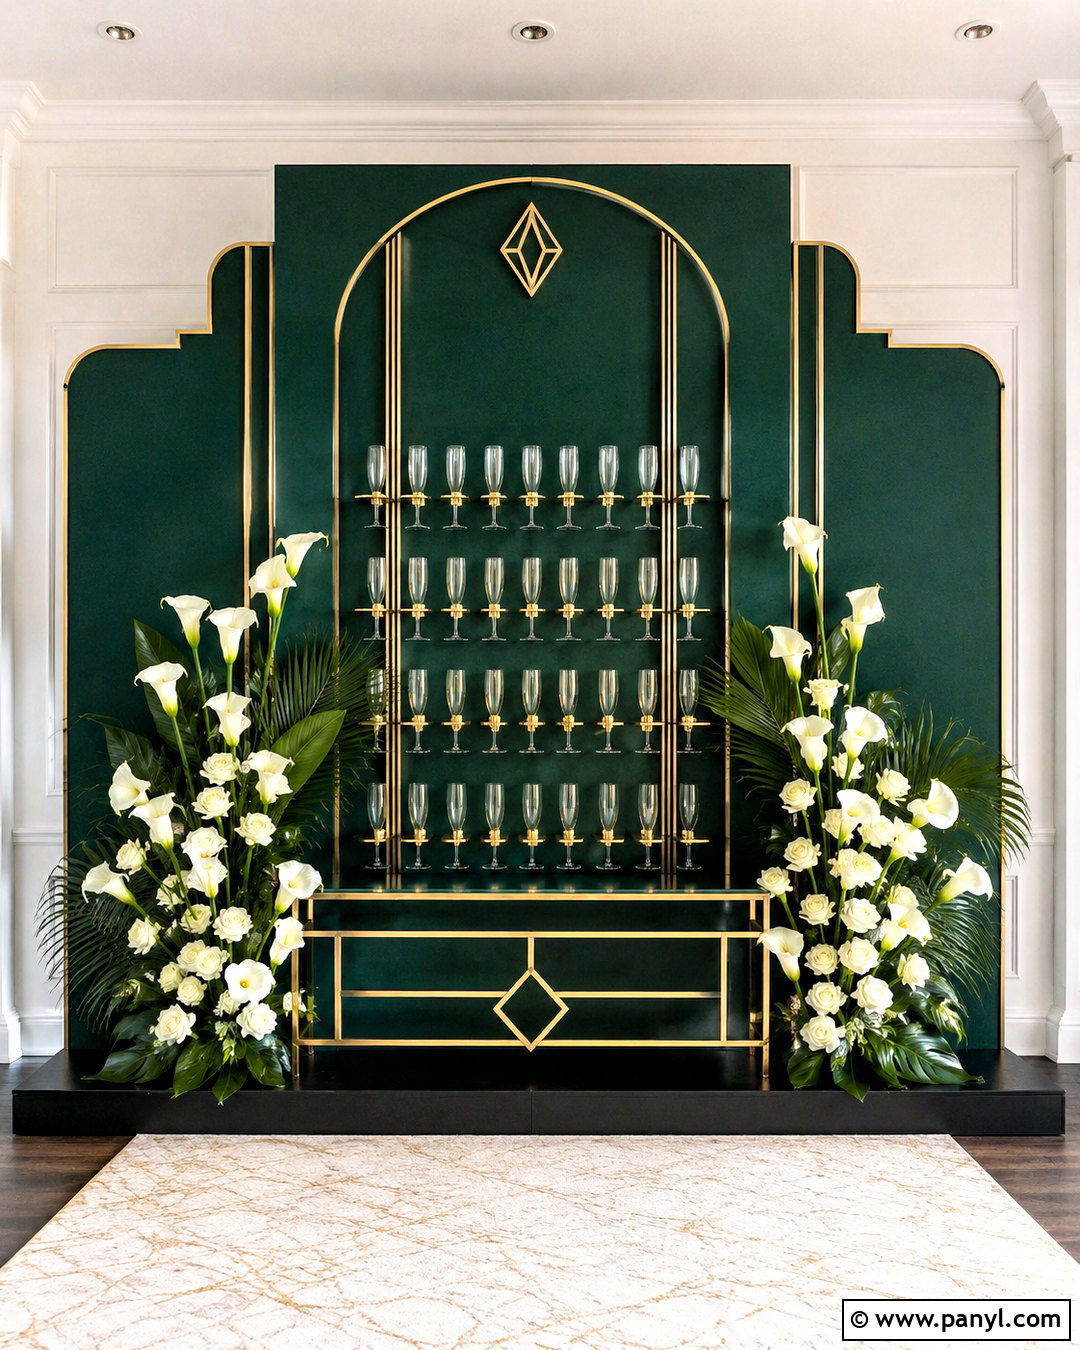
Geometric trim and high-contrast finishes create an Art Deco-inspired champagne wall with strong visual structure. Paint a tall plywood panel deep emerald green, then apply thin gold molding in symmetrical fan or stepped patterns. Position brushed gold holders within the open sections so they appear integrated into the design. Add white calla lilies, ivory roses, and glossy leaves at the base rather than covering the geometry. A black platform, gold-edged console, and cream floor rug complete the full display. Keep accessories minimal so the bold backdrop remains the focal point. This champagne wall works well for formal receptions, milestone birthdays, and polished indoor events, delivering a glamorous finish through paint and simple applied trim rather than complicated carpentry.
Conclusion:
The most successful **20 DIY champagne wall ideas** balance appearance, strength, and convenient guest access. Start by choosing a structure that matches your tools, transportation options, and available space. Then coordinate the backdrop, holders, base, flowers, and nearby serving table as one complete design. Always test the finished wall on level flooring, confirm that every holder fits the actual glasses, and add hidden weight when necessary. Acrylic and painted arches create a modern look, while reclaimed wood, boxwood, and pallets feel more rustic. Tabletop and folding versions are especially practical for small spaces. With careful measurements and a cohesive color palette, your homemade wall can look polished, stable, and ready for a memorable celebration.

Related Ideas and Inspiration:
Leave a Reply